

Shelving for windows is creative and practical for enhancing the aesthetics of any room and providing additional storage, display area, or functional space. Read on to discover how to install window shelves in five simple steps and create a multi-functional space.

A window shelf is a type of shelving installed in or near a window to provide additional storage or display space. There are many reasons for installing window shelving in homes or offices, such as:
- Space optimization: Maximize the use of vertical space, especially in small rooms or areas with limited storage options.
- Display purposes: It’s practical for displaying decorative items, artwork, or collectibles, adding a personal touch to the interior design.
- Plant shelves: Create additional space to grow and display indoor plants. These shelves provide plants with ample sunlight, enhancing their growth and contributing to a healthier living environment.
- Organizing and decluttering: Keep your space organized and clutter-free by providing extra storage for items like books, photo frames, or small kitchen appliances.
- Aesthetics: Add visual interest and enhance the overall aesthetic of a room by customizing window shelves to match the room’s décor.
- Window seating: If there is empty space beneath the window, adding a shelf at a lower height can create a cozy window seat, providing a comfortable spot to read, relax, or enjoy the view.
- Cat perches: Your feline friends can have their own space to bask in the sunlight and observe the outdoors, particularly if they don’t go out much.
- Functionality: Create a functional workspace or study area by taking advantage of natural light.
This article discusses the steps necessary for installing shelving for windows: planning and measuring, purchasing the shelving and brackets or supports, cutting the shelves, attaching the brackets and mounting the shelves, and repeating the steps for any extra shelves. Check out more info in the FAQs section.
1. Plan and measure

Start by planning where you want to install the shelves and their purpose. For example, if you wish to store kitchen utensils, spices, or plates, plan the new shelves at eye level to easily reach the items. Moreover, the shelves should be deep enough to fit all your objects. For decorative purposes only, set the shelves higher so they won’t get in your way; you might prefer narrower shelves for an elegant effect. An alternative is installing two or more rows of shelves, each for different goals. In this case, however, it’s best to use shelves of the same size for a cohesive look.
Measure the window’s width, height, and depth to ensure the shelves fit properly and look aesthetically pleasing. Leave enough space above and below the window for curtains or blinds. It’s a good idea to leave clearance on the sides of the window to avoid making the shelves look too cramped. Based on the height measurement, decide how many shelves you want to install. Consider the space needed between shelves to accommodate items you plan to store or display.
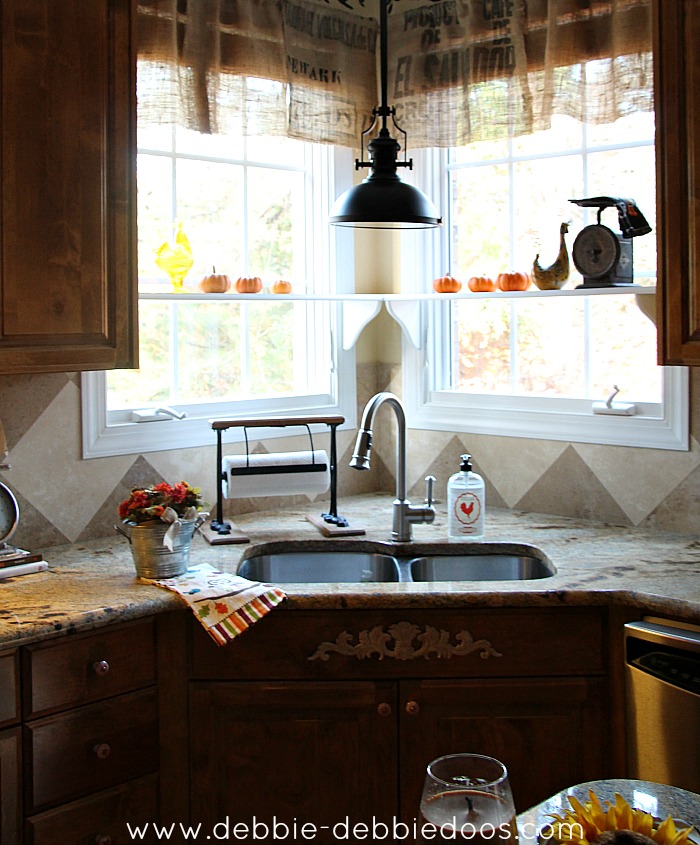
We selected the kitchen for window shelving. After taking the measurements, we figured out that the shelves would have to meet at an angle from window to window. So we opted for a corner window setup.
2. Buy shelves and brackets or supports

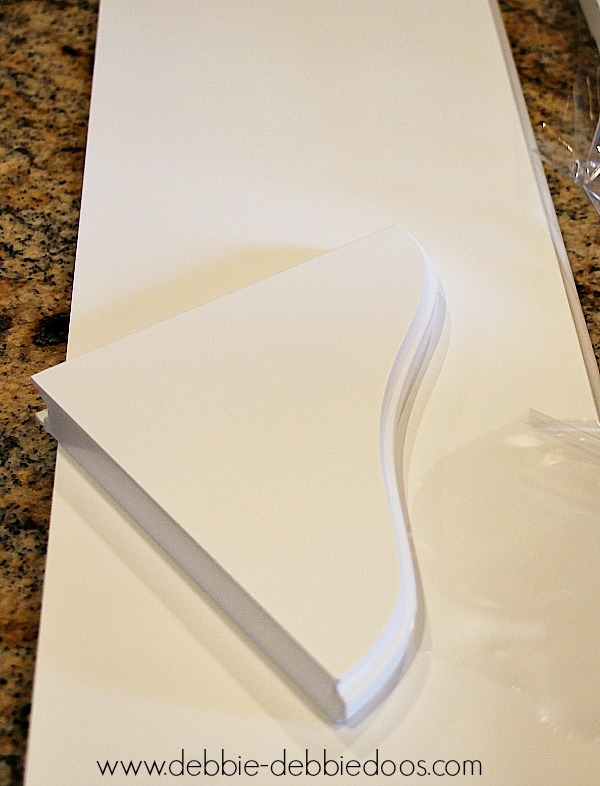
Head to your local hardware store and buy the shelving based on your window measurements. We found wall shelves with a white finish at Lowes Home Improvement, measuring 47.2 in (119.9 cm) long, 7.48 in (19 cm) deep, and 0.71 in (1.8 cm) thick. The mounting hardware and brackets were included in the package. If this doesn’t apply to you, purchase these items individually.
3. Cut the shelves
Based on your measurements, cut the shelves to the desired length using a saw or have them cut at your local hardware store. We used a Black and Decker saw to make 45-degree angle cuts for our corner window setup. But you will have an easier time handling a table saw.
4. Attach the brackets and place the shelf


Hold the shelf against the window and use a level to ensure it’s straight. Mark the bracket positions on the wall with a pencil. Ensure the brackets are placed at an appropriate distance apart to support the weight of the shelf and its contents.
Screw the brackets onto the window frame, ensuring they are level and securely fastened.
Mount the cut shelf to the brackets, ensuring it is level and properly aligned. If necessary, secure the shelf to the brackets with screws or small L-brackets for added stability.
5. Repeat for additional shelves
If you’re installing multiple shelves, repeat the process for each shelf.
Here’s how the window corner shelving looks in our kitchen with Christmas decorations.

FAQs

Discover more useful information about window shelving.
Can I use these steps to build indoor window shelves for plants?
Yes, these guidelines are suitable for installing kitchen plant shelves for window sills. However, you should take into account the following tips:
- Consider the plants’ light requirements before choosing a window for shelving. South-facing windows provide the most sunlight while north-facing windows receive the least.
- When buying the shelf, opt for an easy-to-clean material that withstands moisture, such as PVC, composite, or treated wood. You may also want to use slatted or grated shelves for better air circulation and drainage.
- When planning the window shelf layout, consider plants’ heights and growth habits. Additionally, make sure the shelves are deep enough to fit the plant pots and saucers.
Can I use these instructions to install cat shelves for windows?
Yes, you can follow these steps as a starting point for setting up window cat shelves. However, there are additional considerations and modifications to ensure the shelves are safe, comfortable, and functional for your feline friend. Check out these tips:
- Use sturdy materials like solid wood or thick plywood to support your cat’s weight. For comfort and grip, cover the shelves with a non-slip material, such as carpet or sisal, using glue, staples, or both.
- Plan a layout that allows your cat to easily climb, jump, and lounge on the shelves. Consider the height and distance between shelves, as well as the overall accessibility for your cat. Incorporate multiple levels, and possibly a gradual ascent, to create a stimulating environment.
- Select strong brackets or supports, such as heavy-duty L-brackets or floating shelf brackets.
Are the specific guidelines for glass shelving for windows?
Installing window glass shelving isn’t that different from adding wood shelves, so use the steps outlined in this article. Nevertheless, glass shelves have specifications you should be aware of:
- Select tempered glass for your shelves because it’s stronger and safer than regular glass. The thickness of the glass must be appropriate for the intended load. For light loads, ¼-inch thick glass should suffice, but for heavier items, consider ⅜-inch or ½-inch thick glass.
- Use brackets or supports designed specifically for glass shelves. They should have a rubber or plastic lining to protect the glass from scratches and provide a secure grip.
- Cutting glass is not an easy feat for home tinkerers, so it’s best to place an order. Based on your measurements, order custom-cut tempered glass shelves from a reputable glass supplier. Make sure the edges are polished and smooth to prevent injuries.
- Some glass shelf brackets have a locking mechanism, such as a small screw or clamp, to hold the glass in place. Tighten this mechanism according to the manufacturer’s instructions.
- After installation, place your items on the glass shelves, ensuring not to exceed the weight limit. Regularly check the brackets and supports for signs of wear or loosening, and tighten or replace them as needed.
Conclusion
To recap, window shelves offer a unique and practical way to optimize space, improve organization, and elevate the aesthetic appeal of any room. By carefully selecting the right materials, supports, and layout, you can create a customized solution that perfectly complements your existing décor and meets your specific needs. With our step-by-step guide, installing shelving for windows becomes a simplified task.


Leave a Reply