Debbiedoos

Thrifty home decor, dollar tree crafts, stenciling, decorating blog.

  • Home Tours
  • All things good food
  • Crafty gallery
  • Dollar tree Christmas and Winter crafting ideas
You are here: Home / Stenciling Projects / Plaster of Paris diy sign and a video

Plaster of Paris diy sign and a video

By 12 Comments

FacebooktwitterpinterestFacebooktwitterpinterest

Hello!

Today, I am sharing my other Plaster of Paris DIY sign and a video tutorial.

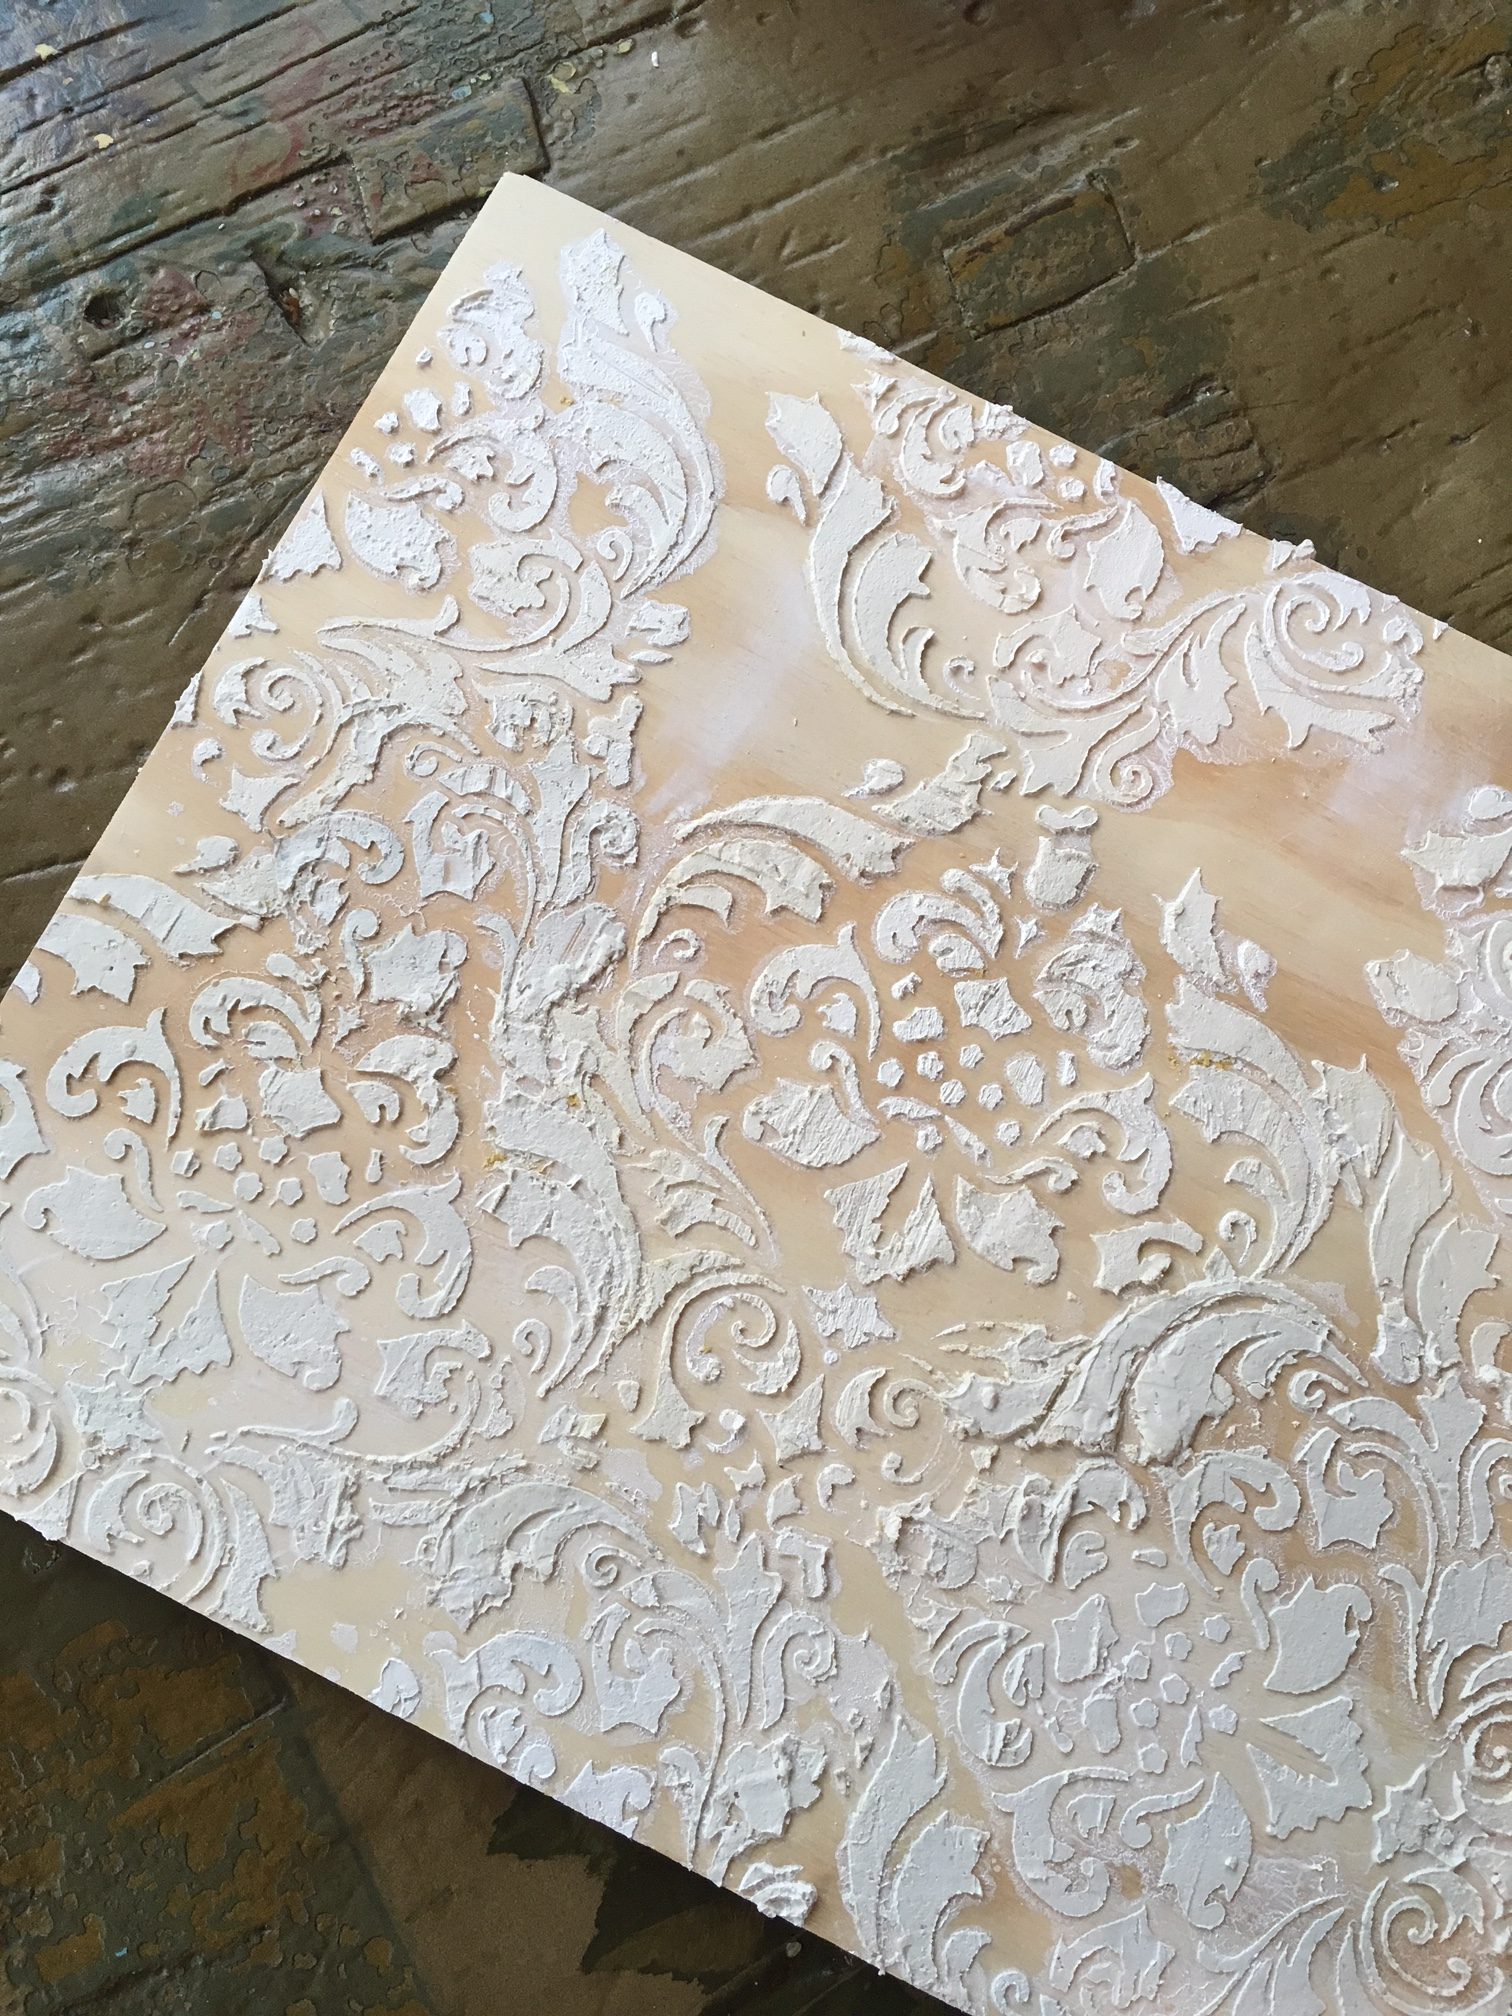
So far my playing with the Plaster of Paris has been fun and successful. I still have more practice to do, but I feel the projects I have done thus far have been a disaster.

1st sign How to stencil with plaster of Paris HERE

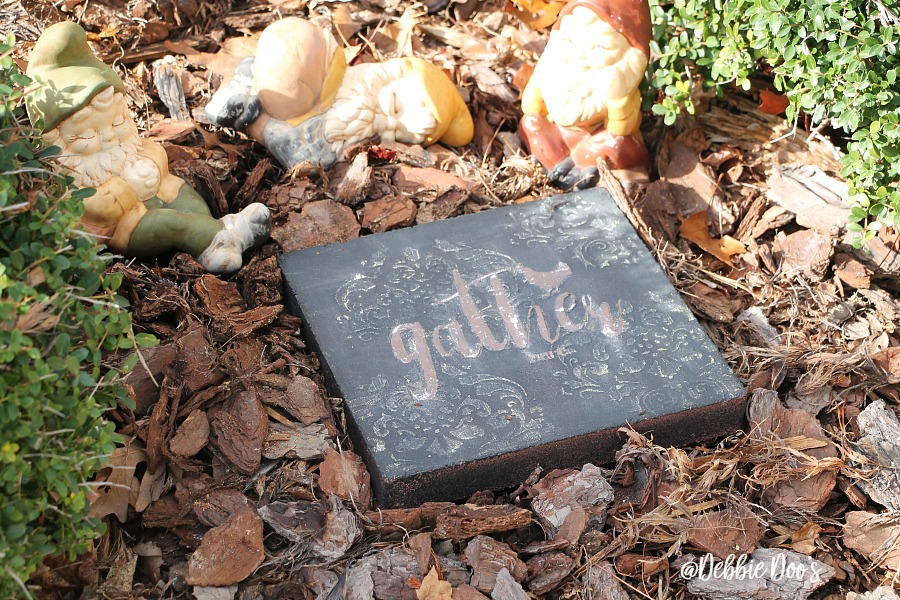
DIY Stepping stone with plaster of Paris HERE

The other day I hopped on facebook live  to share the how to stencil with plaster of Paris. I was sweating bullets and thought I was going to mess up.

Plaster of Paris diy sign

But I didn’t! Thank goodness.

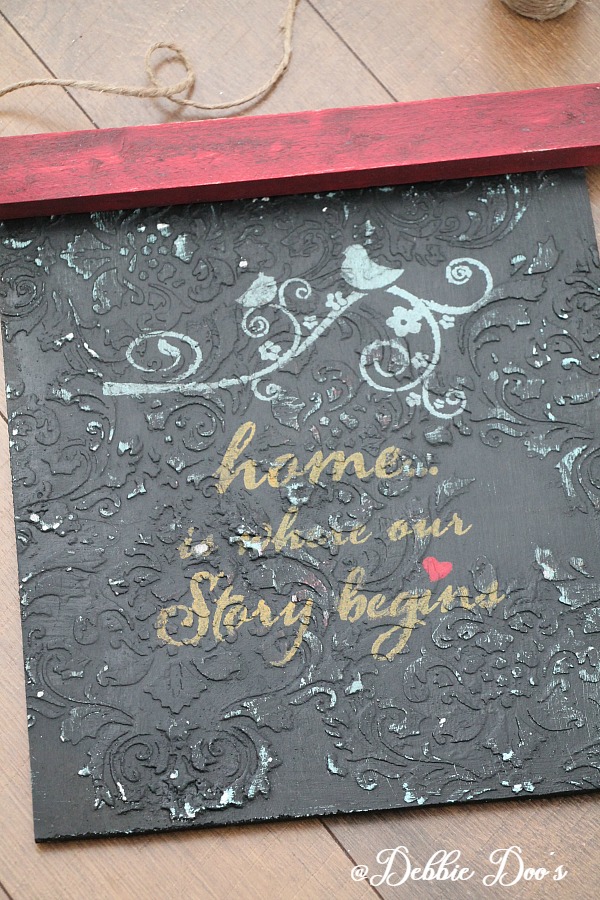
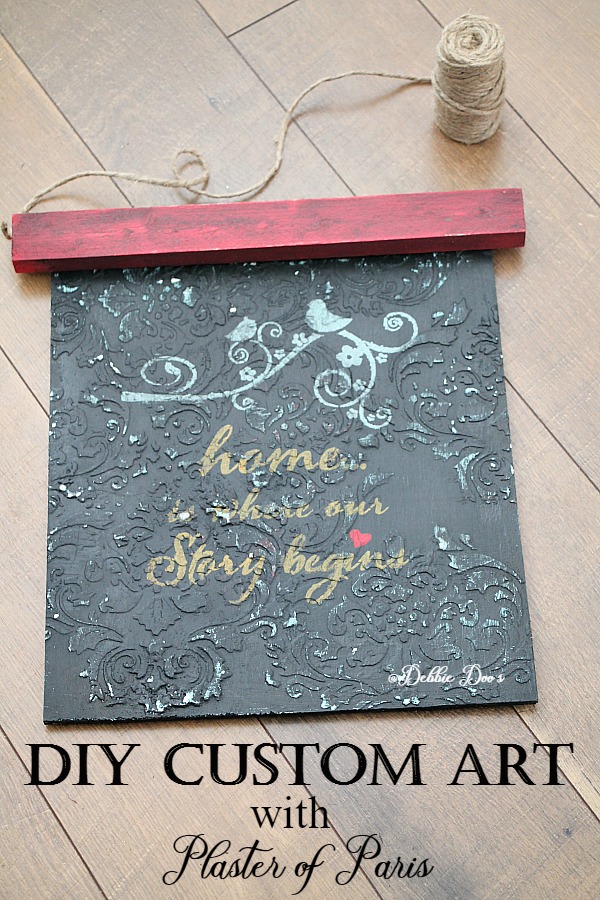
This sign took me a few days to finish. I am usually an immediate gratification kind of gal. I am learning patience though, and actually enjoying the process without rushing it.

After all what true artist can finish a masterpiece in 5 minutes? Well, if all they had was stencil they could. This technique requires a little more patience and skill.  I had no skill going into this. So it doesn’t require much. Don’t be intimidated. Get yourself a few boards at Lowe’s and use one for practice first. They are so cheap it’s ok to waste one, and it won’t really be a waste because you master it the first time and even if you don’t that’s ok. Keep going and don’t give up. You can do it!

Before I share the video down below let me explain the rest of the process I did.

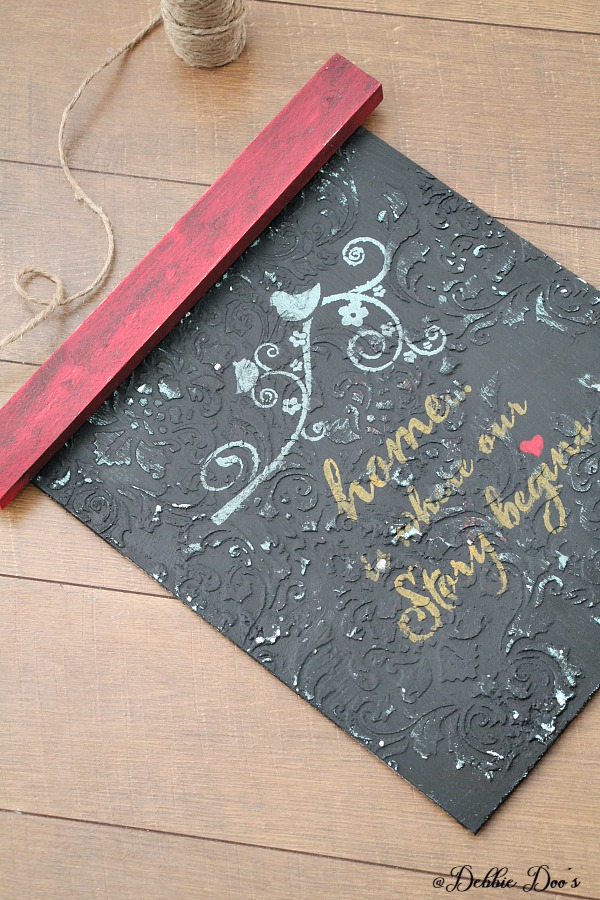
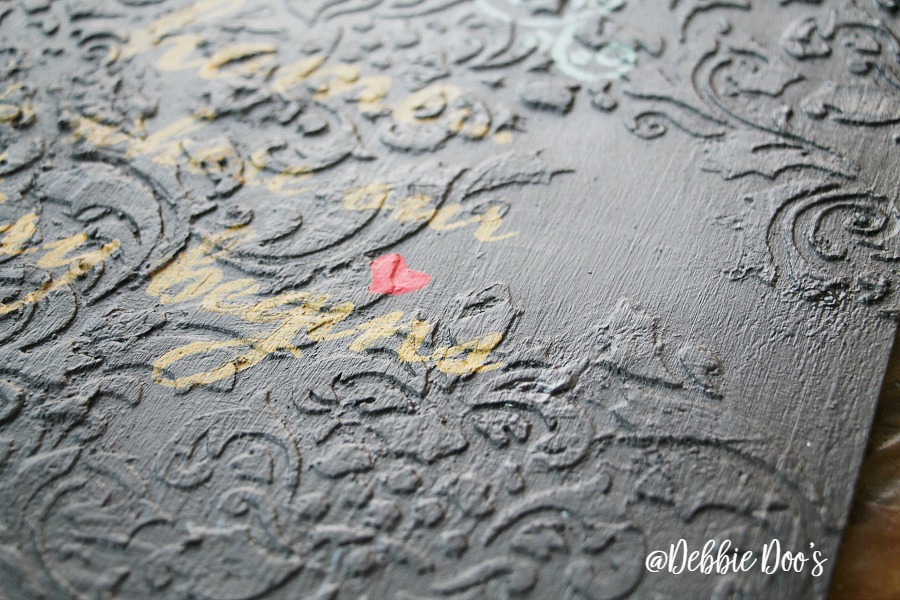
After the board dried overnight I lightly dry brushed some craft paint over the plaster of paris. Then I painted it with black gel stain. Let that dry overnight and the next day I my Home is where our story begins stencil. Don’t fuss about the lines not being clean on this project. Obviously, they won’t be, you are stenciling on top of  a textured surface. After the stenciled dried I used a wax to finish it and after that dried I used a low grit sanding block to get the weathered older distressed look. Get creative and do it to your own liking to compliment your decor. The possibilities are endless I truly do believe. Let me just say this. I HAD A BALL doing this project.

Plaster of Paris diy sign

Plaster of Paris diy sign

Pin it, try it:)

I am not sure which project I like most so far. What’s your favorite one?

It’s suppose to look old world/rustic looking. Of course use any colors schemes that suit your taste and style. I will be hanging this sign on our front porch in a few weeks when I do a little Valentine decorating.

Thank you so much for visiting with me today.

To view my stencil gallery projects you may check out my Debcreates.com page.

Sign up today and receive a few freebies. 12 months of seasonal printable art.

If you would like to commit to becoming a subscriber, I would love for you to join me.


FacebooktwitterpinterestFacebooktwitterpinterest

Filed Under: roosters, rustic, Stenciling Projects

Image Map

Comments

  1. Nancie says

    January 11 at 8:45 am

    Beautiful!

    Reply
  2. Trudy Hibler says

    January 11 at 9:50 am

    Just beautiful! What a fun technique. My favorite is the one with the brown tones and the blue/green accent. Just love the colors. I never would have thought of using Plaster of Paris. Gonna have to go get some!

    Reply
  3. Jeanie says

    January 11 at 10:11 am

    I love the saying…home is where the story begins!!!

    Reply
  4. Linda of No.Cal. says

    January 11 at 10:38 am

    Me again… LoL
    Where did you find the Medallion stencil… our Michaels does not have that design !
    THAnK YoU !!
    Linda of No.Cal.

    Reply
    • debbiedoo's says

      January 11 at 11:15 am

      I am not even sure. I have had it for years. Maybe Hobby Lobby:)

      Reply
  5. At Rivercrest Cottage says

    January 11 at 10:46 am

    Love this project. Thinking I might do something like this to my kitchen tile to whiten it up. Thanks for the inspiring post.

    Reply
  6. Cindy says

    January 11 at 3:20 pm

    I have been using joint compound for years. I was nervous the first time but it’s quite addicting. Our old house I did our ceiling in our dining room. Haven’t gotten to it in the new house yet

    Cindy

    Reply
  7. Raquel says

    January 11 at 4:20 pm

    That is a really pretty sign! I remember my mom doing lots of things with plaster of paris, but I have never used it myself. Thanks for the inspiration!

    Reply
  8. Doris Raab says

    January 11 at 4:37 pm

    I love the Home one. Absolutely great job, Debbie!

    Reply

Trackbacks

  1. How to age and patina wood - Debbiedoos says:
    January 15 at 5:15 pm

    […] Plaster of Paris sign with stenciled medallion layering look including video […]

    Reply
  2. Ceramic and clay pottery knock off - Debbiedoos says:
    January 21 at 9:43 am

    […] Stenciling with plaster of Paris HERE […]

    Reply
  3. Terra cotta pot stenciled and painted with plaster of paris - Debbiedoos says:
    February 17 at 10:27 am

    […] I stenciled with plaster of paris, find tutorial here. I let that dry over […]

    Reply

Leave a Reply Cancel reply

Your email address will not be published.

This site uses Akismet to reduce spam. Learn how your comment data is processed.

Subscribe today!

Looking for something?

Social butterfly

FacebooktwitterpinterestrssyoutubeinstagramFacebooktwitterpinterestrssyoutubeinstagram

Follow me

FacebooktwitterpinterestrssyoutubeinstagramFacebooktwitterpinterestrssyoutubeinstagram

Recent Posts

  • Christmas decorating
  • Dollar tree Splatter Screen Seasonal Wreaths
  • Country Christmas kitchen decorating
  • 5 Minute Dollar Tree Christmas Wreath
  • Budget friendly Christmas Crafts

Printables & Images Policy: Please do not use my printables for anything that is sold or alter them in any way. Please do not post one (or more) of my printables on your site without my permission. If you would like to feature one of my images, please ask first. This includes, but is not limited to, other blogs, round-up sites and magazine publication sites. I can be reached at debbiedoos43@gmail.com

Debbie Manno (Debbiedoo's) is a participant in the Amazon Services LLC Associates Program, an affiliate advertising program designed to provide a means for sites to earn advertising fees by advertising and linking to (Debbiedoo's) (amazon.com). I also grant ZERO permission to use one or any of my photos/printables or any other content here within my website for features or "round ups" without prior permission. Thank you. I also would like to credit Pixabay.com for their CCO use of images. Noting that I can download, modify, distribute, and use them royalty free for anything I like, even in commercial applications. ANY recipes of mine that have inspired you to make and create, please always reference to finding the original recipe on my site and not sharing the entire recipe on your site for no incentive to visit the original creator. Thank you.

Copyright © 2019 Debbiedoo's · Log in

This website uses cookies to improve your experience. We'll assume you're ok with this, but you can opt-out if you wish.Accept Reject Read More
Privacy & Cookies Policy

Necessary Always Enabled