
How to stencil using plaster of Paris
Just when you think you knew all the tips and tricks in the book! There is always something new to be discovered. A friend of mine actually recommended me trying this technique.
Today, I am sharing how to stencil using plaster of Paris. My friend said she recently saw a demonstration of it at an antique mall, I believe that is where she said..can’t remember now. I told her I actually wanted to try that and completely forgot about it.
So on a whim I ran out to Lowe’s home improvement and picked up a box of plaster of Paris. It was cheap, like $6.00. I already have my stencils of course, and some cut pieces of wood to make my rustic signs.

All the pictures I snapped are from my cell phone, so please pardon the quality. Like I said, this project was on a whim, and a spur of the moment. I don’t always have my camera out and ready at all times. Plus, I though it may not work out and why waste my time sharing it. I am definitely going to do a live video on Facebook once I practice a tad more. I did learn a few things with my first go ahead.

There are two types of Plaster of Paris, one for interior, one for exterior. I bought the interior one.
NOTE TO SELF: Please do not try to cast your kids arm ..you are not a medical Doctor.:)

Getting just the right consistency was the tricky part. What I came to find out in the end is that you want it to be like a peanut butter consistency. So, I can’t give you an exact ratio quite yet. Add water, mix, add more plaster, etc. as you go and get the consistency like peanut butter in the end. A few of my Facebook friends mentioned another product called molding paste. Some even said they have used drywall compound. I will give that a try as well in the future. I do admit though- being a mixologist was fun. Even though it was NOT for cocktails. It’s the creative aspect that I enjoyed trying.
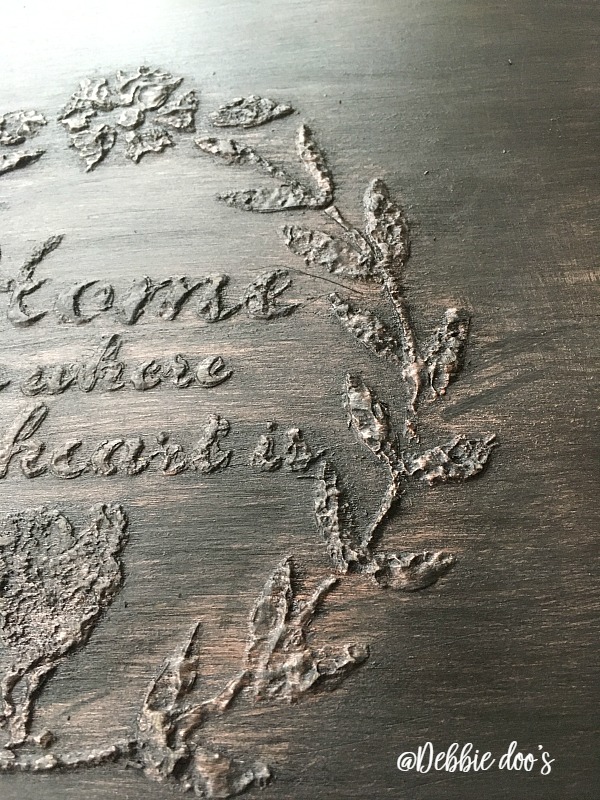
Another thing I learned is that I would use a flat putty knife to spread the mixture over my stencil and then smooth it out. I used a stencil brush just like I would use when stenciling.
I did remove the stencil fairly quick after filling it all in. Then I rinsed off my stencil with warm sudsy water.

I let it dry over night and then painted my board my color of choice. I actually used black gel stain and then a nice shimmer rose gold craft paint to highlight the letters. You could just add the stencil back and use a little shimmer paint to highlight.
How to stencil using plaster of Paris
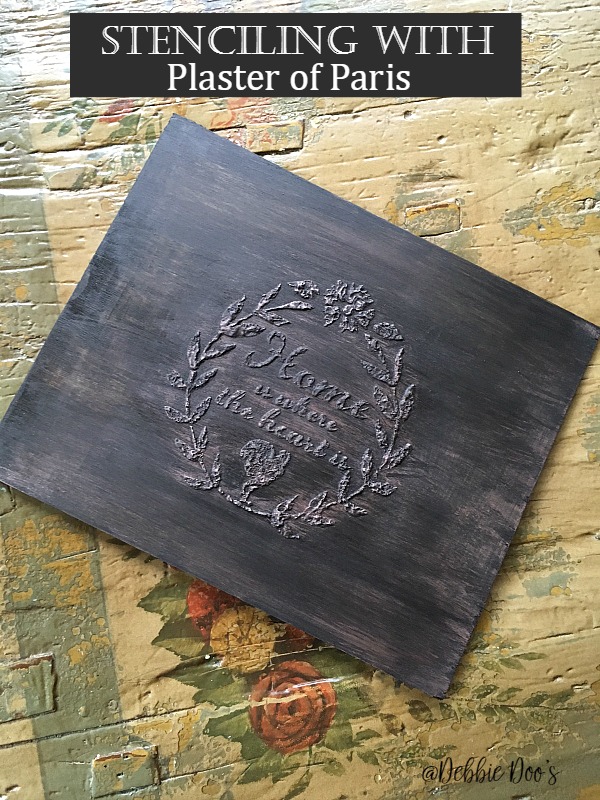
It turned out pretty neat, wouldn’t you say?
Thanks for stopping over today. Like I mentioned I will go into further depth as I learn the process a little better myself. Practice is key my friends.
But for the first time, I am proud I didn’t mess it up. I say give it a try and let me know. I am working on a stepping stone next.
Affiliate links for supplies:
Molding paste
Putty knife
Plaster of Paris
Thank you so much for visiting with me today.
If you are new here, welcome! I am also very excited to share my new stencil line with you.
Thank you for your visit today!
To view my stencil gallery projects you may check out my Debcreates.com page.
I share all things, thrifty home decor, crafts and a recipe or two on occasion.
Sign up today and receive a few freebies. 12 months of seasonal printable art.

If you would like to commit to becoming a subscriber, I would love for you to join me.
So happy you tried this method. I’ve seen it on the internet but afraid to do. Only God and me knows how many failures I’ve had with just paint and stencils!!!!!?
I will look forward to your video on this project.
VERY neat! I love how it turned out. So cool!!
How clever! It turned out great Debbie.
You’ve created a monster!
Great job Debbie! Also, I just ordered your apron for my bff’s birthday. She will get a kick out of it 🙂
Thank you Theresa! Happy Birthday to your friend.
I don’t know if using the putty knife as opposed to the stenciling brush would keep the plaster smooth, since I haven’t tried this technique before, and by the way, thank you so much for posting this; but I prefer the raised and bumpy look of the stencil brush. Too smooth or flat sometimes has a cookie-cutter feel to it. I like the way yours turned out, so I will try this with the stencil brush also. Again, thanks for such a beautiful idea! I have lots of driftwood that would look awesome with the plaster.
Awesome! Let me know how it does. I am like using both techniques. I have been playing around today.
I love it. Imagine the possibilities.
But, I also love the board or table that its sitting on. Is that another creation of yours?
.
That is our kitchen table Alice:) It’s an oldie.
Oh Debbie it looks great; I actually like the ‘rough’ look from the stencil brush. If that were done on a large pot or urn it could have the look of a very old antique! I’ve used plaster of Paris in the past; kids handprints (Christmas gifts for Gr & Gr), doggie paw prints, and even an old screen window with sunflowers made with the plaster. Really fun, dries quickly and makes for an easy craft.
So glad you’re having fun with it.
I am loving it! The sunflower screen window sounds super cute Carol.
I used tile grout to add a stencil to my kitchen island. I’ve been wanting to paint it as it is a natural color on white chalk paint. I never thought of simply putting stencil over it to paint. What a bird brain I am!
Love the plaster. It seems to have a softer look than the grout. Of course I’ll try it!
Oh good..your project sounds very neat Judy! Yes, that struck me after the fact. I started to hand paint another plaster project, and then the light bulb went off. Just put the stencil back over it..duh! LOL.
That’s an interesting process, Debbie. I might try it outdoors when Spring comes, but I don’t have a good place to make messy projects in my house–yet. I’m working on that, so someday….
I’m thrilled that Christmas and New Years is over so we can concentrate on other interesting things now. I’ll look forward to more about this plaster of paris technique.
p.s. Happy New Year to you and your family!
Thank you Naomi. Same to you. I agree, I am excited to try new things as well.
That came out so cute, Debbie, and what a great idea. I want to try that on some pots this spring. I think using chalk paint on it after stenciling and then some antiquing glaze would make them look really great, whether I put flowers in the pots or not! Great idea. Can’t wait to see your video.
Love this!
Hi there Debbie I have been a fan of yours for a couple of years now and look forward to your emails. I have never commented before so I thought this was the right time. I love this idea and definitely plan on trying it! I have 2 boxes of plaster of paris that I purchased for making my own chalk paint and never really liked it so it just sits. Now I know what to use it for! I will be making the stepping stones for sure. I just love how all of your projects are simple enough to do but end up looking so neat!
Thanks so much Kristina, and thank you for taking the time to comment. I appreciate that! Enjoy your projects.
Spackling works great as well!
Debbie I received one of your stencils that I ordered through Amazon and I absolutely love it! I too love to stencil and love your ideas! This apron is adorable, do you plan on making more? Would love to get one.
Hi Cheryl, no I have discontinued the apron:) I am so sorry. I am into creating goods now for Home Pressure Cooking.