
Bisquick peach cobbler is an easy and delicious way to simplify baking a peach cobbler and make it a convenient dessert without sacrificing any of the flavor.
Instead of forcing bakers to come up with raw pastry dough from scratch, this recipe allows you to have a piping hot peach cobbler on the dinner table in less than an hour.
What Is a Peach Cobbler?
Peach cobbler is a fruit-based dessert where a slurry of peach preserves is placed in the bottom of a baking pan before being covered with a dough made of biscuit, dumplings, pastry, or cake.
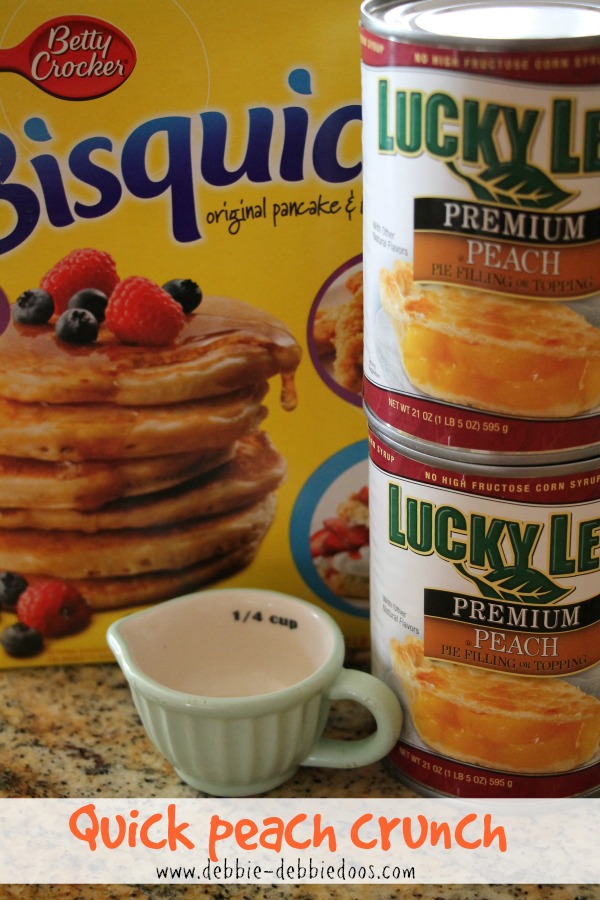
Bisquick Peach Cobbler Recipe Ingredients
- 2 cups of Bisquick quick biscuit mix
- 2 cans peach pie filling
- ¾ cup sugar
- 1 cup melted butter
- ½ cup chopped walnuts
Step-by-Step Instructions on How to Make a Bisquick Peach Cobbler
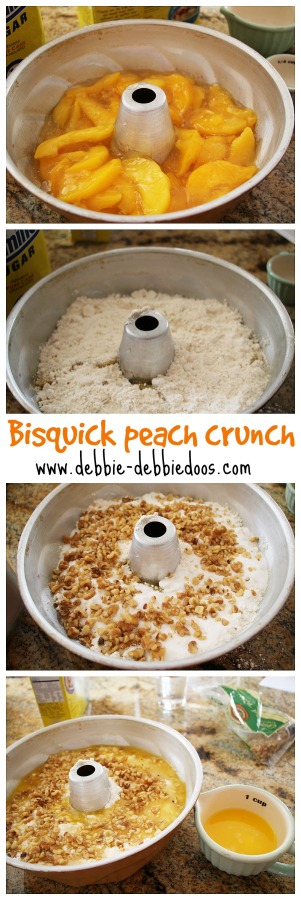
1. Grease the bundt pan
Greasing the bundt pan is crucial to making sure that your Bisquick peach cobbler filling doesn’t stick to the bottom of the pan when it heats up.
After greasing the pan, pour the two cans of peach pie filling into the bottom of the bundt pan.
2. Add the biscuit mix
Once you’ve evenly filled the bottom of the bundt pan with the two cans of pie filling, it’s time to add the Bisquick.
Sprinkle two cups of Bisquick evenly across the surface of the peach pie filling in the bundt pan.
3. Add the sugar
After placing the Bisquick layer of the cobbler, sprinkle the ¾ cup of sugar on the top of the Bisquick layer to form a crunchy crust.
4. Add the butter and walnuts
Next, add the melted butter to the layer of sugar on the peach cobbler before sprinkling the walnuts across the surface.
5. Bake the peach cobbler
Back the Bisquick peach cobbler at 375 degrees Fahrenheit for 45 minutes. Note: Oven time may vary depending on the equipment you use.
Once the walnuts on the top of the peach cobbler are golden brown, remove it from the oven.
Bisquick Peach Cobbler Expert Tips
- Let the cobbler rest after baking before you serve it. If Bisquick peach cobbler is served straight out of the oven, the filling will still be runny. Let it cool to thicken it.
- Make cobbler the night before. Peach cobbler can be reheated easily in the oven the next day to save you some time during meal prep.
- Garnish with caramel sauce. Caramel sauce pairs well with peaches and adds some sweetness to balance out any tartness in the cobbler.
- Incorporate fresh herbs and spices. Spices like ginger and herbs like rosemary or thyme can be used to add some extra flavor to a Bisquick peach cobbler.
How to Serve Bisquick Peach Cobbler
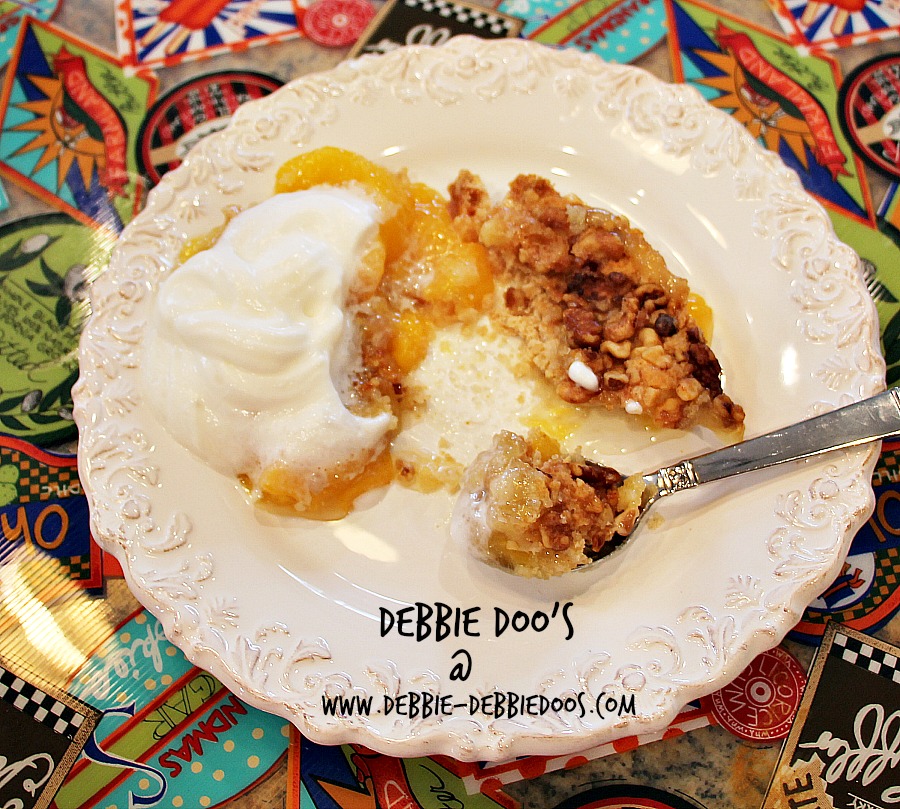
Bisquick peach cobbler can be served on its own either warm from the oven or at room temperature.
Peach cobbler is often topped with caramel sauce, whipped cream, or vanilla bean ice cream.
How to Store Bisquick Peach Cobbler
To store Biquick peach cobbler, use an airtight container in the refrigerator for up to four or five days for any leftovers from right after cooking and serving.
One way to keep Bisquick peach cobbler crisp in storage is to store the cooked fruit filling and the topping separately. Before reheating, add the topping and bake for fifteen minutes.
Mistakes to Avoid When Making Peach Cobbler
- Don’t overbake the cobbler. Overcooking Bisquick peach cobbler can cause it to become mushy. Set a timer on the oven while baking to make sure it doesn’t overcook.
- Don’t bake at too high of a temperature. Baking Bisquick peach cobbler at too high of a temperature can cause the cobbler to become tough and crunchy.
- Don’t use overripe peaches. Overripe peaches have too much moisture in them that will cause the cobbler to be soggy.
FAQ
What Kind of Peach is the Best for Cobbler?
The best peaches to use for an easy Bisquick peach cobbler are fresh freestone peaches. These pie peaches are bred to have a pit that separates easily from the flesh.
Should I Peel Peaches for Cobbler?
Peeling peaches for cobbler is not recommended. Peach skins should be left on when making a peach cobbler since it will deepen the coloring of the cobbler and add flavor to the dish.
Can I Use Canned Peaches for Peach Cobbler?
Canned peaches can be used in peach cobbler if the liquid from the cans is drained off first. Otherwise, canned peaches can make peach cobbler soggy.
Why Is My Peach Cobbler Mushy?
Peach cobbler can be mushy if it has too much liquid, if the peaches are too ripe. A cobbler will also be mushy if it is undercooked.
What Can I Use to Thicken My Peach Cobbler?
To thicken peach cobbler fruit filling that is too loose or thin, you can use cornstarch, tapioca powder, and arrowroot powder as additions.
What Happens When You Overcook Peach Cobbler?
When Bisquick peach cobbler is overcooked, the crust can become tough and brittle, and the fruit filling may burn to the bottom of the pan.
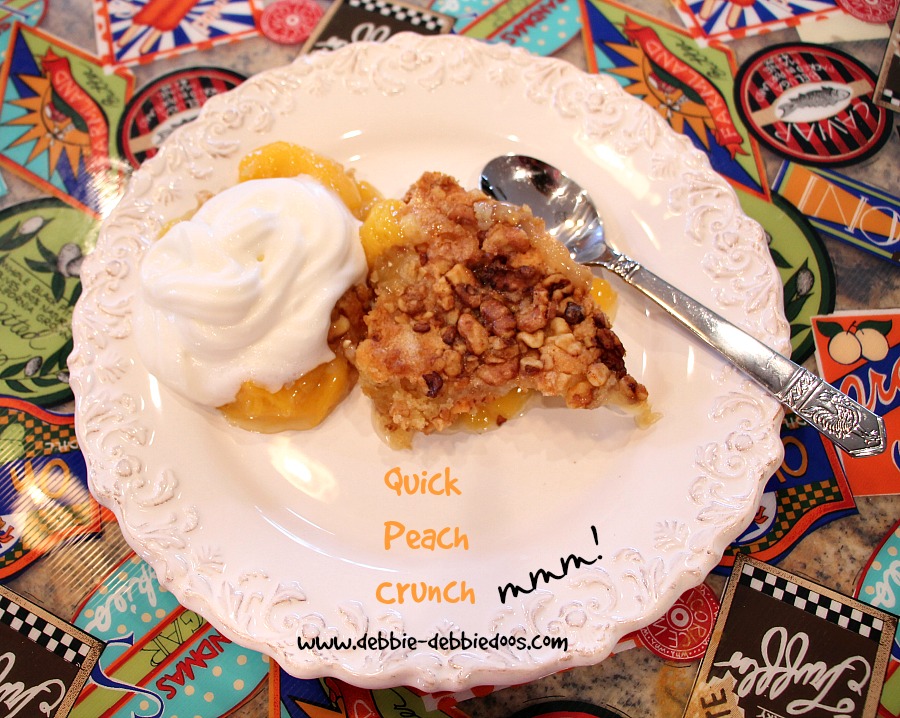
Bisquick Peach Cobbler Is an Easy Dessert
Bisquick peach cobbler is a delicious dessert for when you don’t have the patience to work up a dough or batter from scratch. By using boxed biscuit mix, you can cut cobbler preparation time by at least half an hour and still end up with a scrumptious treat your family and friends will love.
Ingredients
Method
- Grease the bottom of a bundt pan. Layer the bottom of the pan with two cans of Peach pie filling.
- Second sprinkle two cups of Bisquick
- Sprinkle ¾ cups of Sugar
- melt butter and pour over mixture.
- Top with walnuts
- Bake at 375 for 45 minutes. Ovens may vary. Nuts should be toasted light brown.
This is new to me, it sounds great, easy too!
Did you scoop out the servings? Or were you able to invert the pan for presentation?
Thanks.
Yes, we scooped it out. I was tempted to try inverting it, but afraid it would not be formed. I left well enough alone:)
I am making it right now..:) I subbed peaches for blueberry and thank you for telling us you didn’t invert because I was fixing to ask So easy to make. It’s in the oven right now thanx!!!
😀
That’s perfect! Enjoy.
I THINK IT WOULD BE EASIER TO SCOOP OUT OF A REGULAR CAKE PAN.
Then by all means make it in a regular cake pan. Either way, it is delicious. Thanks for stopping by.
Two sticks of butter is never too much! 😉
I will have to give this recipe a try, it looks great.
I love Crisps! Your recipe looks easy and delicious!
Debbie, it looks delicious and sounds easy enough (always looking for easy); I’m gonna have to give this a shot.
thanks for sharing
Yum, Debbie! I LOVE peaches and will definitely give this a try!
The recipe sounds great, especially with the peaches! I’ve made a Dump Cake several times, but never one using Bisquick. I am anxious to give it a try…..
Thanks for sharing!
Lanita
You are welcome! Enjoy and let me know how you liked it:)
You know what…. I make that old recipe in a 9×13 pan, so I increased the butter since there is more acreage to cover on the top. The original recipe doesn’t call for a cup, I will look and see. So it makes sense to reduce it pouring it over the top of the bundt pan. My apologies to everyone’s thighs.
LOL…I can’t say it was bad!! It was delicious, just next time I would reduce it purely for calories haaaaaaaa! Thanks for sharing.
It’s in the oven now. I’ll keep you all posted!
Ohhh yummy!!
Can you use fresh peaches?
Not sure, I believe the syrup from the peaches is what makes this successful.
I made it with fresh peaches…four to be exact. (Walmart was out of pie filling…). I added a quarter cup brown sugar to my peaches. Then halved the rest of the recipe. My husband loved it and so did I. It was plenty gooey. Ipbext time I will reduce the brown sugar a little as it was very sweet!
If I don’t have a bundt pan, what other pan can I use?
Any pan will do!
thank you
Made this for Labor Day, just as suggested, with strawberry pie filling. It was a HUGE HUGE HUGE hit! Next time we will use less butter and sugar, as people mentioned in the comments. The full amounts weren’t bad, it just wasn’t necessary. We ate it with ice cream. We did not flip the cake as it would have collapsed. Will be making this many times again using fruit filling that matches the season. Thank you for the recipe!
Wonderful and I agree on the cutback of sugar and butter. In fact, I made one this morning for a girls breakfast gathering and I cut back on both. It was all gone:)
I have Celiac’s so I use the Gluten-free Bisquick. Have you tried that before with this recipe? I’m kind of afraid to try it and have it come out really weird like most gluten free baking does if you try to use a ‘normal’ recipe.
I can’t answer that Rachel..I wish I could. sorry:(
Alrighty, no problem. I’ve decided to give it a go. I will let you know how it turns out. It’s probably going to be amazing. Fingers crossed!
You can use gluten free bisquick if you need to! It’s amazing! You can’t even tell it’s gluten free!
Awesome! Thanks for sharing.
Too much butter.. Using angel food pan and have all the windows open to air out the smoke from the dripping butter inside my oven.
I mention in my post, I thought it was too much butter as well and next time I would not use as much. I had no problems with drippings. However, I always use a cookie sheet underneath my baking regardless.
I used a 9×13 pan too. I do think mixing the bisquick and sugar (I added some cinnimon and sub’d some of the sugar for brown sugar) and cutting the butter in makes for a crumblier top! Mine came out with just flour by itself! I do like it tho and will make it again.
IF YOU USE A9x13 PAN HOW LONG DO YOU BAKE…..
ALSO WHAT DID YOU DECRASE THE BUTTER TO…..
THANK YOU
, I WOULD LIKE TO TRY IT…………
Anne, I never made it in the 9×13 but I would assume roughly the same. Just keep an eye on it. Bake until golden brown on top. I used half the butter it called for. One stick and a half.
I DON’T KOLNOW IF YOU REALISE THAT I AM YOUR COUSIN ANNE ANND ALSO YOUR GODMOTHER… THANKS I WILL TRY IT AND LET YOU KNOW HOW IT TURNS OUT…….
LOG YOU ANNE
OMG Hi Anne:) I am so happy you visited. You will enjoy this recipe very much. Love you too. xoxo
Why does the picture show sliced canned peaches and the recipe uses peach pie filling?
I am not sure what picture you are speaking of. I used peach pie filling.
I have made this with fresh berries..peaches etc. I have also used canned and frozen..its one of those things you can’t screw up! It’s great EVERY TIME!
This is just like a dump cake. But instead of bisquick you use a cake mix, sugar already added. You can either melt the butter or crumble it.