
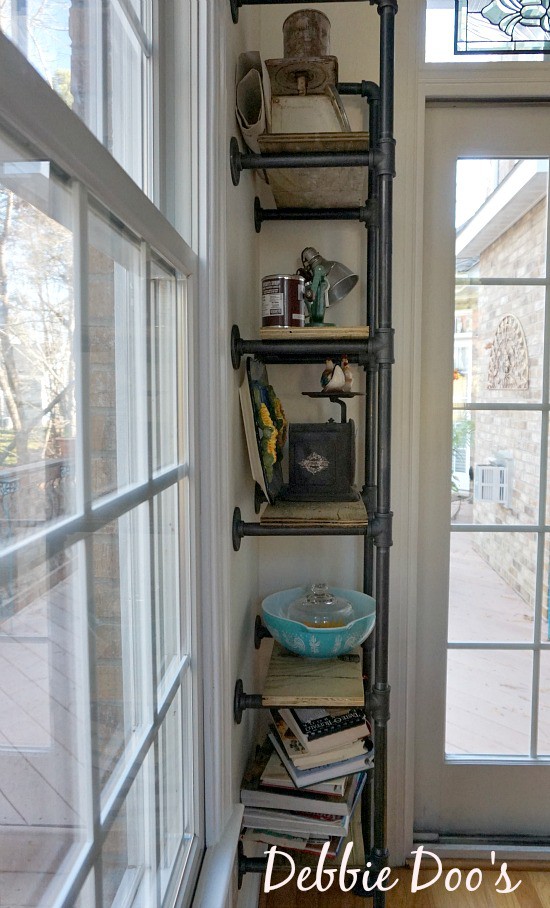
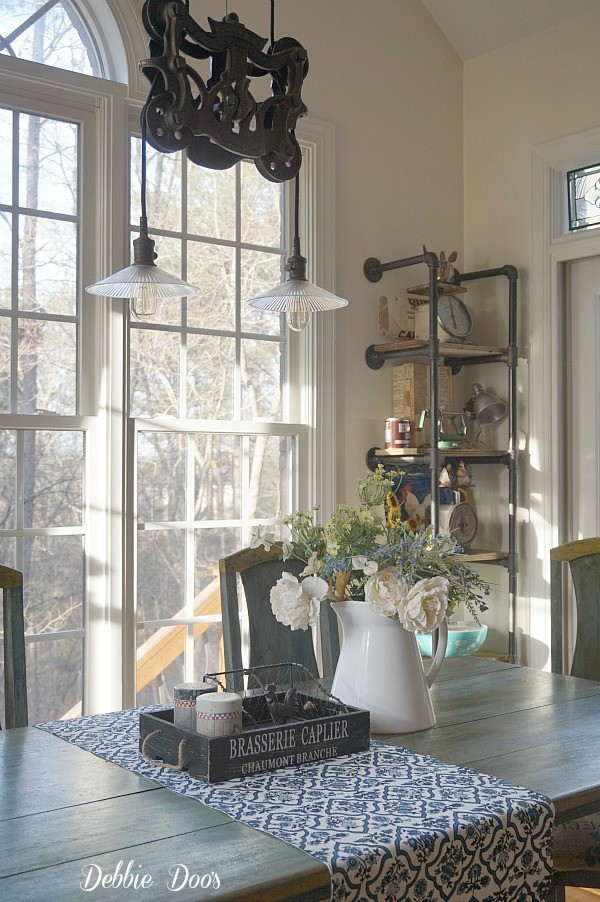
An organized and efficient kitchen is crucial, and a baker’s rack is a great way to make it happen. This versatile and functional piece of furniture not only provides ample storage for baking supplies and equipment but also adds an element of style to any space. Read on to discover how to build your own baker’s rack.
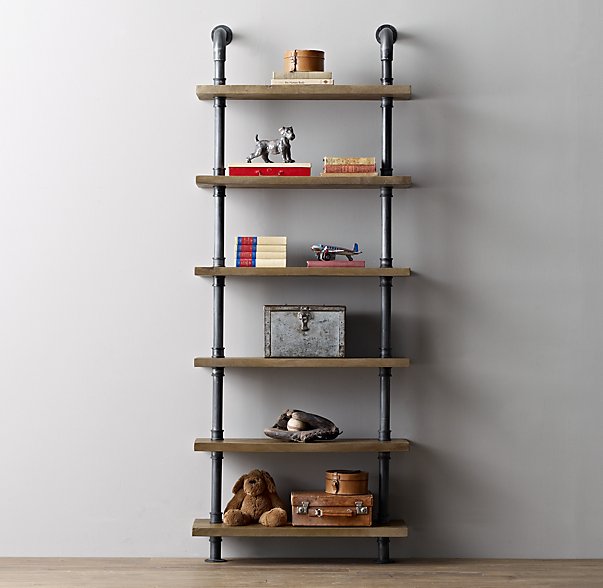
This guide lists step-by-step instructions for building your own industrial baker’s rack, from gathering your tools and materials and building the frame to preparing the plywood shelves and making the final touches and customizations.
1. Gather your tools and materials
- Pipe wrench
- Drill and drill bits
- Measuring tape
- Level
- Protective gloves and safety glasses
- 2 18-inch pipes
- 10 12-inch pipes
- 10 T-fittings
- 14 10-inch pipes
- 14 flanges
- 2 90-degree elbows
- 2 large boards of plywood
These materials can be sourced from local hardware stores or online suppliers. You can also consider reclaimed or recycled materials to be more environmentally friendly.
2. Build the frame of the baker’s rack
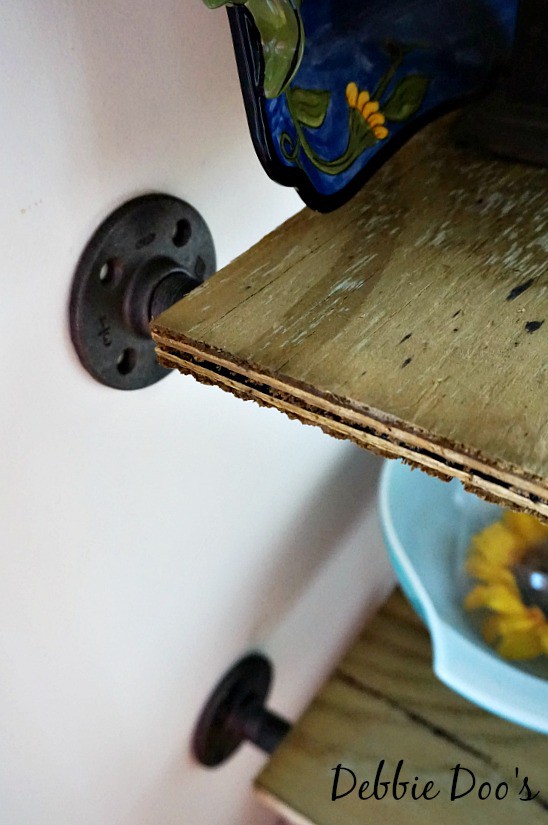
- Assemble the vertical supports: Start by connecting the 18-inch pipes to the T-fittings. Then, attach the 12-inch pipes to the other end of the T-fittings, creating two parallel vertical supports. Secure the flanges to the ends of the 12-inch pipes. These will be the feet of your baker’s rack.
- Assemble the horizontal supports: Connect the 10-inch pipes to the T-fittings to create horizontal supports. Next, attach the 90-degree elbows to the ends of the horizontal supports. This will ensure a sturdy and stable connection between the vertical and horizontal supports.
- Connect the vertical and horizontal supports: Attach the T-fittings of the horizontal supports to the vertical supports. Make sure all connections are secure and tight, and use a level to ensure the structure is even and balanced.
3. Prepare the plywood shelves
- Measure the cut the plywood: Measure and cut the two large boards of plywood to fit the dimensions of the horizontal supports. These will be the shelves of your baker’s rack. With the leftover plywood, I made a simple love sign.
- Sand and finish the plywood: Sand the plywood surfaces to achieve a smooth finish. Apply a stain or protective finish to the plywood, allowing it to dry according to the manufacturer’s instructions.
- Attach the plywood to the frame: Secure the plywood shelves to the frame using the flanges. Ensure proper alignment and stability before proceeding.
4. Make the final touches and customizations (optional)
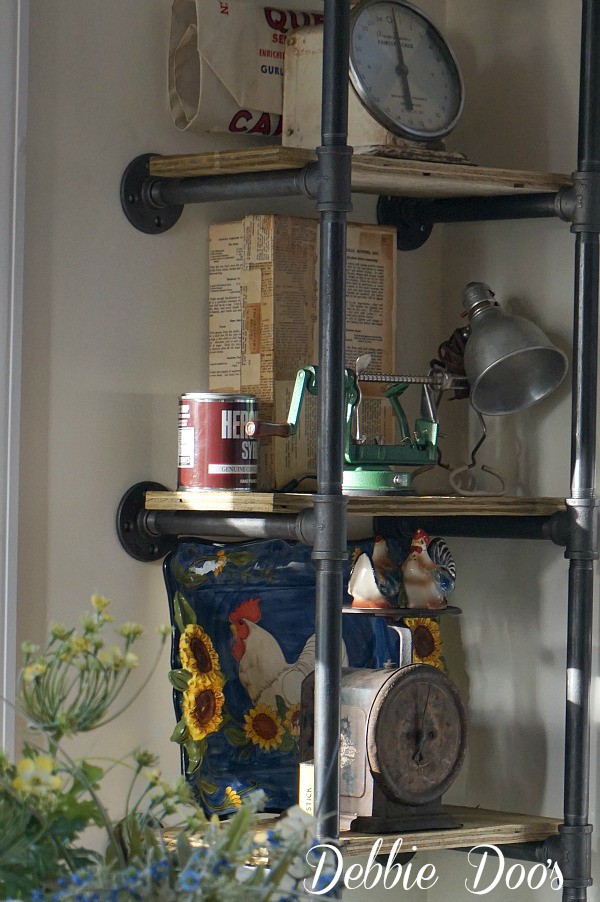
- Paint or stain the baker’s rack: Consider painting or staining the metal components of your baker’s rack to match your existing decor or to add a touch of personalization.
- Add hooks for hanging utensils: Hooks to the sides or underside of the shelves can provide convenient storage for baking utensils, measuring cups, and other small tools. You can use simple S-hooks, which can be hung over the pipes, or install screw-in hooks directly into the plywood shelves. This not only saves space but also keeps frequently used items within easy reach.
- Add casters for mobility: Casters to the bottom of your baker’s rack can significantly increase its versatility, allowing you to move it around the workspace as needed. To install casters, choose ones with a suitable weight capacity and attach them to the bottom flanges of the vertical supports. Ensure that at least two of the casters have locking mechanisms to keep the rack stationary when not being moved.
- Consider additional shelving: Depending on your storage needs, you may want to add extra shelves to your baker’s rack. To do this, simply add more horizontal supports and T-fittings to the vertical supports at your desired height. Then, cut additional plywood shelves to the appropriate size, sand and finish them, and secure them to the frame using flanges. This will increase the storage capacity of your baker’s rack and allow you to organize your baking supplies more efficiently.
- Attach a magnetic knife strip: For a safe and convenient way to store knives and other metal tools, consider attaching a magnetic knife strip to one of the plywood shelves or vertical supports. This will keep sharp objects securely in place and easily accessible while freeing up space on the shelves for other items.
- Integrate built-in storage containers: Mason jars, plastic bins, and other similar items are practical for storing ingredients or small tools on your baker’s rack. You can attach a wooden or metal strip with pre-drilled holes to the underside of a shelf and then screw the lids of the containers onto the strip. This creates an efficient and organized storage solution that also keeps your workspace clutter-free.
It looks great Debbie and the DIY way was a much better price. It will be a great spot for seasonal decoating and styling.
Thanks Dawn! Yes, I agree. I am excited about that too! I just love it.
I love it, it is so perfect for your room.
I am screaming “Wow”!
I just love the rack Debbie! I have that apple peeler/corer too and love it! Happy New Year!
Love it Debbie! Love & Pinned for my {first} husband! laura
Love it! I’m looking at all the corners of my house, trying to decide where I can fit in something this cute!
You don’t need much space that is for sure! I was thinking the other day, even one over the toilet bowl would be neat shelving.
I love it too! We are making some pipe shelves at #1 daughters house as her Christmas gift, but the man with the tools has to heal from two December shoulder surgeries first. Cruel punishment for him.
Oh no! That’s terrible. Hope he recovers quickly Bliss. You will get him right back to work:)
Love it, Deb. Your light fixture is amazing, too- I must have missed it previously.
I really like your industrial rack. I have seen these used in kids rooms and some industrial-looking kitchens.
I love it!
Wow, I love the shelf! It looks super in your eating area!! Hugs- Christine
I just happened upon your site from a link on Rodale’s Organic Life. What a great find – I am amazed at all your clever and unique DIY ideas, and the safe home cleaning “recipes”. Poking around I saw your industrial baker’s rack and I thought “I could do that!”…..I can’t wait to get the materials and set about to putting it together.
I can’t wait to see what you have for the holidays!!!
Really cool to see your process for making this baking rack! I love how those pipes are so unique and yet fit in to the overall space so well. My cousin has been thinking of getting a baking rack, so maybe this article could be beneficial to her when she’s thinking about her options.