
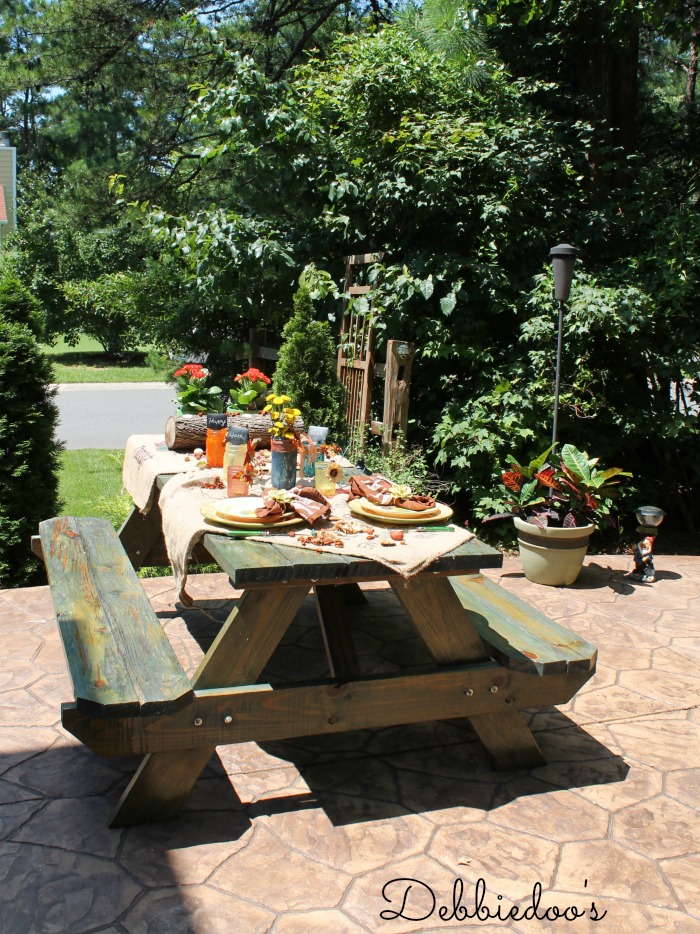
Hello there!Today I am sharing a Fall outdoor tablescape with Rit dye and Mod podge mason jar centerpiece.I have to say, I am in love with color and Rit dye has just about every color that appeals to me.So, today I am sharing some of my new techniques that you have seen in the past month or so. It is easy,and the end results are unique,and always one of a kind.In fact, I have found that no two are ever the same.So let’s get started on the basics.
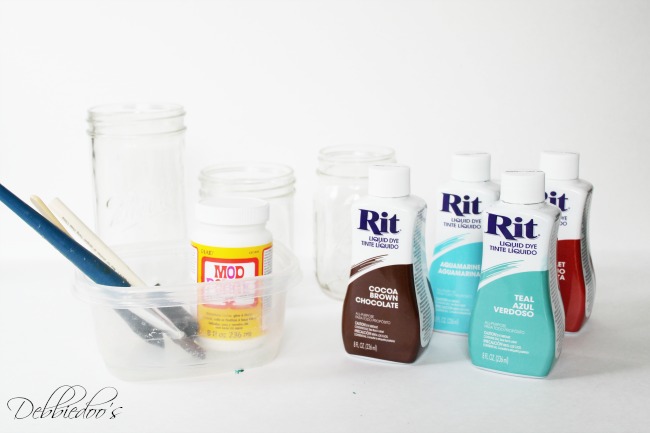
Supplies needed:
Color of choice in Rit dye
Mod podge
sponge brushes
rubber gloves
Mason jars
any size of your liking.
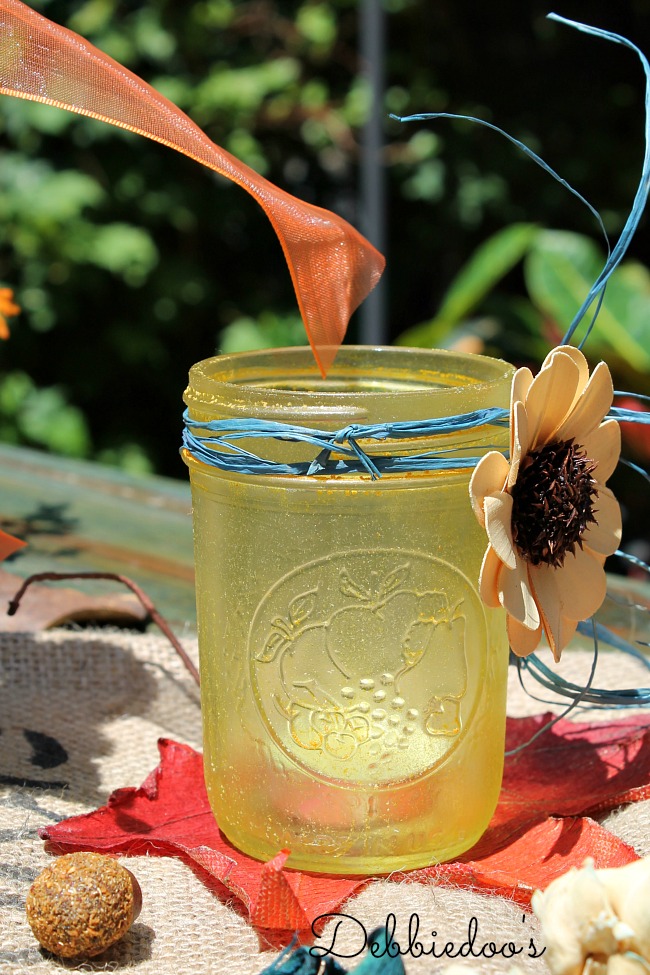
I am going to first share the inside out technique

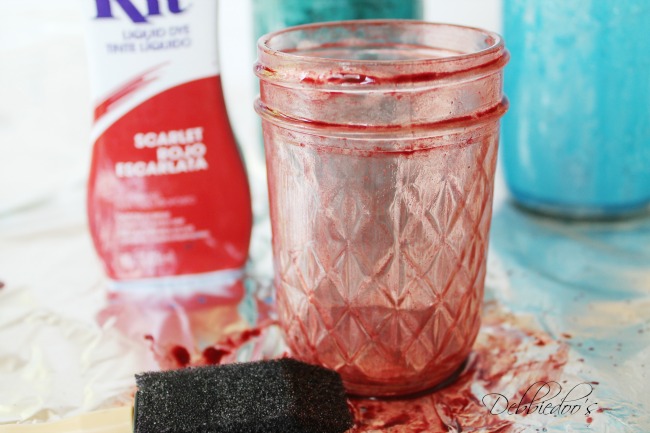
Paint the inside of your jar as shown with mod podge.
Just one light coat is all that is needed.
I really like sponge brushes as the mod podge goes on nice, smooth and even.
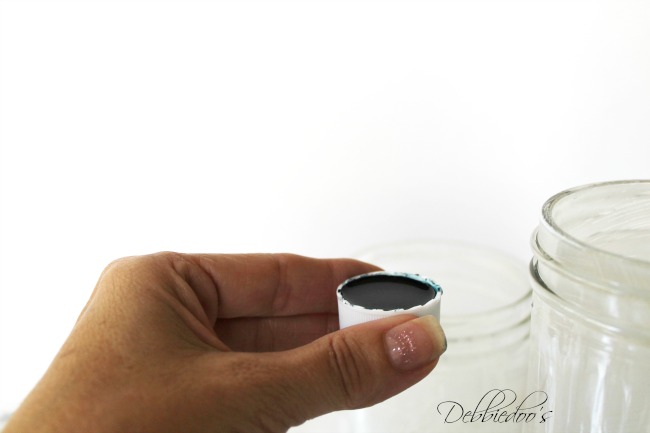
Next take about a cap full
and pour it in your mason jar
This would be for a smaller jar.
If you are using a taller one, use two capfuls.
The mod podge is not dry yet,
in fact you only have to wait about 10 minutes and you can pour your color in
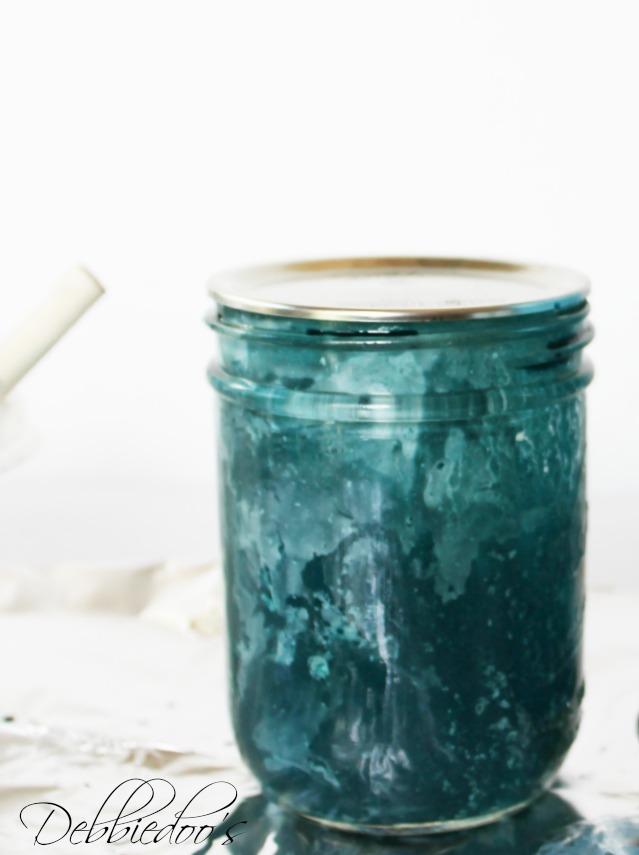
Cap up your jar and shake vigorously making sure the jar is completely covered.
You can then disgard any remaining rit
turn jar upside down and let dry overnight.
THAT is the inside out technique.
NEXT…..
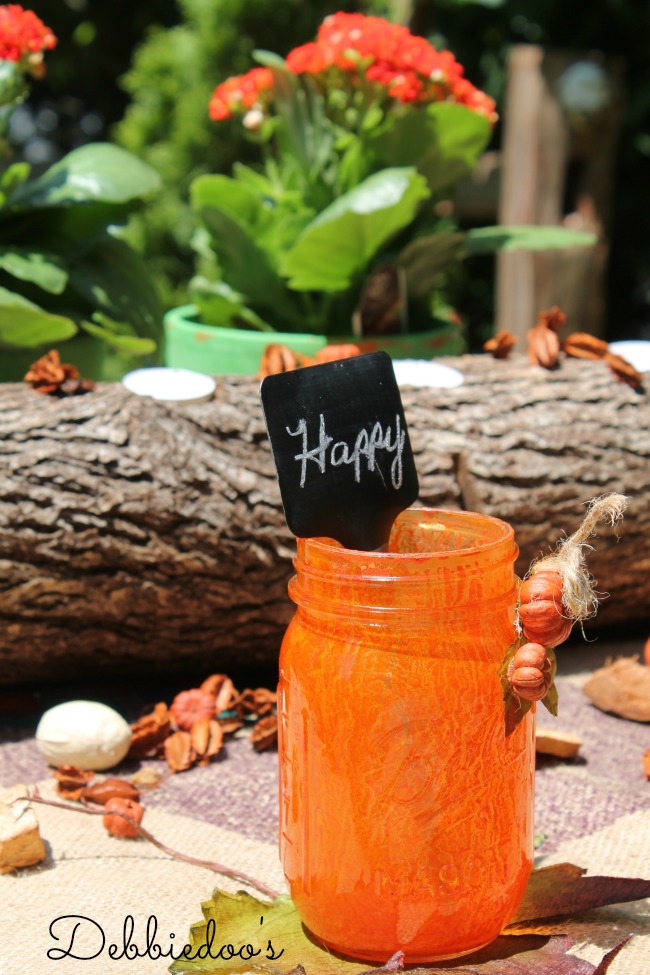
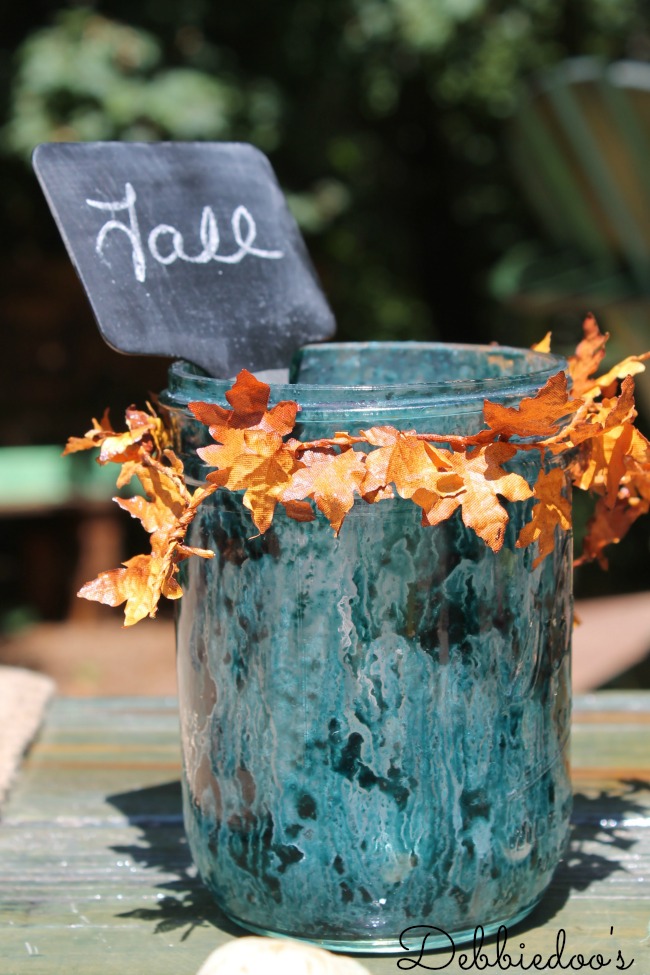
painting on the outside of a mason jar or any other glass surface.
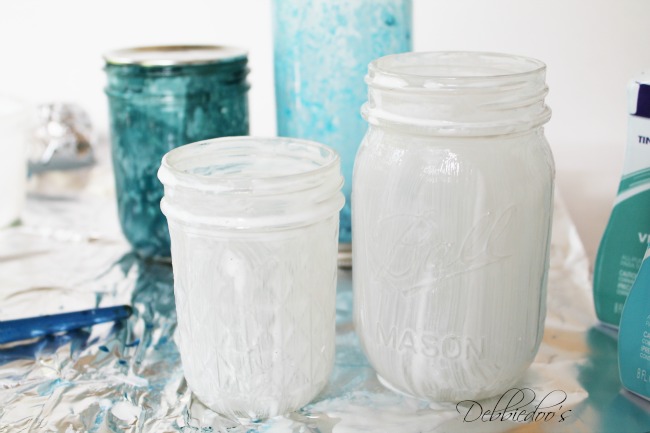
Again, with your sponge brush lightly the mod podge on the outside of your jar.
LET completely dry, this may take an hour or so.
Then take your color of choice
and paint on the outside of the jar with your sponge brush.
You can let drip down slightly if you like that look or continue to brush and soak up any drips with your sponge brush.
This is one coat of Rit dye on the outside. If you want it darker do two or three coats in between drying.
Let completely dry.
NOW, I used Matte Mod podge however you can use glossy if you would like.
After my jars dried completely
I lightly sprayed them with a satin polyurethane protector.
You can do that with the inside out technique as well.
Now how about we see how it all came together on a Fall tablescape.
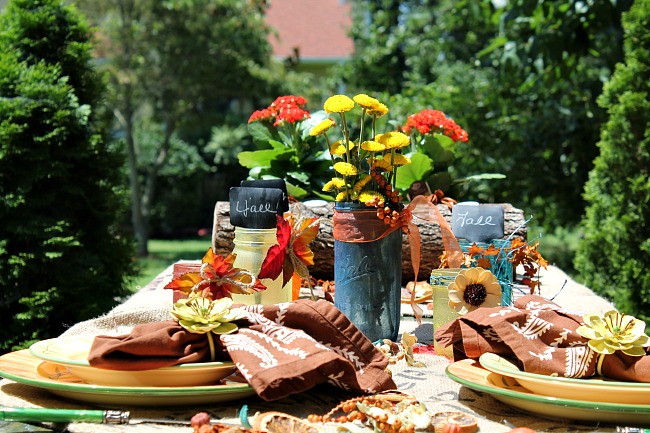
Not sure If I mentioned Fall is my all time favorite time of year.
I look forward to the color change,
cooking in the crockpot, and the smell of falling leaves.
{Inside out technique}
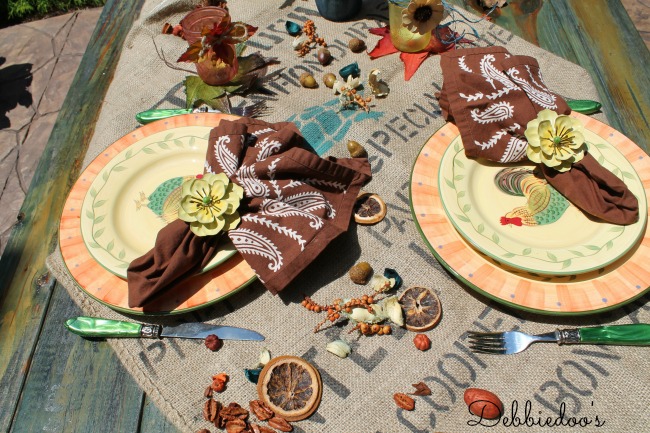
And I love roosters and burlap too.
I never tire of them.
{inside out technique}
See how it takes on different variations and patterns inside?
Love that!
Rit dye and Mod podge painted on the outside using of course the technique shared in the above tutorial.
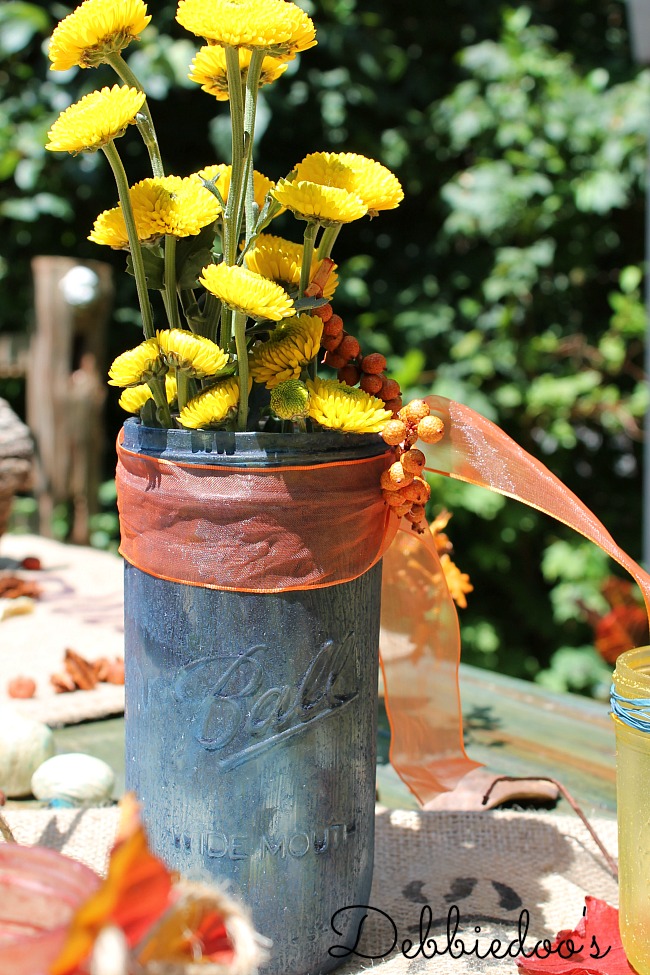
{Painted on the outside}

Hope you enjoyed learning about Painting on glass with Mod podge and Rit dye.
What started off as an experiment, never been done, has turned into a favorite hobby of crafting with for me.
Try it!
You will love it. In fact, a few of my readers have tried and absolutely loved their end results.
Here are a few of my others…
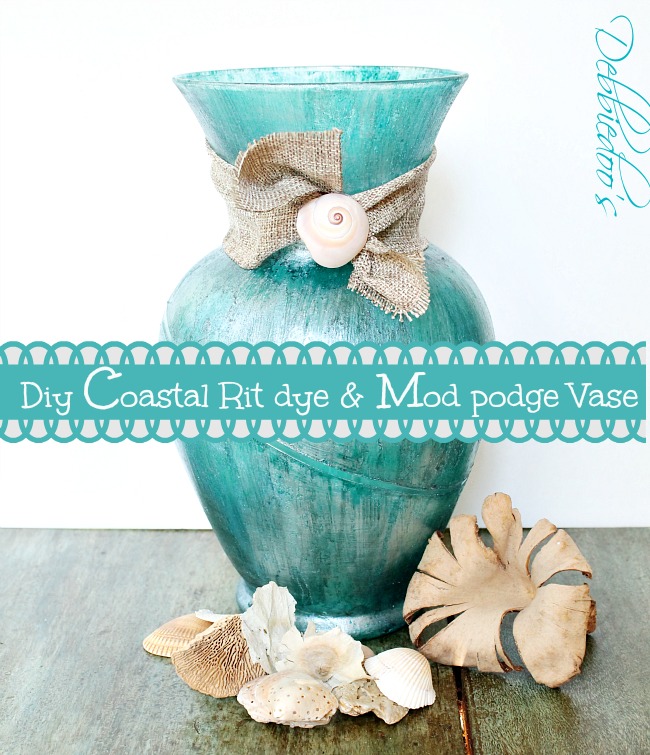
Coastal look mod podge and Rit dye vase
and a Mercury glass look bottle.
Just check out my RIT dye gallery for more!
These are just a few of my recent.
You can also visit me at
Thank you so much for visiting with me today.
If you are new here, welcome! I am also very excited to share my new stencil line with you.

[envira-gallery id=”32693″]
Thank you for your visit today!
To view my stencil gallery projects you may check out my Debcreates.com page.
I share all things, thrifty home decor, crafts and a recipe or two on occasion.
I also have an Etsy shop!

Sign up today and receive a few freebies. 12 months of seasonal printable art.

If you would like to commit to becoming a subscriber, I would love for you to join me.
Fun post, Debbie! The tablescape looks wonderful and it’s great to have the tutorials in one spot…pinning!
Thanks Linda! It was fun:)
These turned out so great! Love your fall table scape.
Your are the Rit Dye Queen, Debbie. This turned out fantastic and I love the table!
Cynthia
Debbie..I really like the orange and the blue colors!!
You’ve done it again! Your creativity is outstanding, and the tablescape is beautiful. Thanks for sharing. Peggy
You are too kind Peggy! Thank you.
Love the inside one!
Those are my favorite too!
everything looks so pretty 🙂
I love all your ideas, but the coastal vase is my fav so far.
Very charming Debbie, it looks like you are still having nice weather.
Hi Debbie, There you go again with a great idea……They look so great. I have the same napkin holders, and some others that you use…….Love knowing a different use for Mod Podge…..<3
This is actually one of my favorite posts that you have ever done. I love the tablescape. It’s right up my alley. Plus. I love the way the mason jars look with the dye. The blue one looks so much like blue jeans, and that yellow one is my very favorite. LOVE this!
Awww…thanks Debbie! it was a lot of fun!
what a gorgeous tables scape…what time is lunch?
i so love seeing all of your creative projects with the Rit Dye and Mod Podge….you come up with the cutest ideas…love it all Debbie!