
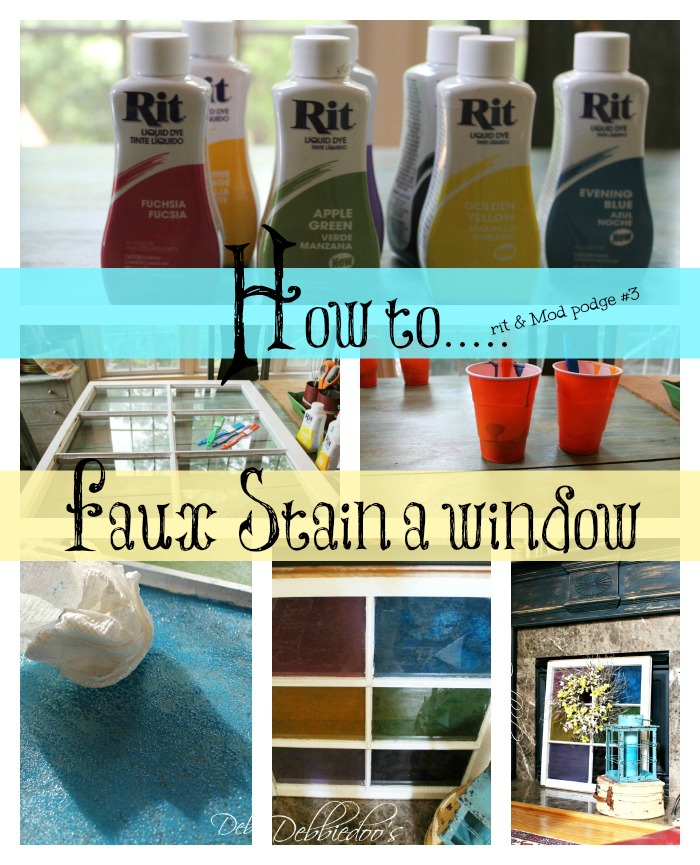
Want to know how to faux stain a window with Mod podge and Rit dye?
Experiment # 3.
If you missed my Experiment with rit dye and mod podge on glass
#1
#2
You may want to catch up first.
Here is the Before.
Certainly too plain for my liking…..
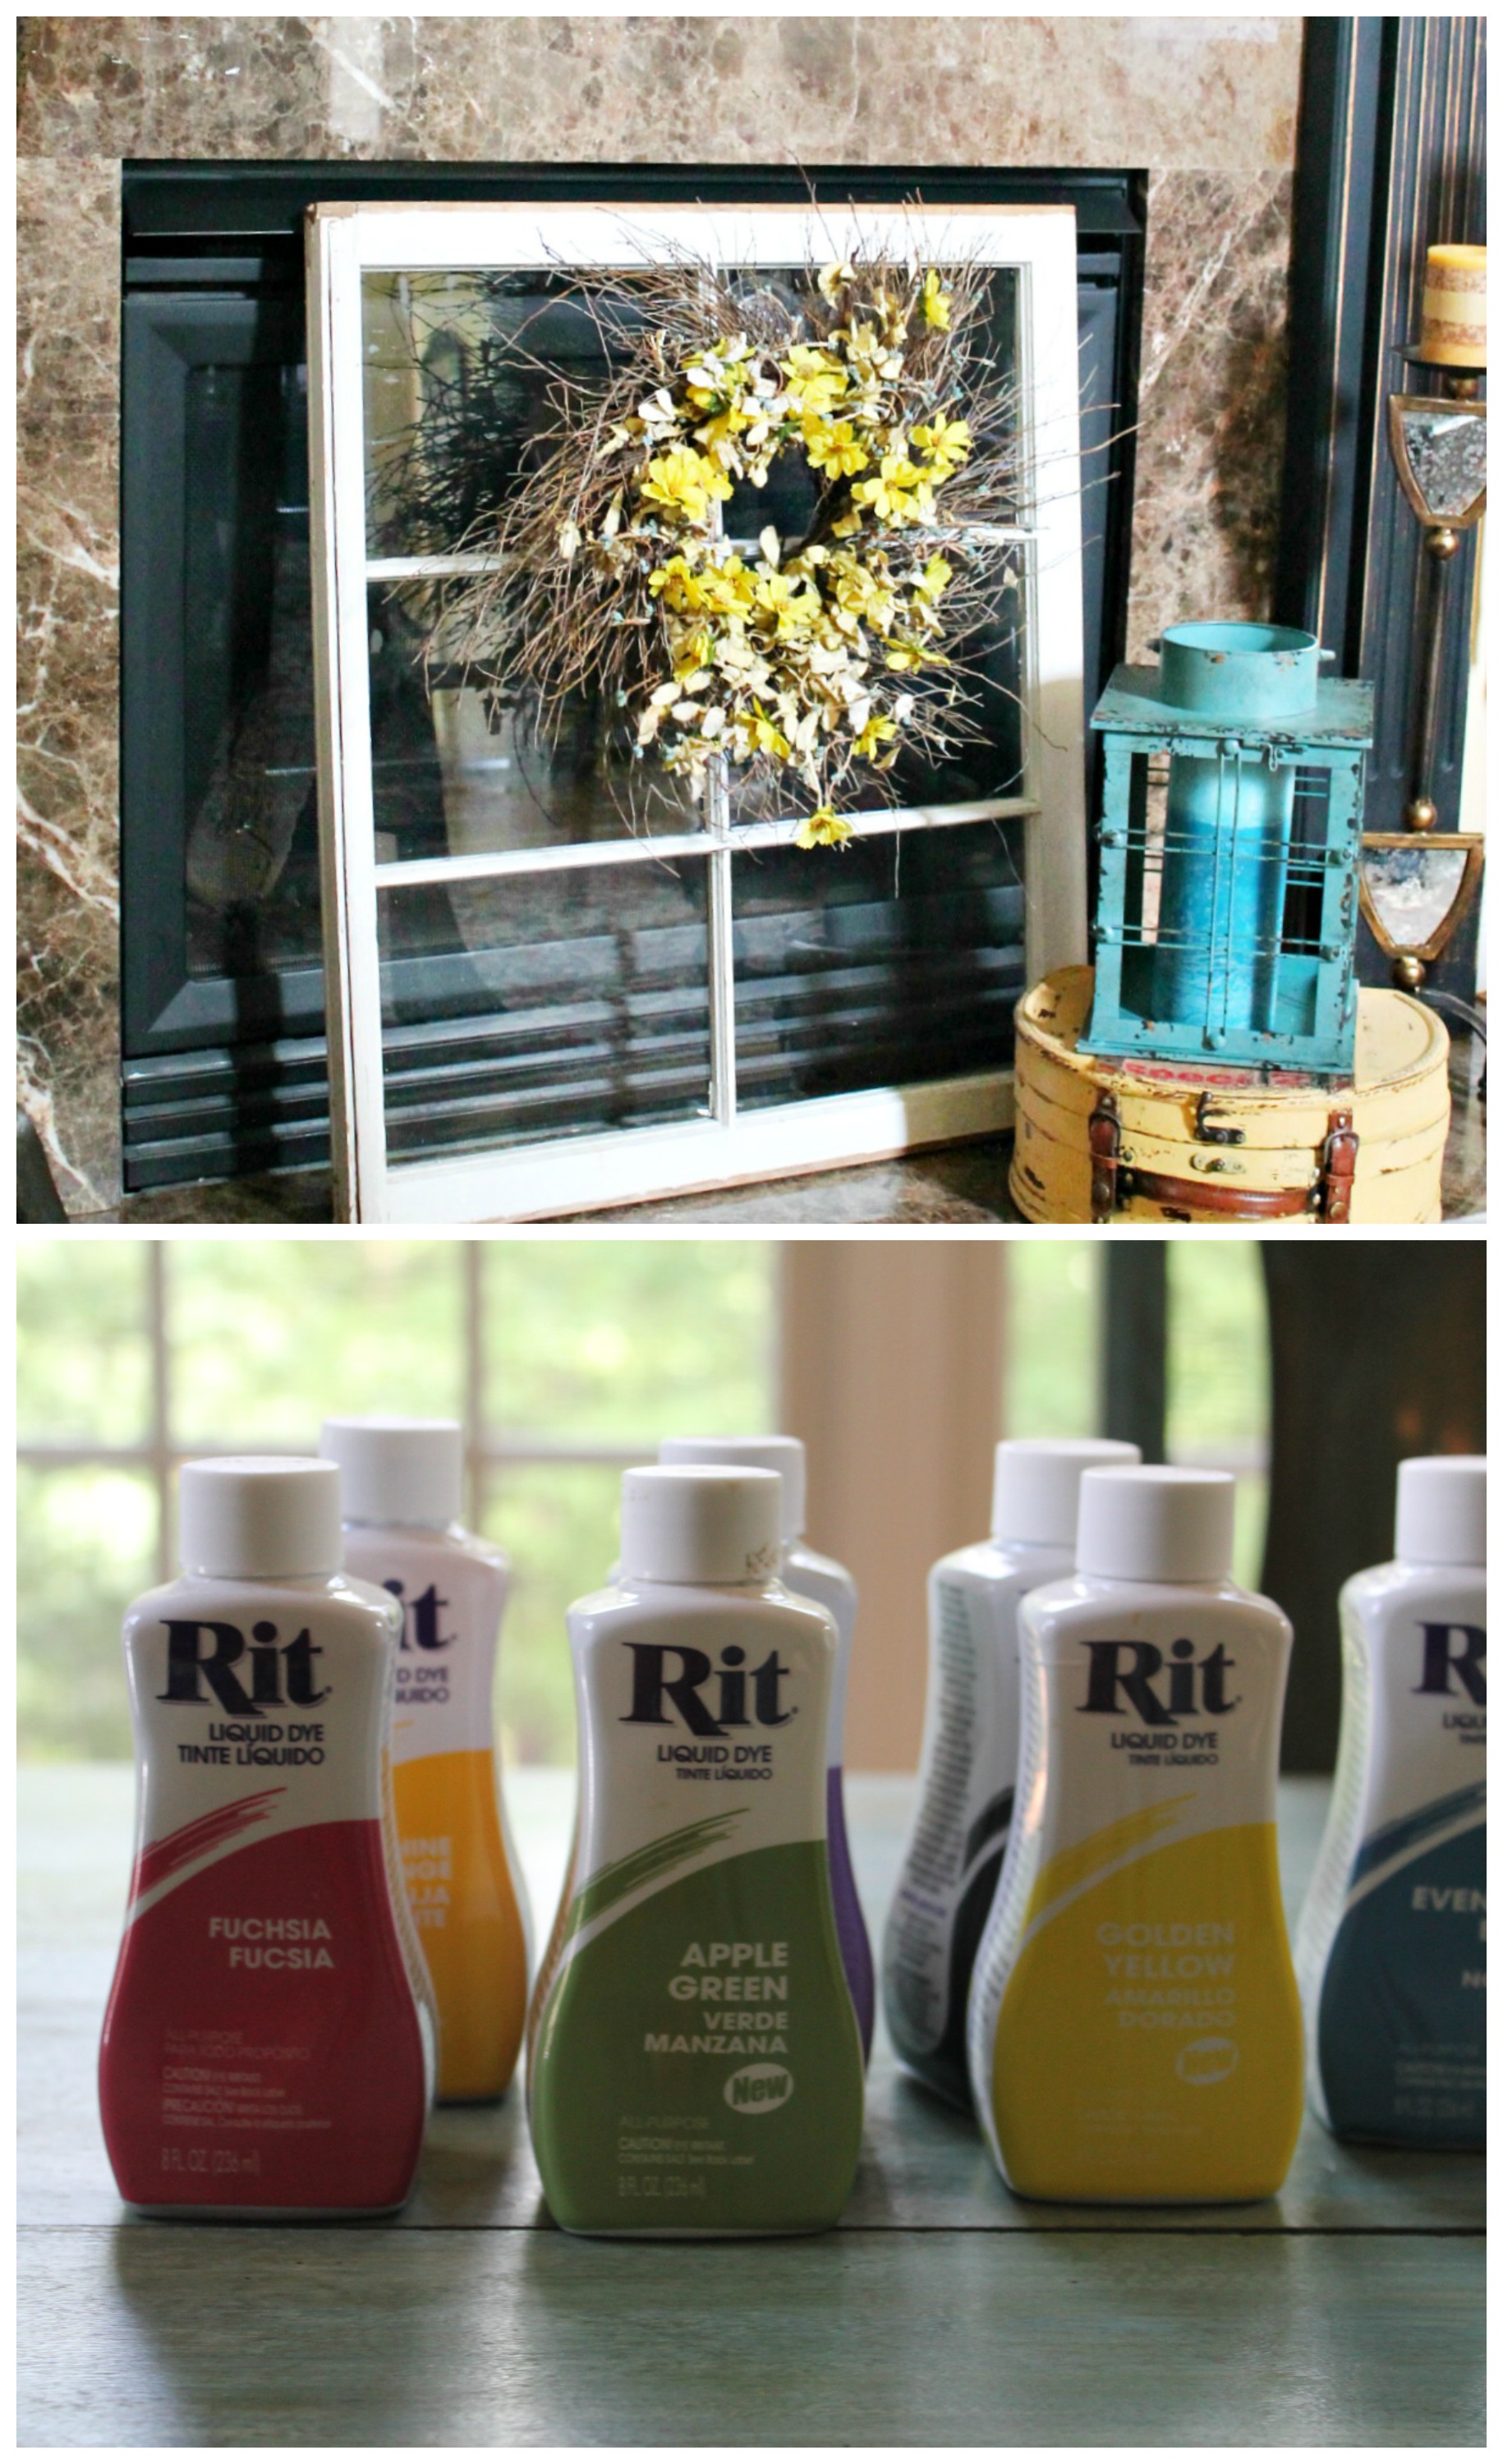
I started off with this old window, that a friend of mine actually picked up for me at an antique mall.
A few weeks back
I shared another one I had picked up….
re-purposed old window project that I turned into a chalkboard piece of art.
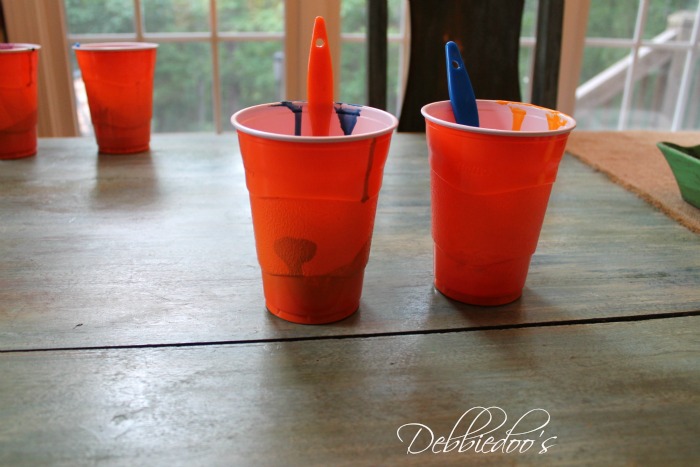
So I mixed all my colors in individual cups with rit dye and mod podge.
I used the matte finish as I did not want it glossy. All a personal preference.
There is no secret formula to the mixing ,
it is all trial and error more or less to the color you want to achieve.
More rit, deeper color, less rit, lighter color.
I only put a bit of mod podge with it per window pane. You really do not need that much.
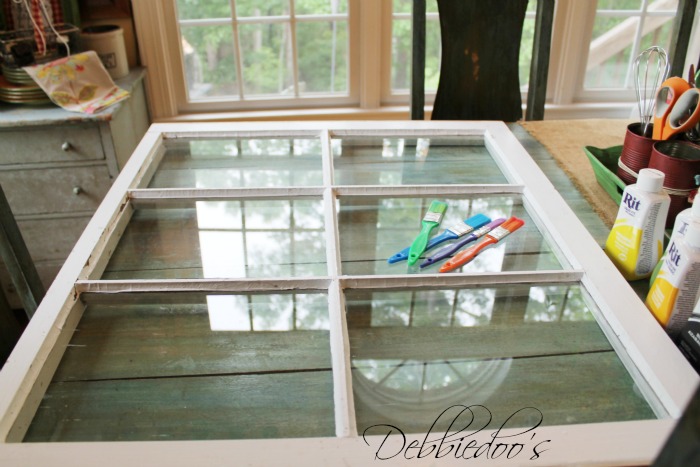
You can see the craft brushes I used here.
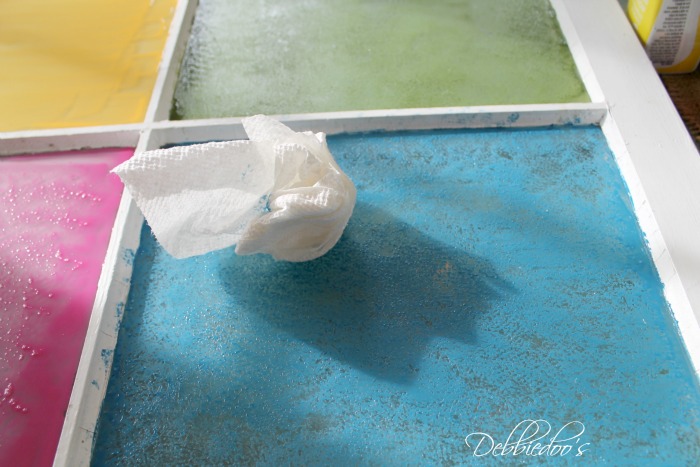
After I painted each pane,
I went back with a paper towel
and before the rit and mod podge actually dried I dabbed the entire pane.
I wanted it to look textured and more like stain glass obviously.
I went through a lot of paper towels.
Oh and I also have about three coats total of my concoction.
I let each coat somewhat dry, dab and re applied.
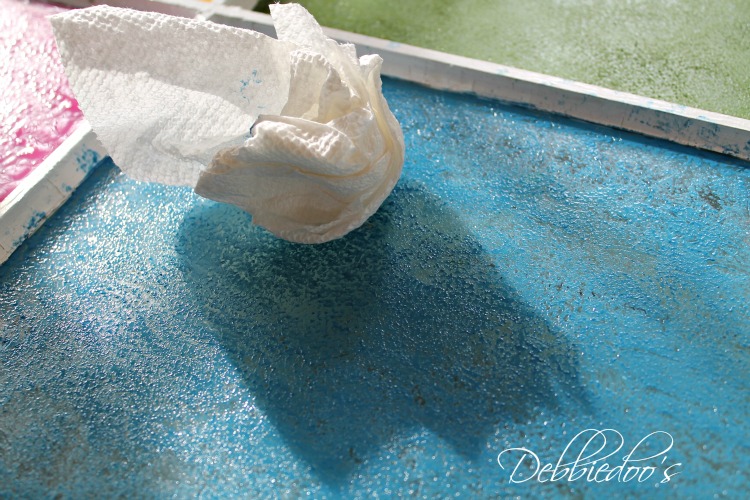
Here is a close up of what it looks like as it is drying.
I cleaned up the edges even though this is the back, I still don’t want it to look sloppy.
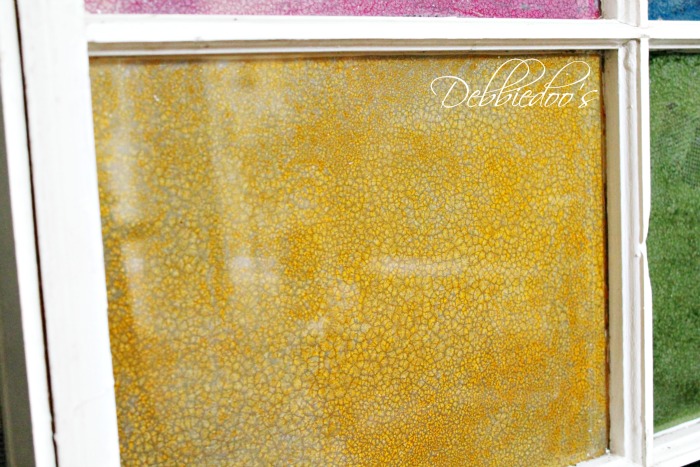
And here you can see it completely dried and what it looks like from the front.
Pretty cool huh?

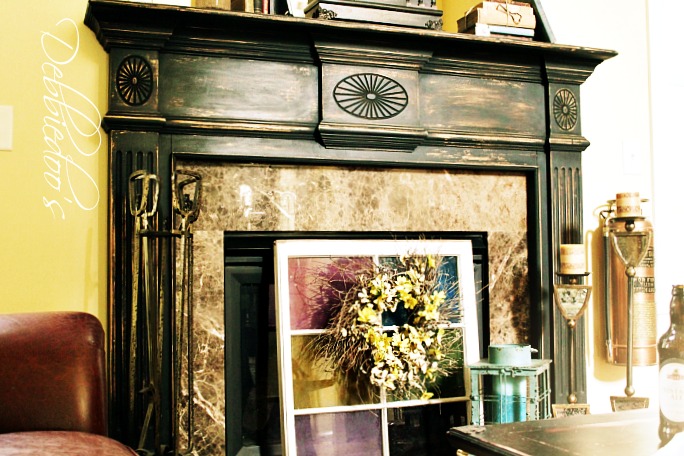
And here you have the end result.
Pretty simple, cheap and fun!
Certainly is one of kind.
Just playing around with picmonkey for special effects.
I think I may be done for now playing with Rit dye and mod podge and painting on glass.
I must obessess now over something else:)
thanks for stopping by today.
Hope you stay awhile and find something else that may inspire you.
check out my over
100 + DIY gallery projects!
 You can check out my Dollar tree archives of budget friendly ideas while you are here.

and some fabulous blogger home tours

I LOVE IT!!!! You come up with the most amazing ideas! I love the different colors and I’m pinning this so that I can try it when I get my hands on a window frame! Happy Sunday! xo
Debbie this is amazing I love it! Sharing on my FB and Twitter today and of course pinning!
Super neat idea Debbie and I have some windows!
Blessings,
Linda
You are a clever girl!! 🙂 That turned out WONDERFUL!
Hugs
Karin
http://www.artisbeauty.net
How fun is this. I love your window. Great idea. Hugs, marty
Its perfect!!! I happen to have a couple old windows, some already with some original stained glass in them ..I am definitely trying this!!, Boy the possibilities are endless… 🙂 yay!!
That is fantastic! I love stained glass, the prices of stained glass, not so much! YIKES it can be expensive ~ I have some old windows myself and would definitely love to try this ~ thanks for experimenting!!! I must pin this for future reference! Judi
Oh Debbie, that is so great! It turned out perfectly!
Super cool Debbie!
I LOVE your window Debbie 🙂
Debbie, you always amaze me with your ideas! This is so interesting and looks great at your fireplace! It really has the vintage look of a multiple stained glass window.
I love this!!! Hmmmm…..now I’m looking around my room seeing what glass I can paint! LOL!! Great job!!~~Ang
Your window turned out really neat, Debbie…and it looks great where you are using it.
How in the world do you come up with so many crafts…??? You are a busy busy girl.
One day at a time I come up with them LOL!
Debbie, that looks like a beautiful stained glass now! I love it!!!!! You have inspired me!!
xo Kris
I love it! I have a few old windows, I might have to try something like this for one of them. It looks fabulous, Debbie! I’m pinning this.
Debbie 🙂
i love this…not that i can run out and buy a few bottles of rit-red, blue, yellow could make plenty of colors though! But what I do have is fabric dye from a large kit for tye dyeing clothes-and it will work:) I have 3 old windows left, and thanks for the idea! I just need to get up and do it !
kudzu
Debbie, this ‘experiment’ turned out phenomenally! I cannot wait to try something like this myself, you rock!
Wow! That looks awesome. I can’t remember when the last time I bought Rit Dye, but I’ll be looking for it now!
great idea – as usual!! love the stained glass look!
Kelly
They really look great! I have some old windows…do I dare try this?? 😉
As near as I can tell it turned out good, and does give off a stained glass vibe. What say you?
Much better than just the clear glass Debbie … great idea without the expense of stain glass. Thanks for the inspiration.
Audrey Z. @ Timeless Treasures
I love it! Now I want one of those. Really turned out so unique and interesting. Peggy
Love it! So cute and colorful!
That looks so pretty Debbie! Love how you laid out the color combo. Much more “you” too 🙂
What a great idea Debbie! I have a window I need to do something with.
This is so cute!
Sherry
Wow! that looks simply awesome! I love how it looks in the entire vignette with the beautiful mantle as a backdrop. Wonderful job, Debbie! Thanks for inspiring me today!~Poppy
Hey –
Your last post [How to faux stain a window with Mod podge and Rit dye] was freaking awesome. I have gone ahead and added your stuff to my Feedly account. Please keep me updated if you post anywhere else.
Keep rocking –
Dante
What a great idea, Debbie. I love how it turned out and it makes a great fireplace “screen”. xo Diana
Beautiful! I can’t wait to try this with some of my window stash! Thanks for sharing!
So cool Debbie! I love it in front of the fireplace!!!
Nice, but still not quite sure on what “just a bit” of Mod Podge means. For about a cup like what you have in your demonstration, would that mean like a tablespoon?, teaspoon, 1/4 C.? Hmm, is a bit confusing, sry.
I did not measure anything and as I mention it is trial and error, I would say about 3 teaspoons.
This is so clever…AND beautiful! Pinning!
Your window is to Die for! You make everything look so easy and fun too! Mind if I copy cat the idea? I have some old windows and an event coming up and I have a feeling these would sell like hotcakes!
Bev at Give me a paintbrush
I don’t mind at all….after all that is why we share right? Let me know how they turn out.
too cute Debbie! The colors are perfect for the fireplace.
Debbie this is super cool. The endless possibilities with colors and combinations are going off in my mind like fireworks! Nice job…love it as always.
Your faux stained glass turned out great. Very cute!
Jennifer @ Decorated Chaos
Looking good girl!
This is genius. Pure genius!!
Wouldn’t have thought of mixing dye with Modge Podge .. i would have probably gone to acrylic paints. Great idea!
Loved the idea. Made hubby stop at Walmart for Rit and Modge Podge on way home from dinner. I had decided to try it on one of the massive number of clear cut glass pieces I have. Started out with the plan to paint the cuts a different color than the surface, that plan ended quickly when I realized that I am too old, too blind, and or too untalented to make that happen. I then painted the entire piece and it still didn’t look right, I chalked it up to the glass piece I choose was not a good candidate for this technique. I decided to wait until it was dry to finish messing with it and went to check my email. I brought up my computer and it opened to your tutorial at which time I realized I forgot to pat it a paper towel; I rushed into the kitchen to find that it partially dried and impervious to a paper towel patting so I turned to my handy dandy veggie brush, wet the tips and beat the stink out of it; this seemed to work. If this turns out to look good it will be in spite of my skills, not because of them. I’ll let you know.
Hi Beth, I hope it turns out..it really should. I don’t see why not. Don’t forget you have to add a few more coats as you go too, not just one. Let me know…and send me a pic too:)
This is so fun! I love this.
Do you think this would be weatherproof if I used the outdoor mod podge? Has anyone tried it? I have an old
door with many sections of glass that I wanted to use as a backdrop to an herb garden. I thought this would look great! Love the idea! Just wondered how it would hold up to the elements.
I am thinking no, because mod podge is glue and rit dye may fade. However, if you try a poly finish on top it may hold up. WOrth the try.
You probably won’t see this, but I LOVE THIS!! I am never going to get caught up with my blog reading because I keep seeing links to stuff on this blog that I missed and need to check them out. You are just so creative, Debbie.
Way too cool, Debbie! I pinned it for future reference!
I would like to do this on my actual windows … the top halves, I am putting shutters on the bottom halves. How thick is it? Does it run? Any suggestions on making this work on a vertical surface?
I did not add water to the mixture because for one thing,the more rit dye the thinner the mod podge gets. Dabbing with the paper towel was the trick to the texture and it not running. I had no problem with this project and it really was simple. Good luck!
I have a window pane door, I would live to try this technique what do you think it is a new door
I would not do it if it gets any sunlight direct. I don’t think the dye would like it.
What a great look, Debbie!! This technique has so much potential…thanks for sharing how you did it.
Debbie,
I really Loved this one. I Loved You included The History of Stained Glass that was very Interesting!!
Thank You for that!! And really the fact you can make a stain glass window from Rit dye is really Amazing!!
Your piece your friend did is Just Beautiful and the piece you did is equally as Beautiful in a different way
It has a different purpose and different Look !! You really did an Amazing Job so Much I Really want to Share This with my followers So they can see what they can do with Rit Dye. Thank You so Much I truly enjoyed it.
Thank You
Lisa
Wow Debbie…I love this!! It is amazing how a little color on those window panes makes them jump right off the page and really standout. Beautiful texture and colors. Thank you for sharing.
Did you paint on the back or front of the window?
The back:)
I have a question – is this permanent? OK – I have two questions – have you ever tried to stencil designs onto the glass panes using Mod Podge and Dye???
Love this idea but just got into stenciling and since I have an old window that I got from the rubbish ages ago I want to try to do what you did but stencil as well.
Thanks for sharing, love your ideas, Lis
Hi there! yes, I think this is permanent. I certainly would not try to remove it. I think stenciling sounds like alot of fun. I have never tried the technique with this combination, even though I am huge stenciler myself. I may have to now for the New year and see. Happy New year!
Debbie, thanks a lot for that. Now my sisters will think I have more money that I do have.
Gorgeous!! Now I have to start looking around for a window. Thanks for the inspiration.