
Creating wooden pumpkins with a rustic touch is a fun and simple way to embrace the fall season. By following this guide, you can easily craft charming decorations for your home using basic materials.
Read on to discover the step-by-step instructions for crafting wooden pumpkins, from gathering your materials, painting wooden blocks, and preparing burlap to sticking burlap to the blocks, stenciling letters and words, and assembling the wooden pumpkins.
1. Gather your materials
- Apple wood blocks
- Burlap
- Craft paint (orange and black)
- Stencils (letters and/or words)
- Sticks (for pumpkin stems)
- Mod Podge
- Sponge brush
- Small artist’s brush for stenciling
- Twine
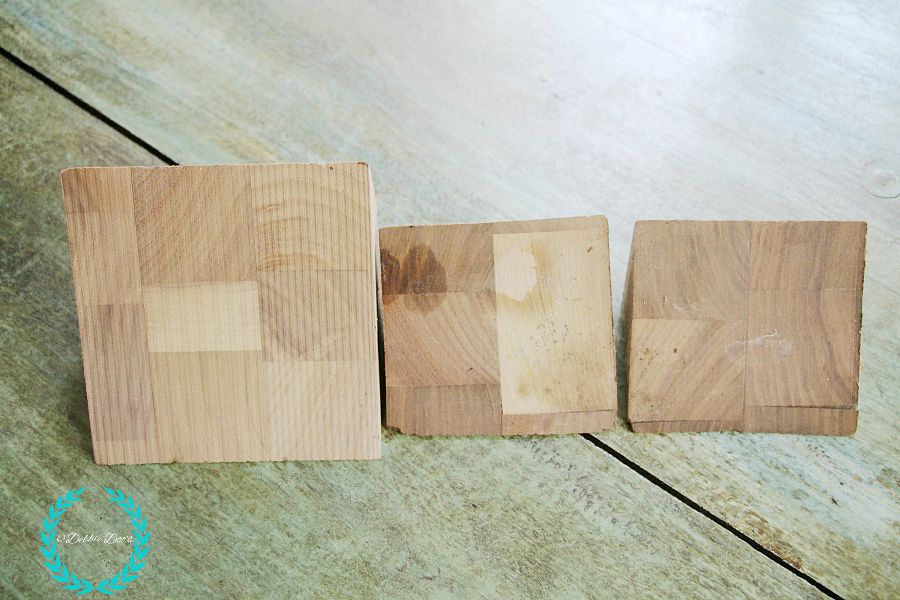
2. Paint the wooden blocks
Begin by selecting apple wood blocks of appropriate sizes for your pumpkins. Once you have chosen your blocks, paint them with orange craft paint. Allow the blocks to dry completely before moving on to the next step.
3. Prepare the burlap

Cut burlap into squares that are the right size for each of your wood blocks. The burlap will add texture and a rustic feel to your wooden pumpkins.
4. Apply burlap to the blocks
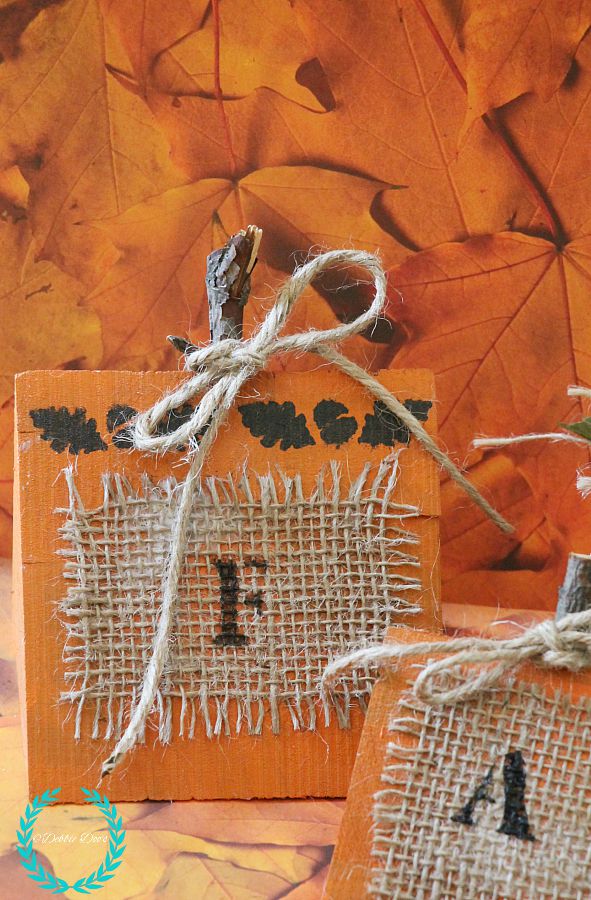
Using a sponge brush, apply Mod Podge to the surface of each wood block. Press a burlap square onto the block, ensuring it adheres smoothly. Then, paint over the burlap with another layer of Mod Podge. Allow the blocks to dry completely.
5. Stencil letters and words onto the blocks
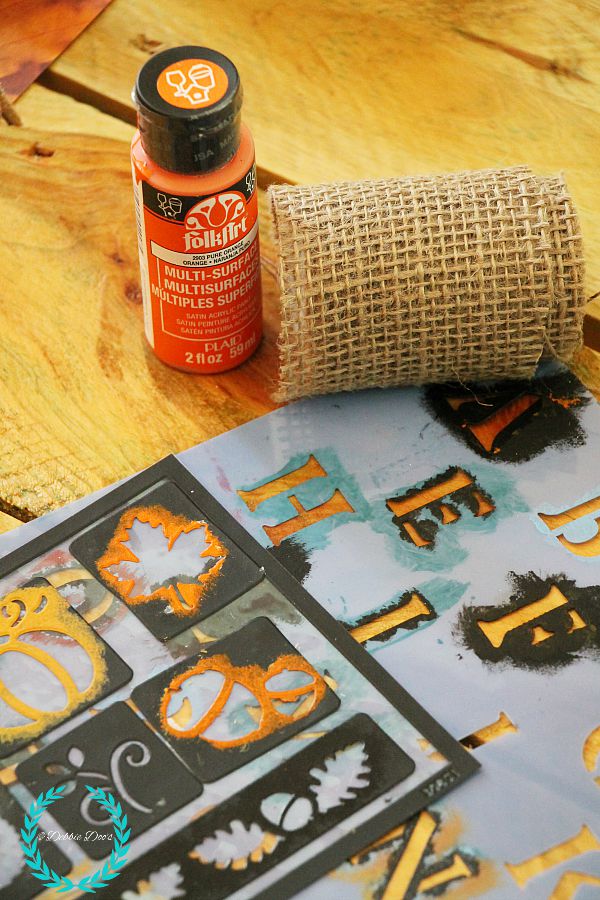
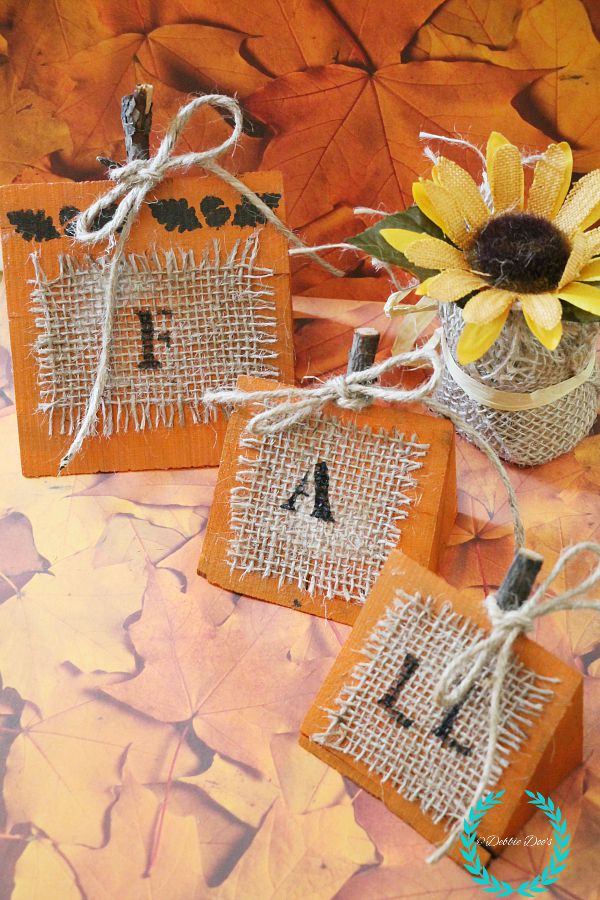
Choose stencils for letters and words to display on your wooden pumpkins. Using a small artist’s brush, apply black paint through the stencils to create your desired design. Consider applying one letter per block or creating entire words, such as “FALL,” for a more festive look.
6. Assemble the wooden pumpkins
Now that your blocks are decorated, it’s time to assemble the wooden pumpkins. Attach sticks to the tops of the blocks to serve as pumpkin stems. Wrap twine around the sticks, tying it into bows for added charm.
With your makeshift wooden pumpkins complete, you can use them to decorate your home. Place them on window sills, mantels, tables, or use them as centerpieces or accents for fall-themed events. These enchanting wood pumpkins are sure to add warmth and character to your seasonal decor.
Check out more farmhouse pumpkin decorating ideas.
these little wooden pumpkins are SO CUTE……I just love how you can make something so cute outa ‘whatever is lying around the house’. Little special touches scattered throughout your home make it so cozy and filled with love.
Thanks Carol! I try not to clutter the place too much:)
what cute ideas love the fall placks so cute the dollar store is great to get crafts from to make 🙂
Can’t beat the Dollar tree Mom. Get ready to get your winter craft on.
I am totally with you about Walmart,,,in and OUT quickly! but now you have given me a reason to go there, i’m going to check out their craft department. very cute pumpkins. I love the rustic feeling to them. Thank you, I can’t wait to see your next posting.
Thanks Margie!
I love my dollar tree! Cute idea’s Debbie. I noticed the new burlap ribbon as well, I picked up 3 rolls on Saturday. 1 roll was huge. Or as Donald Trump would say, HUUUUUUUGE. LOL
Heading back over there today. I need another HUUUUUGE roll LOL.
Dollar stores are great, eh? I have a Real Deals dollar store near me and they have some cool random stuff I dont find at Dollar Trees. I love it.
Im with ya on Walmart! LOL
Those pumpkins are so cute! I also love your owl garland!
Never heard of Real Deals. Sounds great though.
Clever AND Cute.