
Hello, hello there!
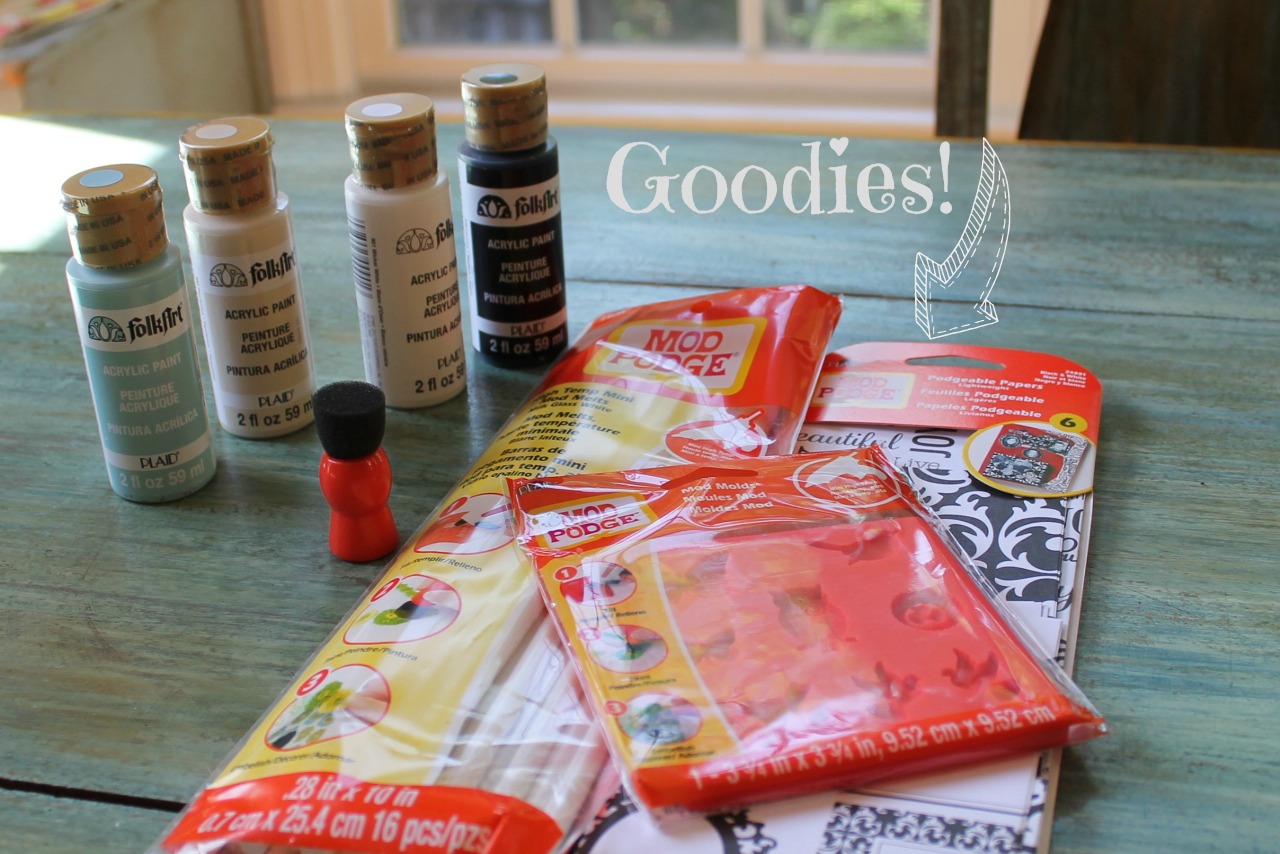
I was pretty excited to receive a box of goodies from Plaid.
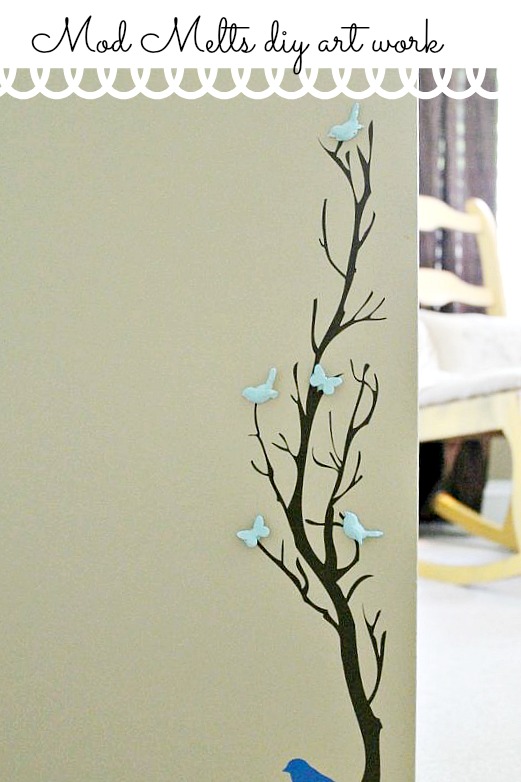
Today I am sharing how to create a cute piece of art work with Mod podge Melts.
Mod podge melts are new, and of course I have never worked with them and you all know how much I already love mod podge.
To be honest, when I saw the mod podge melt form, I was a little clueless as to what exactly I would do with these.These forms are small
and I really have never worked with anything like this.
So there it sat on my kitchen table for about a week.
I wanted to do something really different.
I thought these are super cute to make some jewelry with
however,
no that’s not me.
How about something cute with a can and embellish with these?
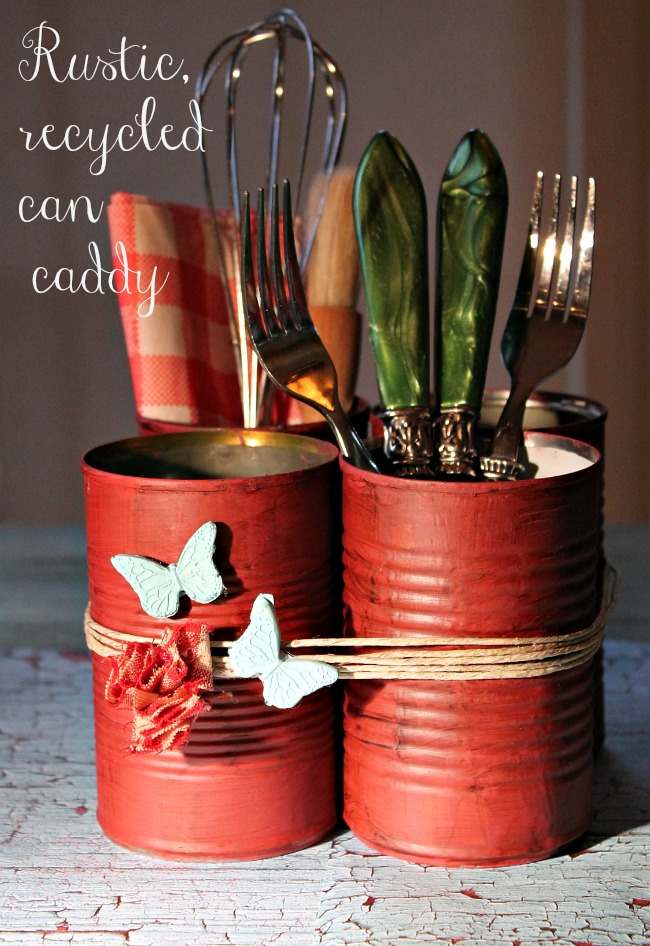
Ok, so that was my first mini trial
I realized I should have trimmed these up with small scissors as you can see I had slight glue overflow.
That would have cleaned it right up.
NO biggie, moving on.
Supplies:
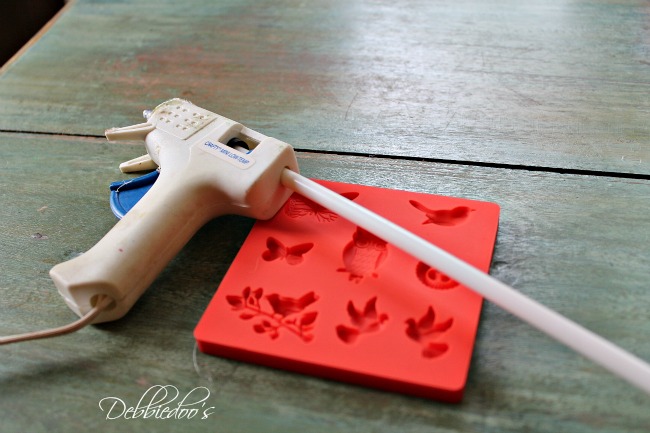
High Temp Hot Glue Gun
Mod Melts in Milk Glass White
Mod Mold
Acrylic Paint
Paint Dauber
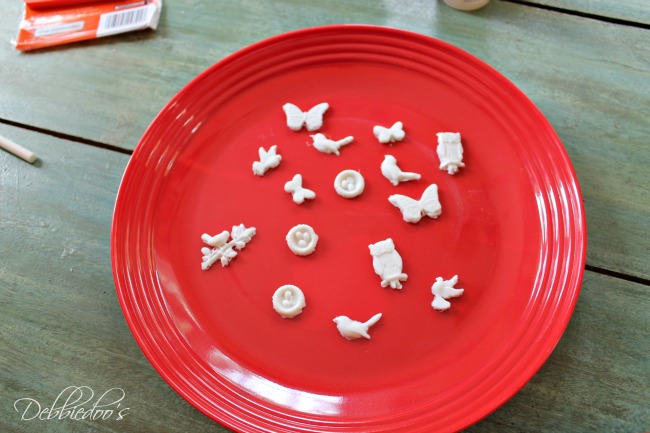
So I got to it, and made the little forms which was simple
Simply insert the mod podge melt stick in a hot glue gun
and shoot the gun into the form
wait ten minutes and pop them out.
Paint with the dabber.
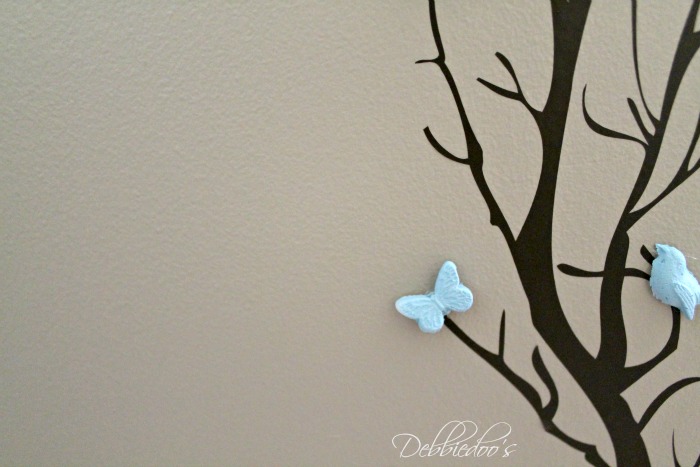
A few weeks back a friend of mine ordered some vinyl wall words for another friends new kitchen.
She received a freebie of a cute tree and bird.
My friend Natalie said here Debbiedoo’s you like birds and I am sure you can come up with something fun to do with this.
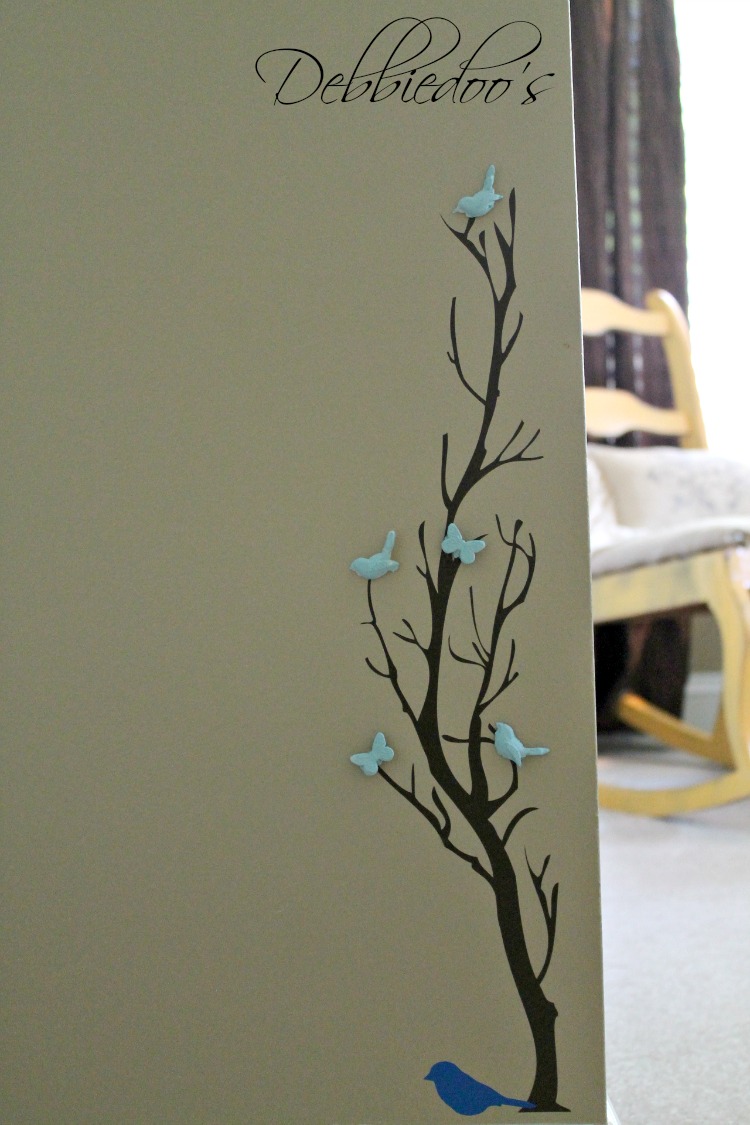
This morning the light bulb went off…
use the mod podge little melt forms to embellish the vinyl tree that I wound up just putting in the guest room as you enter.
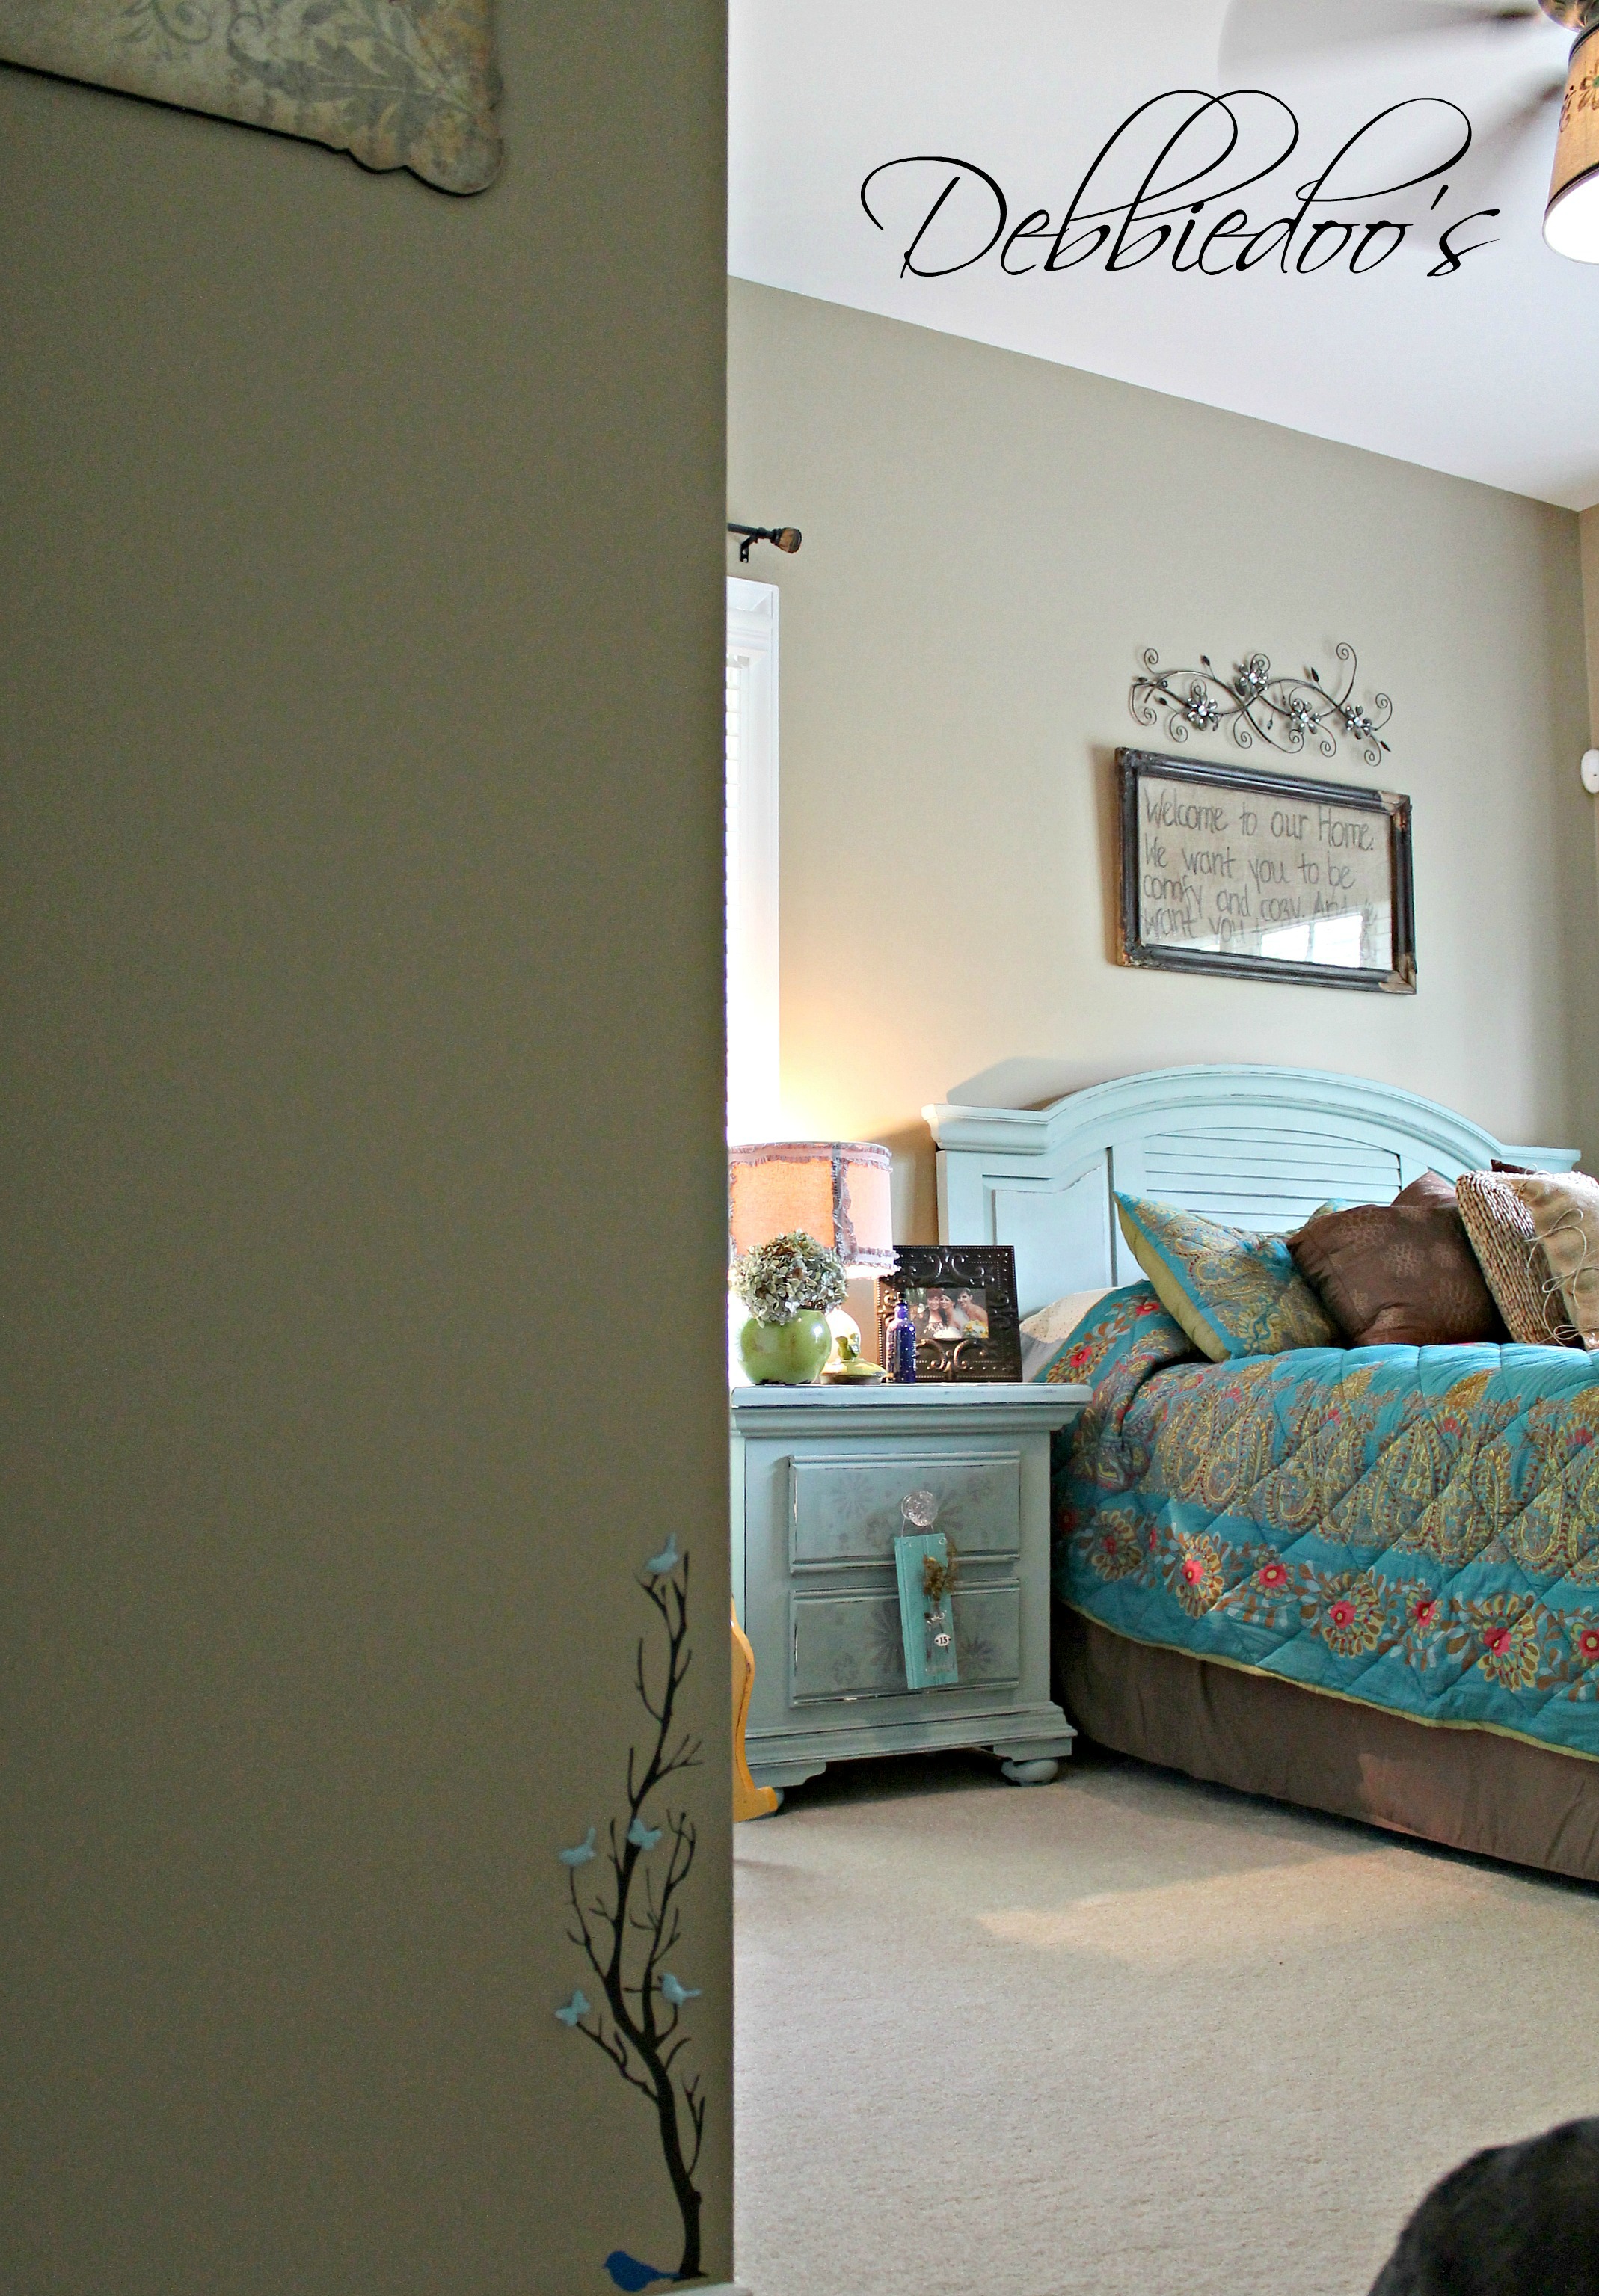
Done deal!
Cute as cute can be:)
Hope you enjoyed my easy diy art work with mod podge melts.
Your creativity can go in many directions with these cute little embellishments.
Want to see some other fabulous projects using Mod Melts?
Check out these amazing projects…down below
Thank you for your visit today!
I share all things, thrifty home decor, crafts and a recipe or two on occasion.
If you would like to commit to becoming a subscriber, I would love for you to join me.
 You can also check out my Mod podge gallery of ideas HERE
Thank you so much for visiting with me today.
If you are new here, welcome! I am also very excited to share my new stencil line with you.

Farmhouse/rustic stencil line by Debbiedoo’s HERE
Thank you for your visit today!
I share all things, thrifty home decor, crafts and a recipe or two on occasion.
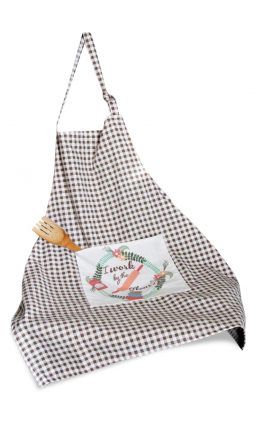
I have also created my own custom apron. “I work by the flour” logo on linen deep front pocket. My husband was the witty one with that slogan:)
Sold on Amazon Debbiedoo’s custom apron.
If you would like to commit to becoming a subscriber, I would love for you to join me.
Cute Debbie. If you can believe this. I have never used mod podge
Well girl, you better get on it!
Cute idea. I knew you would think of something.
Thanks Kim, I try:)
OMGosh- Aren’t those cute? The kids would love them-but I wouldn’t let them touch the hot glue part but they could certainly pop them out and paint them. Very clever and I like the way you used them on the tree-xo Diana
Now that is just the cutest idea with the birds and branch. : ).. Adorable! You always have the best ideas! Well done!
Oh how darling! Could you use them as furniture appliques also? I’ve never seen or heard of them before!
Sure you can, I don’t see why not:)
Can you tell me where you go the picture over the bed in the guest room? I love the saying and the picture. Thank you
At a local antique mall. You can make your own though. Old frame, burlap and stencil letters.
Wow! Those are super cute-I love it! I think I’d try some jewelry or hair clips. Or what about embellishments for gift tags? I can’t wait to try these-it seems like there are a ton of possibilities!!
Those look so fun! I know one craft that I’ll be doing with my daughter this Summer! She’s just getting to be old enough to use the glue gun, so she’ll LOVE having these to play around with too!
Oh wow Debbie, I just LOVE those melts on that wall! What a totally creative idea! The vinyl by itself would have been super cute, but I love the color and the 3D of adding the birds and butterflies!!! Pinning for sure!
What a cute idea Debbie. I love the little tree. Really dresses up a spot you wouldn’t be likely to notice otherwise!
Hmmm I would probably create some kind of wall art.
So cute!! You’ve got my create juices flowin!! LOL!! ~~Angela
Debbie, I have heard of these, but when I went to find them, they weren’t in the stores yet! I love what you did with your wall art…so cute! If you do another post I would love to know how many sticks it took to like make 4 or 5 birds…do they go a long ways? I wonder what they cost? Got to try them!
Carol
Those are adorable!! I hadn’t heard of the melts/molds before, but I am pinning this because I would love to try working with them.
super cute debbie! i love them on the tin cans!
I knew wouldn’t be long before idea’s be popping out top head,,,,,’,Cookie”17
Okay I have seen these but they are soo stinkin cool! I cant wait to try them out!
I love that you paired them with the vinyl wall decal… adding the 3D Mod Melts really makes it stand out!
Debbie these are adorable! I’ve never heard of Mod Melts before, but I bet Garrett would love crafting something with these! Great ideas!
Love you idea! And your your new hair do too!
Adorable project! You know I love anything birds, I especially love how you used them to make your vinyl stand out. It took it from cutesy to real art! I could totally move in that guest room. This looks like a new craft I could get into; birds on everything!
Soo pretty and adorable Debbie! There are so many different ways you could decorate your home with this product! I’ve never used it – off to check it out! Pinned!
I tried these this weekend. I used two sticks of melt material on about a dozen forms. Am I the only one that’s having a problem with air bubbles? I start filling the mold from the middle, then loop around until the whole mold is full. I even tried dropping the mold on the table from a couple of inches, hoping to settle the melt material. But every dang one of my forms came out with air bubbles, or places where they weren’t filled in. I would LOVE any advice you have. Thanks!
Hi there Jennifer. You have to use a high temperature glue gun. You can pop the bubbles with a pin. I did not have any troubles at all with bubbles. I filled the form even slightly and now learned I could trim the access around the form once I pop out my embellishment.
Adorable!!! We love what you made with our Mod Melts! Sharing today on Facebook. 🙂
Well, seriously, where have I been? I’ve never heard of this product before. I think this certainly means I need to spend more time at Michael’s or Hob Lob — I mean, really, I need to stay up on all things new, fun and just doggone cute! Your jars turned out so cute.
I saw on FB that you are doing something with Rit, and I just wanted to say how great that is and how much you deserve that recognition. Congratulations, Debbie!
Thanks for including my project in your wrap-up! Mod Melts rock!
I am so far behind, I didn’t even know these existed. What a fun idea, I love the tree on the wall!
So Fun! Just bought these and am so excited to use them- I never would have thought of wall accents – love it 🙂
You can also use the molds with high temp glues and glitter glue sticks. I used the molds for creating pieces with polymer clay also…so cool.
I’m going to the store today to get the Mod Podge sticks, Hadn’t heard of them before, thanks for your instructions, so cute, love the tree. Howare these sticks different than glue sticks?