
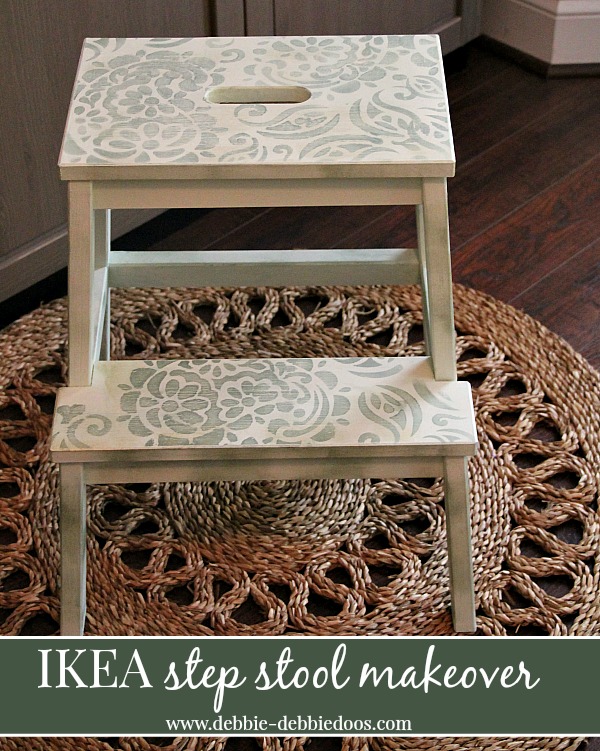
If you’ve ever wondered about applying stencils for wood, this article proves how easy it is to turn ordinary furniture, such as an IKEA step stool, into statement pieces. Wood stencils are a great way to upgrade your home on a budget and create personalized wood pieces for gifts.
1. Gather your supplies
- Wooden furniture. I used an IKEA step stool
- Stencil. I used a paisley design
- Chalky Paint by Americana Decor
- Deco Art craft paint
- Brushes for painting and stenciling
- Painter’s tape (optional)
2. Prepare the step stool
Before starting the stencil job, make sure the surface is clean and smooth. Clean the step stool and lightly sand it if necessary, in order to ensure a dust-free surface without any irregularities.
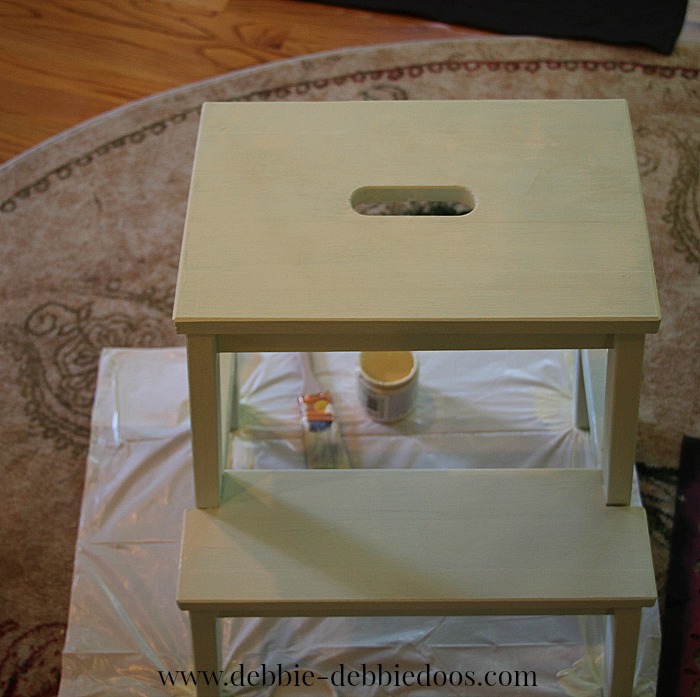
3. Paint the step stool (optional)
IKEA step stools are unpainted by default. If you want to use them raw, just skip this step and move on to stenciling. Otherwise, you can paint the stool to refresh its look.
My step stool was already involved in a previous paint job, so I had to apply three coats of chalky paint and allow each layer to dry thoroughly.
3. Apply your stencil
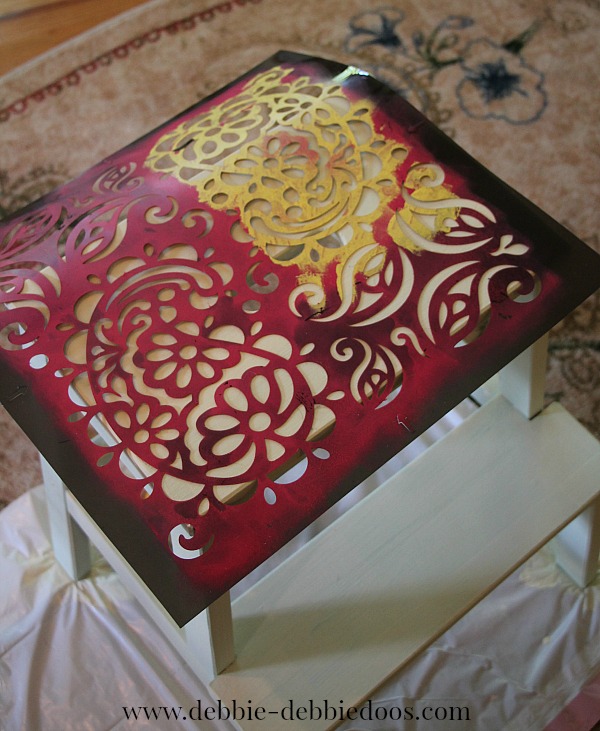
Place the stencil in the desired spot, whether the top surface, steps, sides, or all over. If there are multiple stencil parts, secure them on the step stool with painter’s tape.
Carefully apply the Deco Art craft paint using a dab of paint – saturating the paintbrush might result in bleeding under the stencil, so you will have to clean it and start all over again. Follow the packaging instructions to allow the paint time enough time to dry.
4. Make your stencil design distressed (optional)
The distressing technique adds an extra layer of texture and a more vintage feel to your wood project. Using the same Deco Art craft paint applied to the stencil design, lightly rub it over the dried chalky paint. The key here is subtlety since you want the distressing effect to be noticeable but not overwhelming.
5. Make the finishing touches
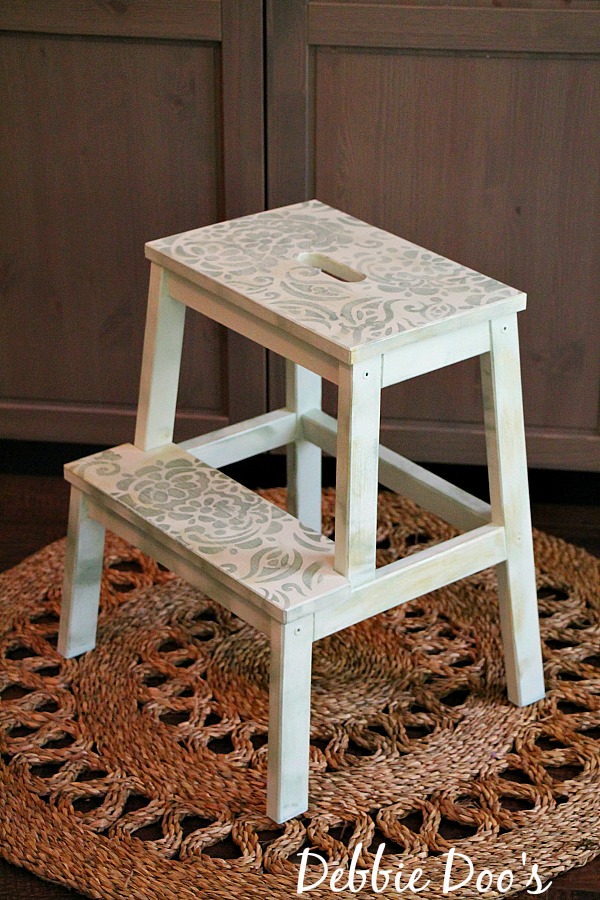
Finish your wood stenciling project by lightly distressing the entire stool for a cohesive, worn-out look. This step will blend all the elements together to give your stool a professional, polished appearance.
Care and maintenance
To maintain the beauty of your stenciled IKEA step stool, clean it gently with a soft cloth and avoid abrasive cleaners. If needed, a fresh coat of sealant can help protect the paint and stencil work from wear and tear.
Very Cute!!
Love the stool Debbie, both the first and second version. The redo is really pretty though and the stencil and paint treatment look amazing.
Love the new make over of the stool. It looks so cute now!
Thanks for joining in, Debbie!
Loooove this Deb. So cute. Happy Week End.
Kris
I like them both! It’s great how you can change it up when the mood strikes!
So cute Deb. Like the soft colors too.
Love the second makeover. Classic and pretty.
Alison
Love the muted stencil pattern. Cute idea!
That step stool looks great, Debbie! I love the size of it, too. I need a two step one like that for my granddaughter so she can reach the bathroom sink. I really need to make a trip to Ikea.
Embellishment is always a good thing….Pretty, pretty stool Debbie!!!
Adorable!
This stool is so cute! My mom teases me about my stool addiction. I can’t pass one up:) Over the weekend I got 2 from Goodwill and 1 from craigslist:) Maybe I do have just a little problem;) lol Have a wonderful day!
This is a great re-do, Debbie!
Beautiful!! Love it!!