
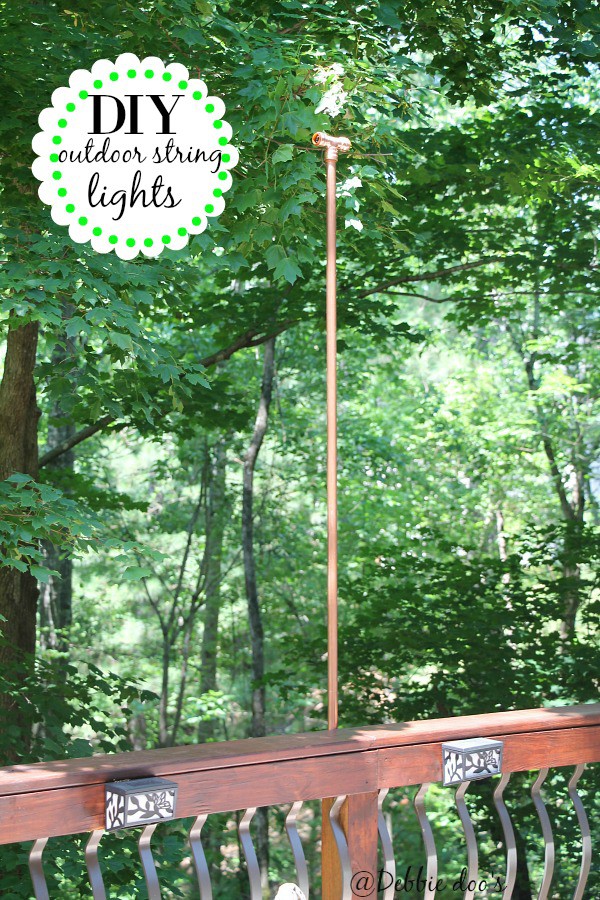
Outdoor string lights are a fantastic way to transform a garden or patio into an enchanting retreat for friends and family. This article shows you how to create a charming ambiance with outdoor string lights using copper pipes and Edison string lights.
1. Gather your supplies
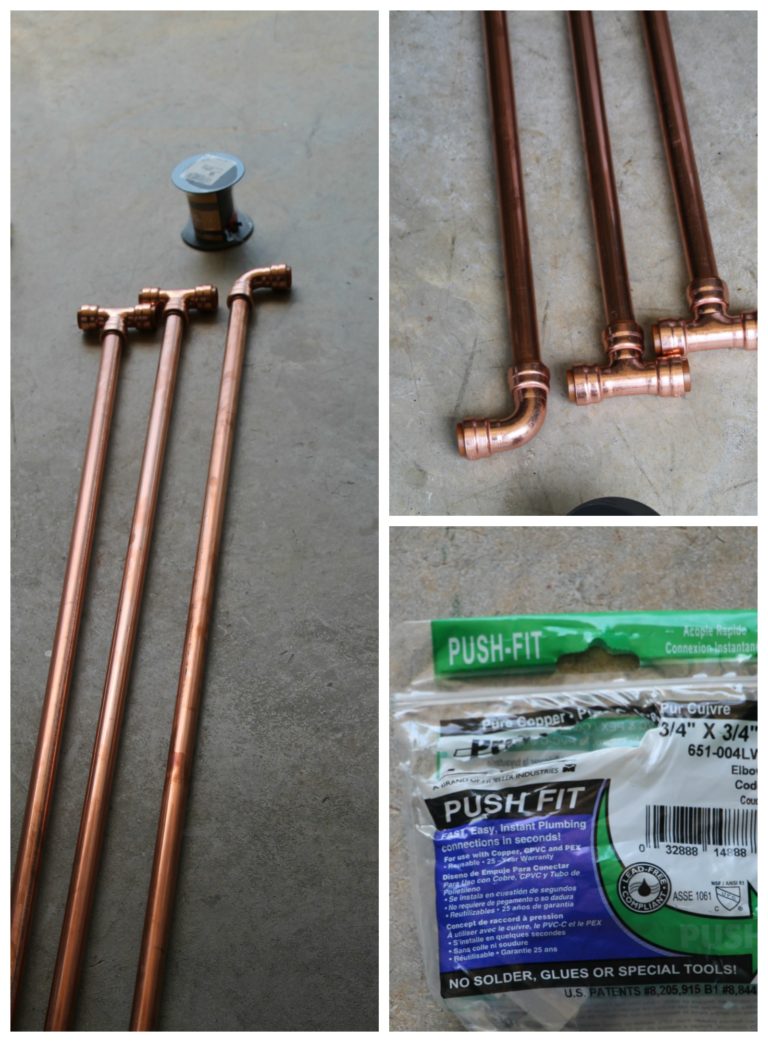
- 4 ¾ inch x 5 feet copper pipes
- 3 packages of Edison string lights
- Electrical wire
- Friction tape
- 2 ¾ inch copper push elbows
- 2 ¾ inch copper push tee
- 1 inch 2-hole EMT straps
- Small metal and plastic splices
- Plastic electrical tape
2. Set up the copper pipes
To begin, attach the push elbows to the ends of copper pipes. Make sure the angles of the elbows match the corners of the area where you’ll hang the lights. For a secure setup, confirm the elbows are tightly fitted to the pipes.
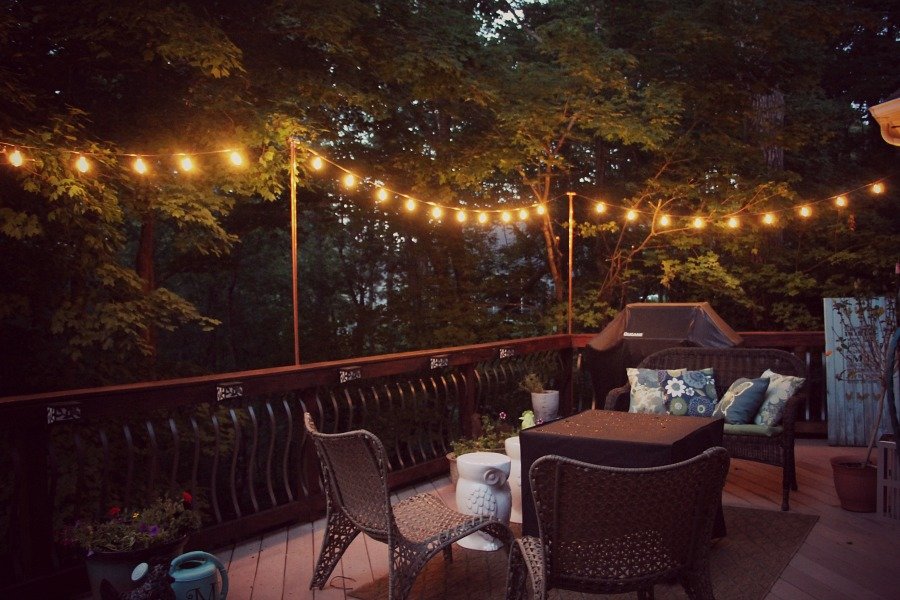
3. Mount the copper pipes to the deck
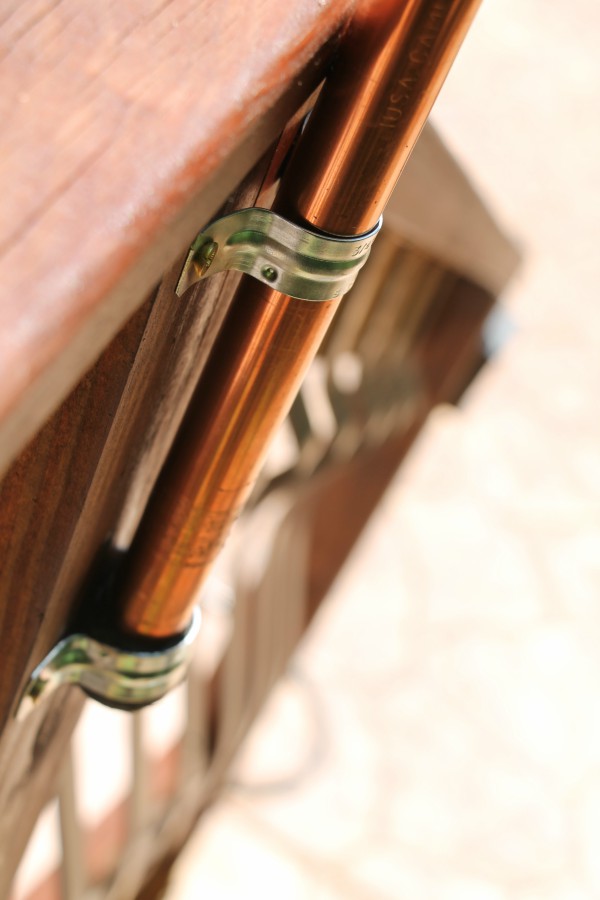
It’s best to place the copper pipes on the back side of the upper rails to provide the best lighting. Use friction tape on the bottom of each tube to improve the grip and secure the copper pipes firmly. The pipes must be safely and securely mounted to prevent any accidents.
4. Prepare the Edison string lights
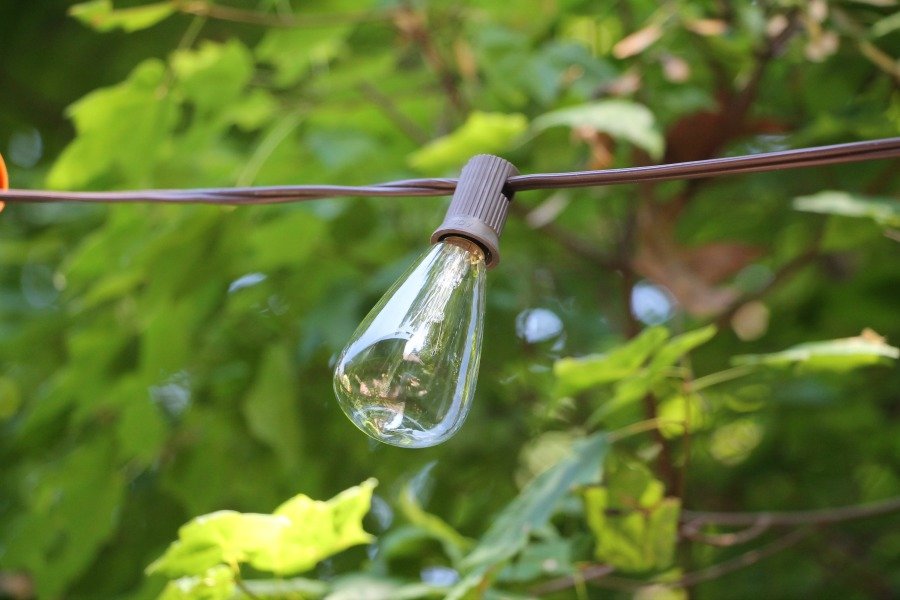
Snip the ends of all string lights and splice them together with electrical wire. Then protect the splices with shrink tubing and plastic electrical tape to ensure the longevity of your outdoor string lights and protect against potential electrical issues.
5. Connect the string lights through the copper elbows
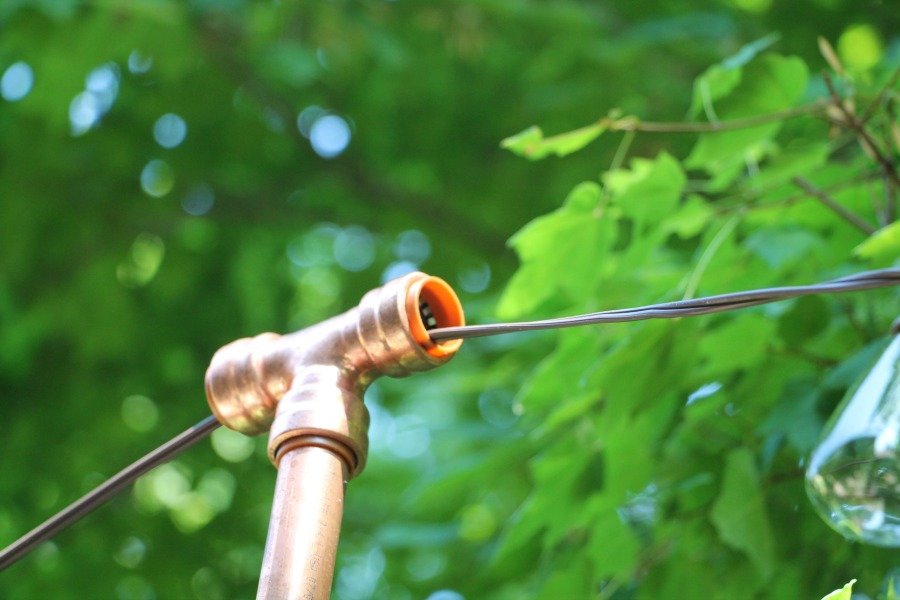
Thread the string lights through the copper elbows, ensuring a seamless flow of lights around the area. Be patient during this step to prevent any damage to the lights.
6. Check your work

Before you flick the switch to check your new illuminated space, it’s important to double-check your work. Make sure all connections are secure, and all splices are well-protected with shrink tubing and tape. Once you can confirm all of this, plug in your lights and enjoy the results.
This looks fab guys! I love the copper pipe. It’s going to patina up so awesome.
Great night shot. I bet it looks wonderful from inside the house too.
Love it!!
I so love it ,Debbie! Wish my hub could do this. He’s dangerous with tools! I’m jealous! Love the night picture! You won’t be afraid anymore! Enjoy your new lighting!
That is so cool.
Love it! Great job as usual!!
I love this! Having a blond moment right now, wondering how you strung that size light all the way around using the elbows on the pipe? I understand getting the wire through, but how did you get the lights through?
My husband cut the strands and spliced them together at the end. No lights went through the pipes.:)
I just love it. Great idea. I recently saw on pinterest where they put the cord and connections of their Christmas light in a plastic container (such as glad container for leftovers) to keep it dry. Just an idea. I will put this on my to do list as I live in the woods too but I am afraid to step on a snake.
thank you for all you share.
donna
Love the lights!!! Great job!
I would love those around my pergola!!!!
Perfect timing for this post! Wanting to add some lights that weekend given to me. I have some pvc pipes that I can paint and adapt your idea. Thanks as always for your sharing! Happy 4th of July!
This is beautiful. Our daughter and son-in-law have a deck. This may be a housewarming gift Dad can do for them.
Great idea! Looks beautiful at night.
they look great…I am going to buy solar string lights for our new pergola..hope to get them today..I was wondering if I would like the Edison lites…your;s look fantastic
There was only one item in the materials list that I had ever held in my hands before–electrical tape. I use colored electrical tape to mark my luggage when traveling. But as a read your step-by-step directions, I realized this project is possible, even by me. I believe I could do all of the stringing, connecting, and splicing while sitting in the yard, with a little help. PVC or something else lightweight would please me, and I might even paint them to blend with the greenery. The copper hardware would still be pleasing, or maybe galvanized, but I would probably avoid more plastic. The Edison bulbs are perfect. I would need help placing the poles in the yard, but I would keep my placement flexible so I could change bulbs, lighting strings, and even the position of the lines when I wanted to. This is an excellent article with helpful, appropriate photos. Thank you!
It looks fantastic. Good job Mike!!
Looks fabulous!
Fantabulous Debbie! Love the copper and the lights are so pretty! Kudos to Mike….he did an excellent job!
Love it!
Leave it to Mike to figure out how to do this it looks wonderful ???
Thanks Mom:)
I love these lights! I bought a pack at BB&B, for my hubby. They were pricey. They looked nice in the original spot, on the fence in the garden near our pond. But, he moved them to the eave on his barn shed. They still look nice but you just don’t enjoy the details.
Yours look very nice! Enjoy the holiday!
Thanks LuAnn! You too.
Your lights are wonderful; and ‘no more spooky’ is a great thing. You two work together so well to come up with such exciting end results. You should be so proud!! Just one more time I’ve gotta say I LOVE IT. Happy 4th!!!
Thank you Carol! Happy 4th to you as well!
That looks so good. We love our outdoor lights. Now, if it would just cool down out there!
We were out there tonight. Thank God for the slight breeze!
I LOVE this!!! It makes the outdoors soo romantic! Will have to get my hubby to work!! Thanks for the idea!