
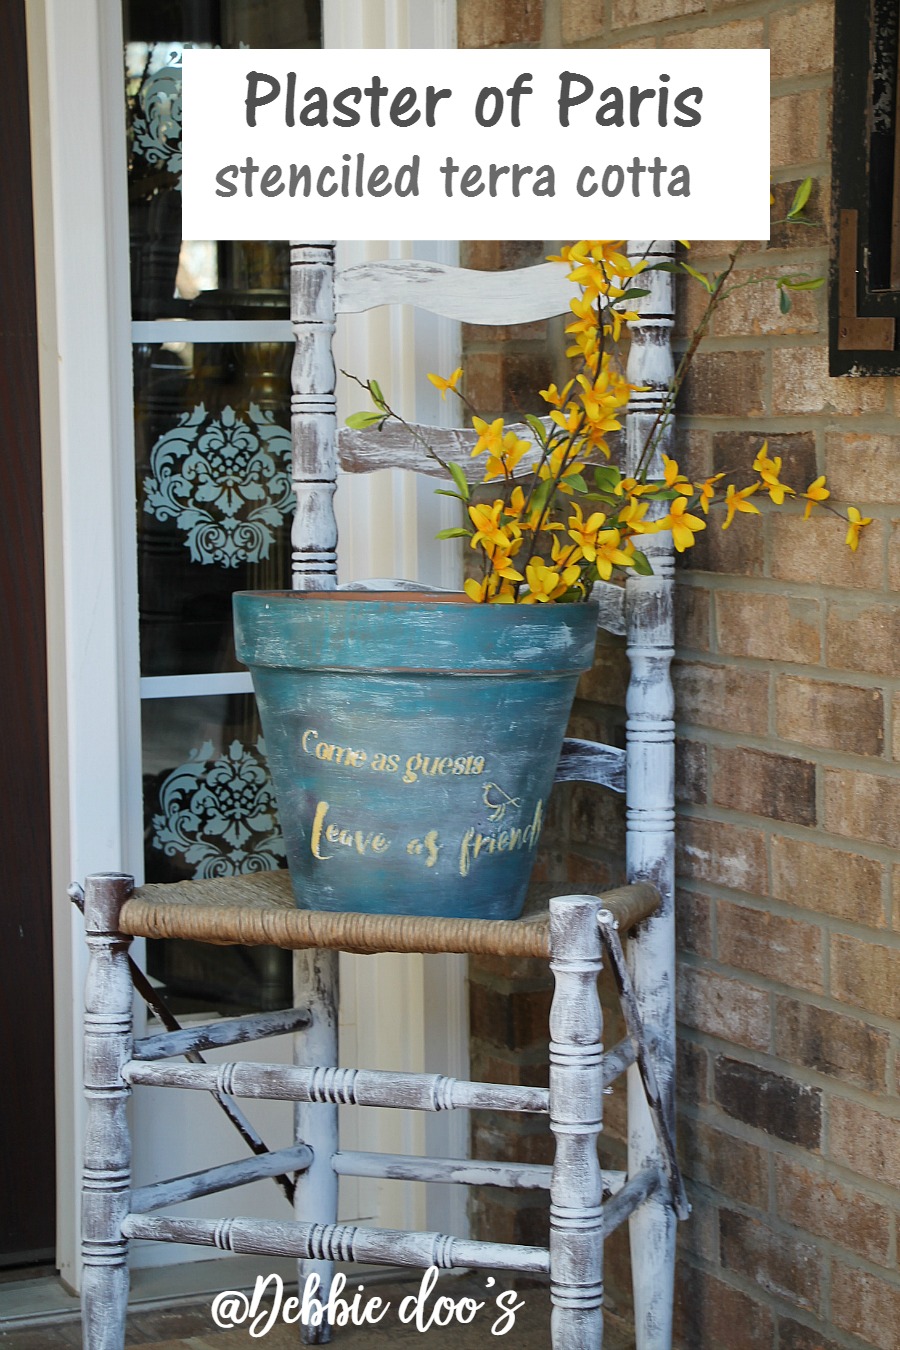
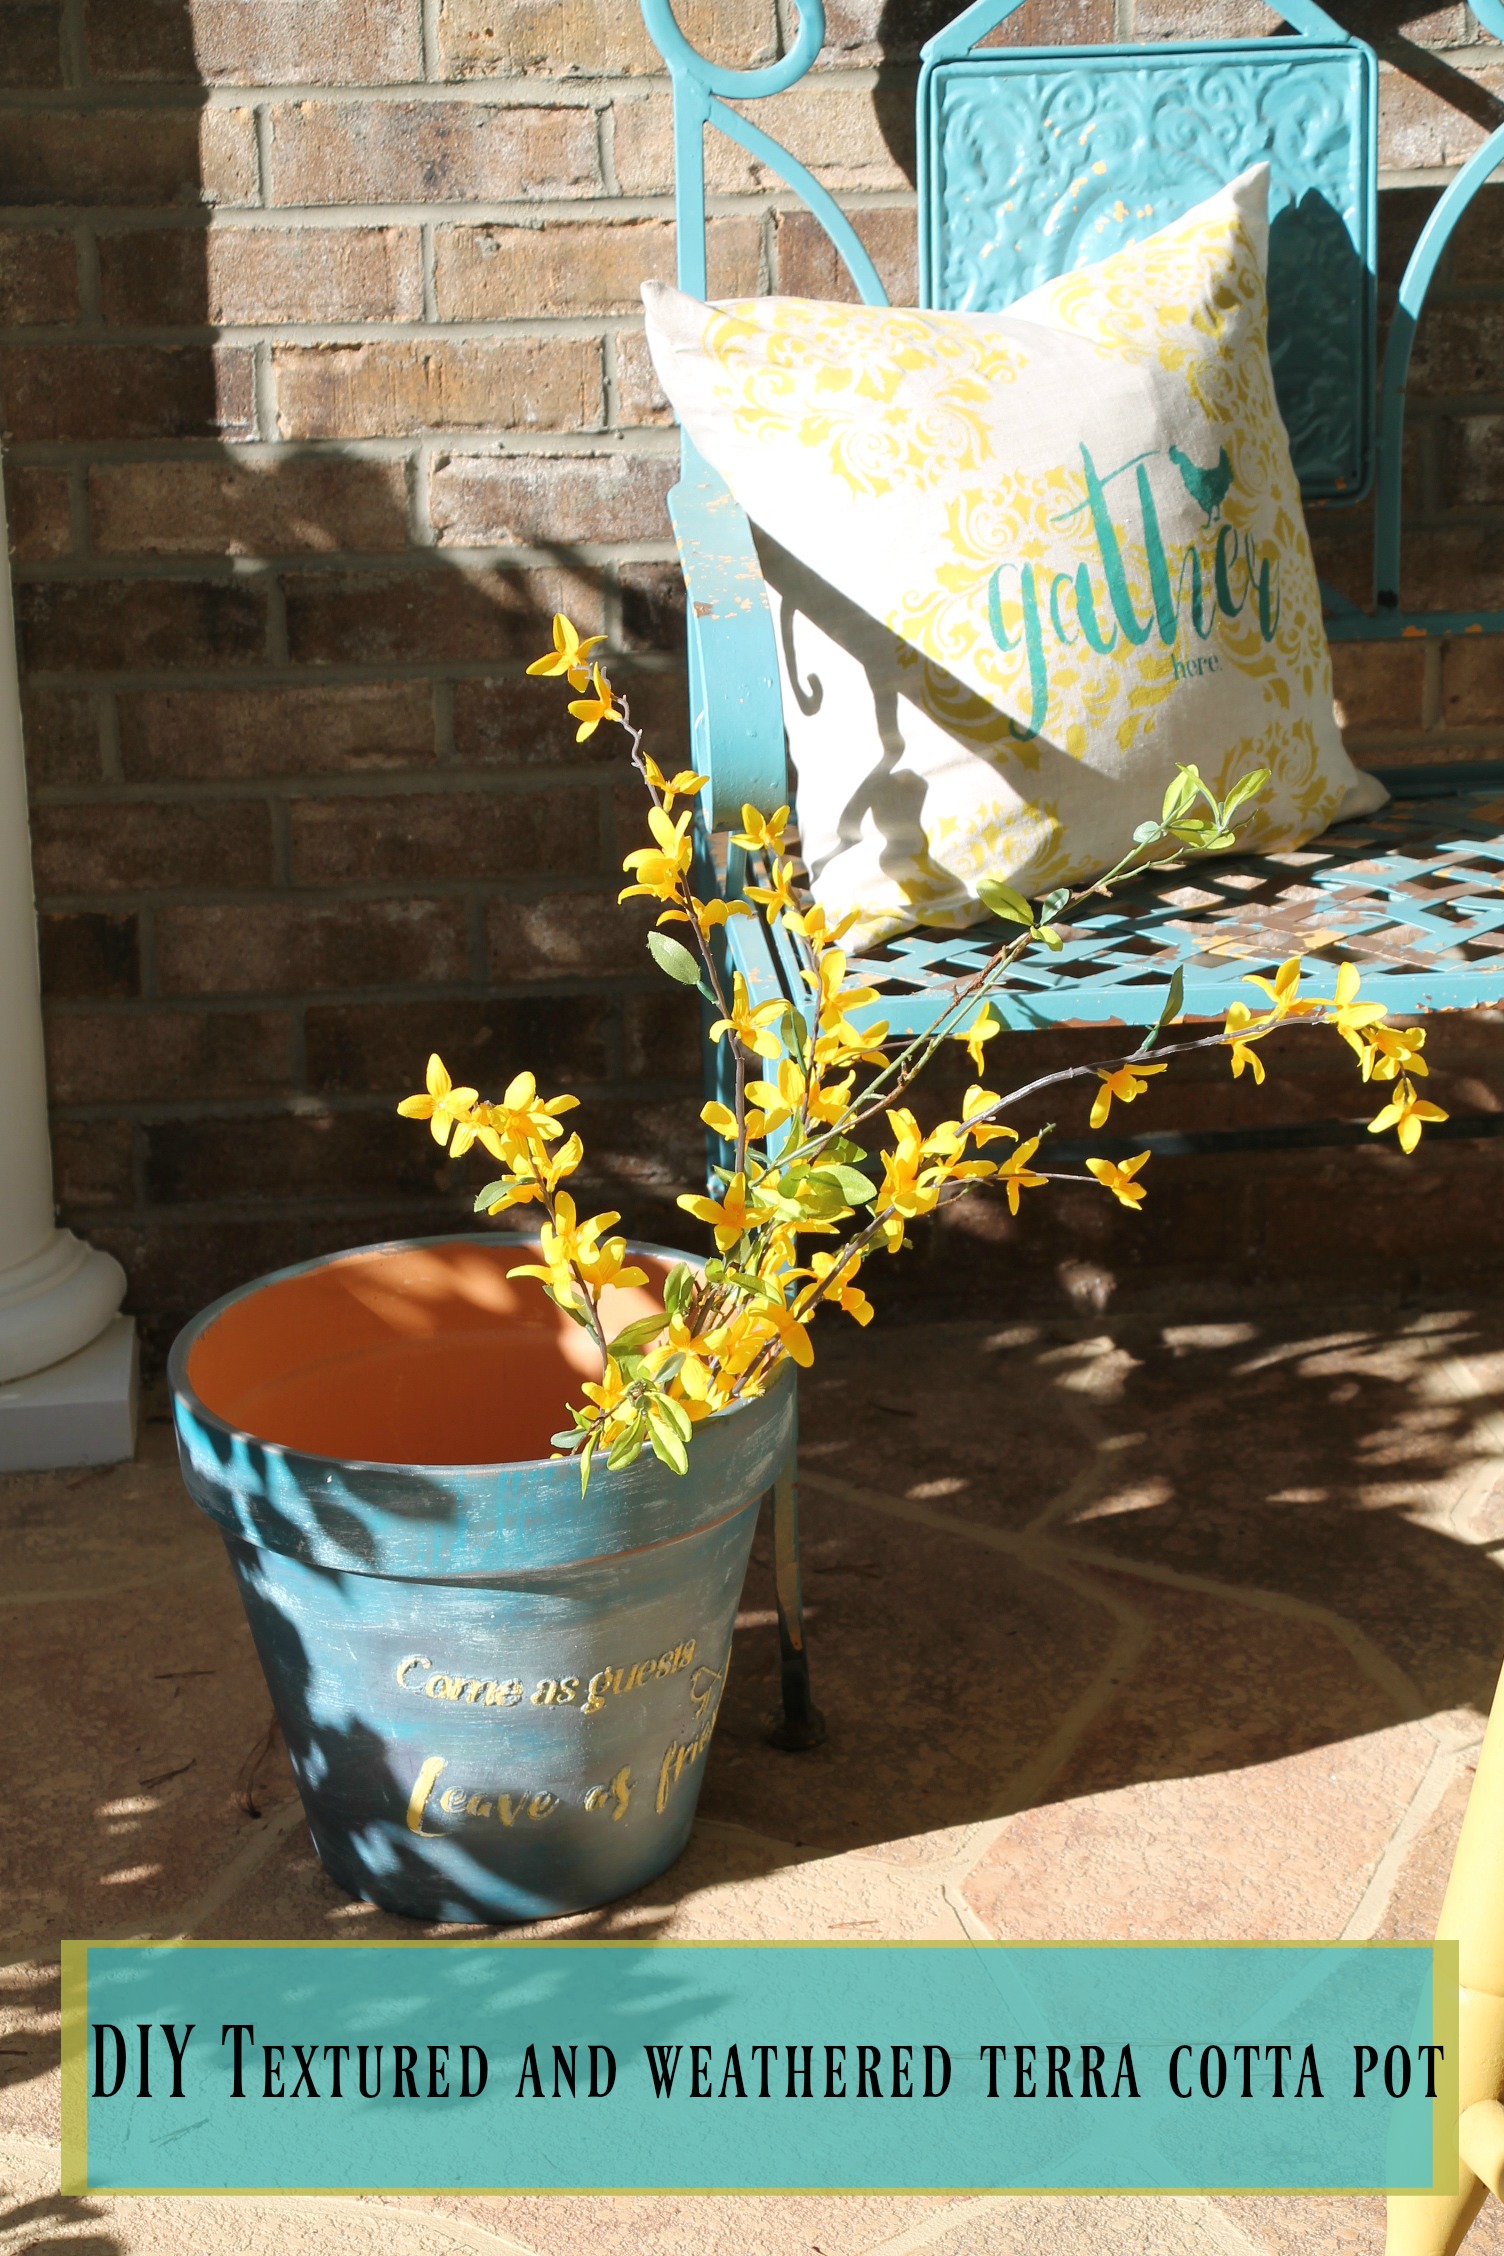
If you’ve ever wondered how to add a flower pot stencil, it’s easier than you imagine. This guide shows how to apply a flower pot stencil with plaster of paris to add a personal touch to your garden decor or create unique gifts for green thumbs.
1. Gather your supplies
- Terracotta flower pot
- Stencil
- Plaster of paris
- Spray paint in your preferred colors
- Sandpaper
- Clear wax
- Paintbrush or sponge
- Box
- Protective gloves
- Painter’s tape
- Clean cloth
2. Prepare your workspace
Choose a well-ventilated area to work in and lay out all your materials. Don’t forget to wear protective gloves, especially when handling the plaster of paris and spray paint.
3. Apply the stencil with plaster of paris
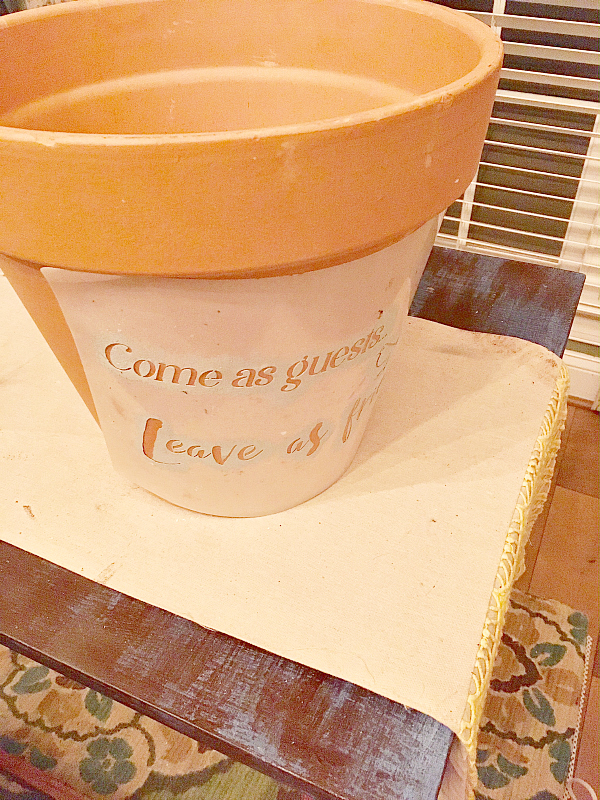
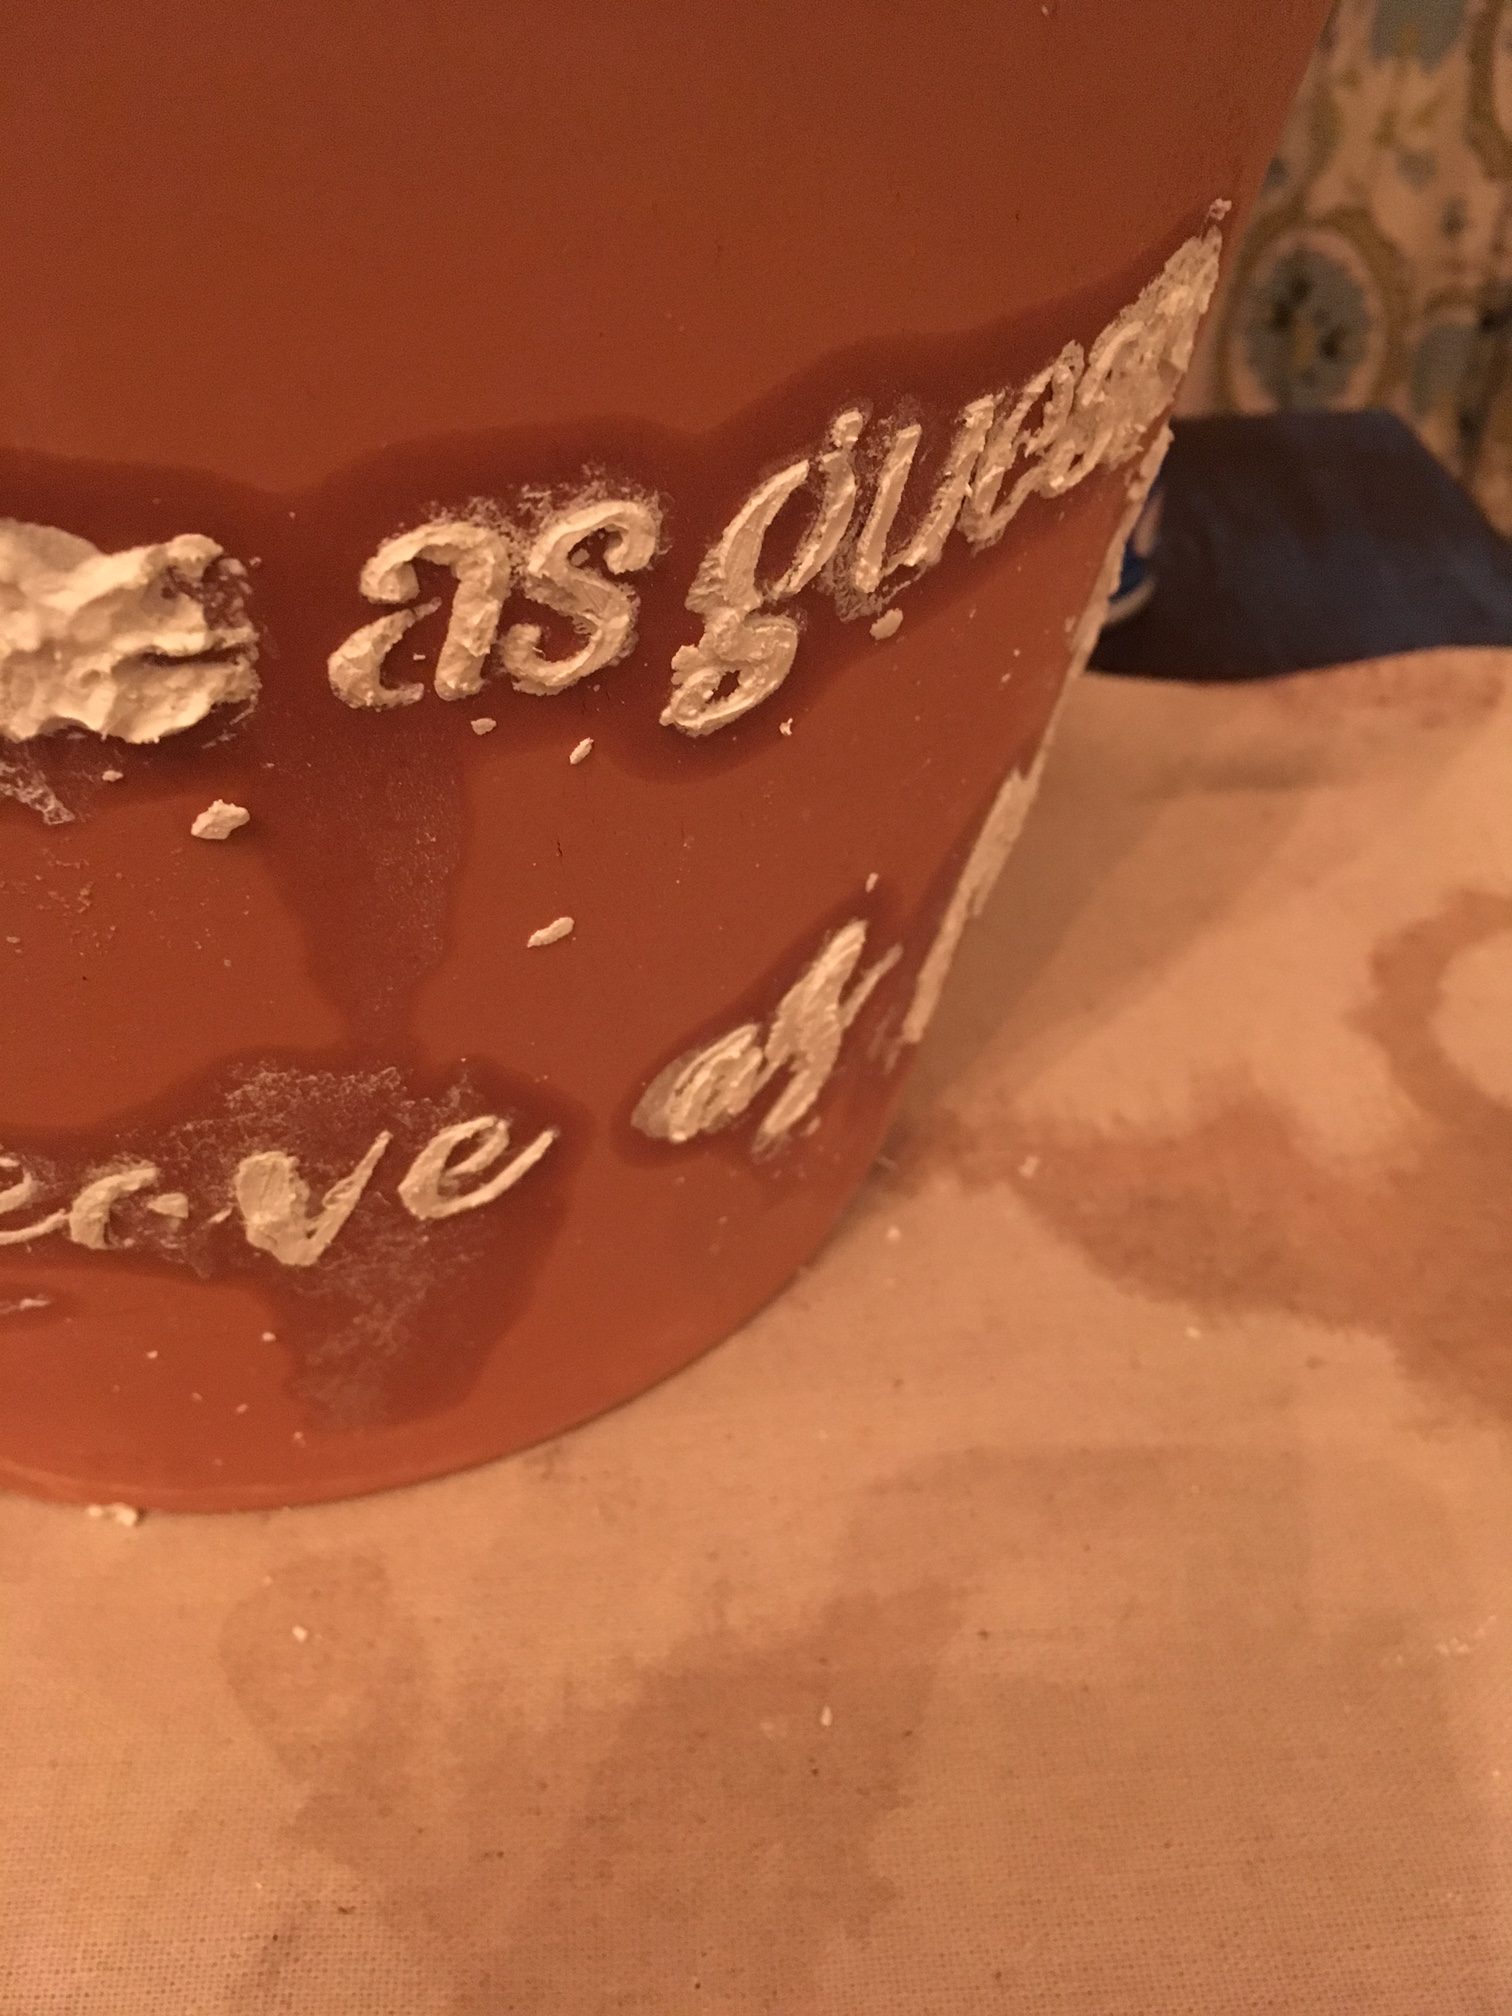
Place the stencil onto the pot and use painter’s tape to secure its position. Next, prepare the plaster of paris by following the packaging instructions, and apply it over the stencil. Ensure the plaster is evenly spread for best results. Leave it to dry overnight to allow the stencil to be imprinted correctly.
4. Spray-paint the pot
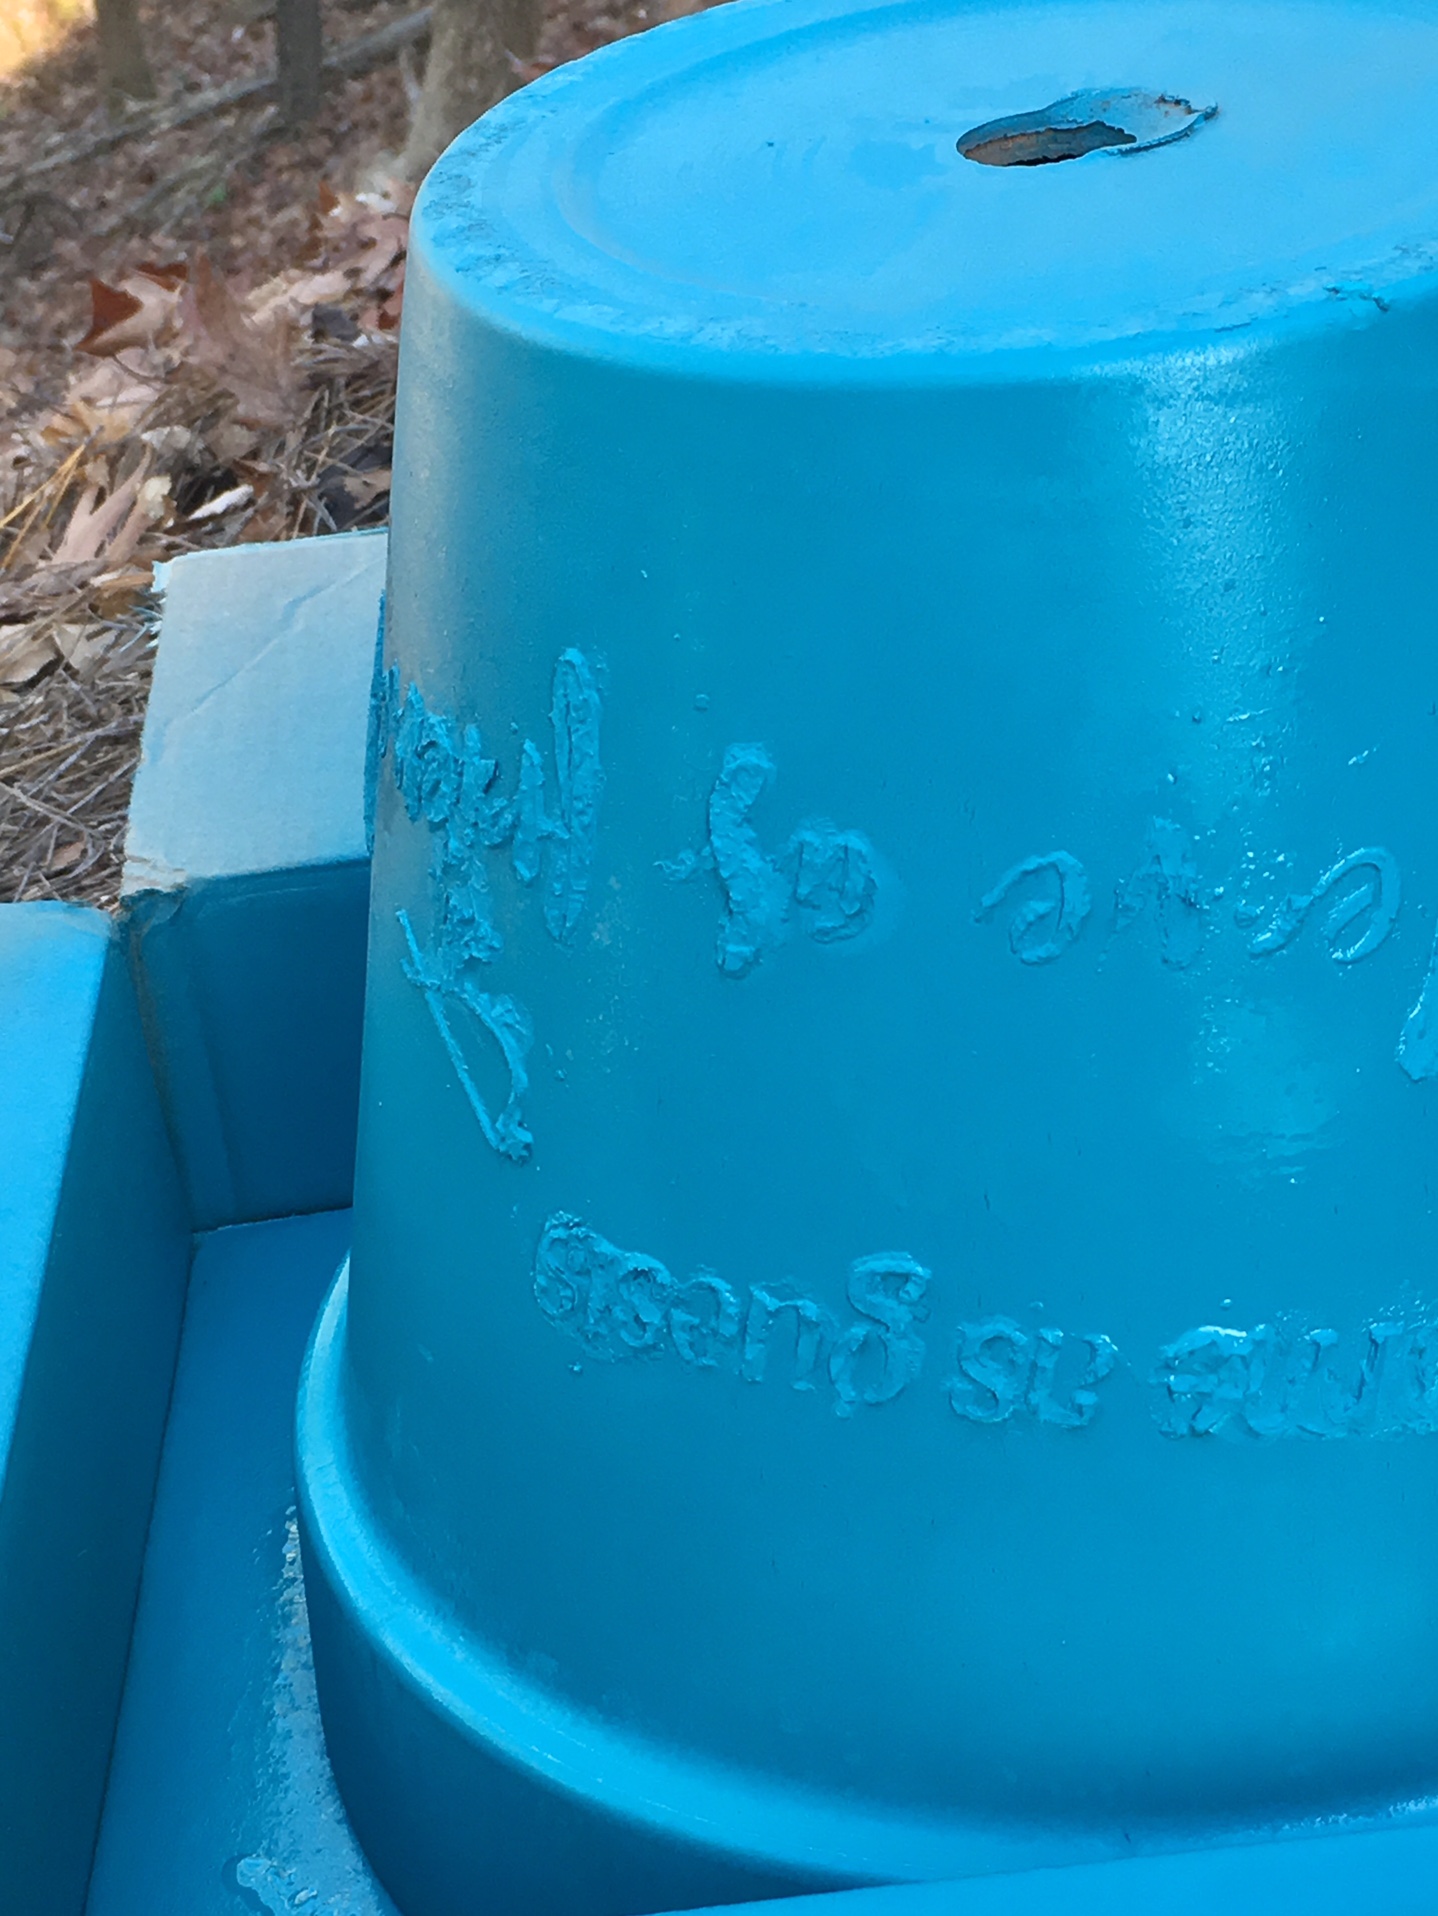

The next day, place the pot upside down in a box to protect the surrounding area from paint spills. Spray-paint the pot to create a base color, ensuring you coat all areas. Let it dry overnight before proceeding to the next step.
5. Add color variations (optional)
If you’re satisfied with the current color, you can skip this step. Otherwise, you can add depth to your stenciled terracotta pot by painting it with more colors.
Choose one or more complementary colors to the base color and dab these onto the pot using a sponge or paintbrush. Allow these colors to dry completely.
6. Create a weathered look (optional)
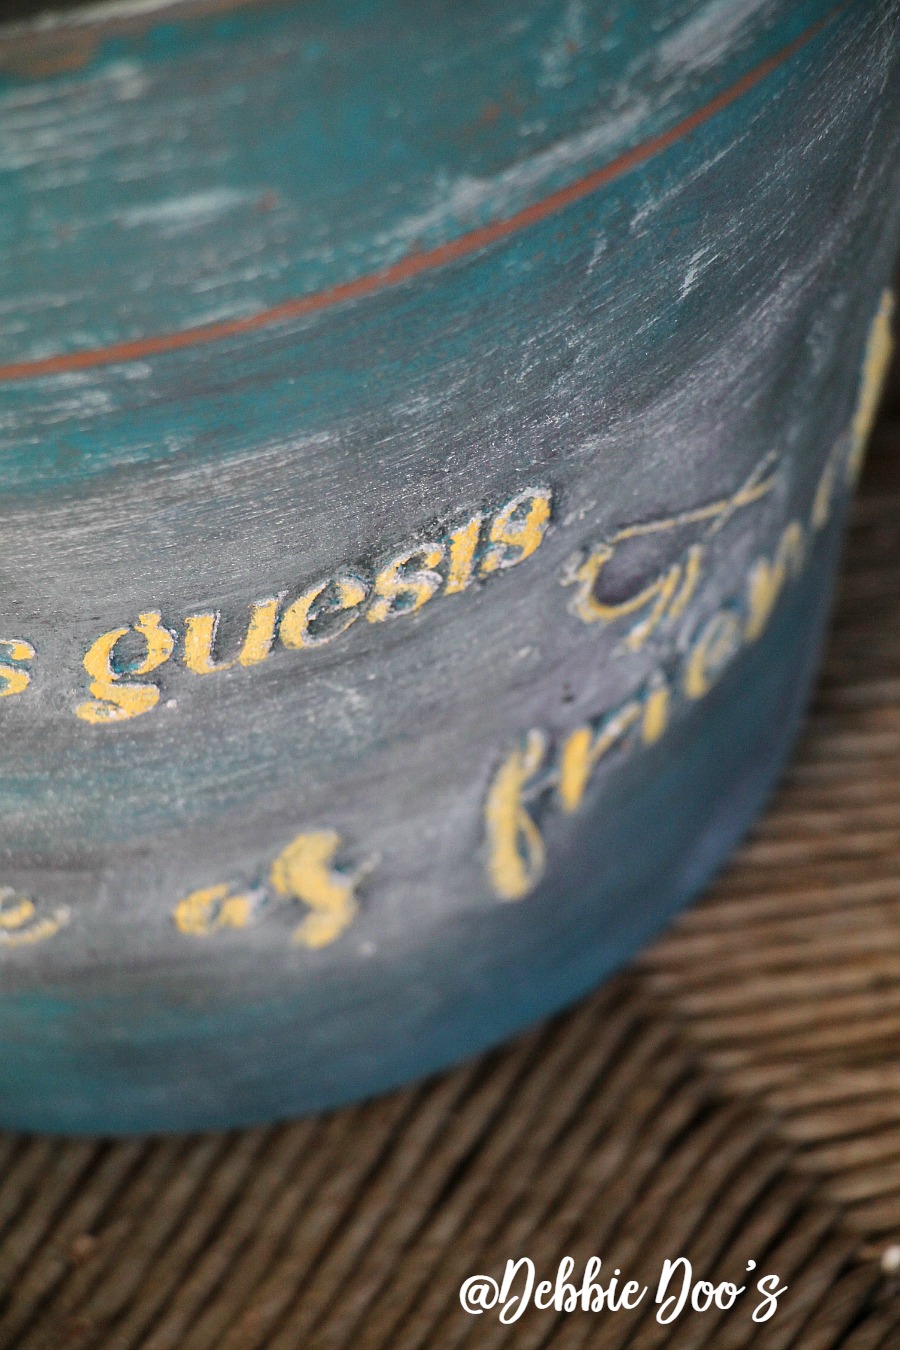
For a more rustic or weathered look, lightly sand areas of the pot. Once you finish, let the pot rest for a while.
7. Seal with wax
To protect your pot’s new design from the elements, apply a clear wax using a clean cloth or a paintbrush. Besides enhancing the color, it gives the pot a nice finish.
Check out a video for stenciling terracotta pots to learn more about this process.
WOW!!! you are moving on up!!! You and Mike will make a great team and I cannot wait to see what you have in store for us!! Congrats and good luck!! I have followed you forever and I am not the least bit crafty!!! lol..I just enjoy your ideas so much….Bless you!!
Good Morning Good Morning !!!!
I am so excited for you …and for us…. EXCITING. Great LOGO.
Will you be pressure cooking on the web and Pinterest or only on Facebook?
My neighbor purchased a pressure cooker a year ago and absolutely LUVS it.
I think between the two of you I need to check this out… have you tried different brands ?? take care… ENJOY your next adventure.
Linda of No.Cal.
p.s. I immediately subscribed to your Home Pressure Cooking
Good for you. Best of luck in the new venture. Change is always good. Stagnant water seems to be only thing that does well undisturbed and unchanged.
I enjoy your following your blog and projects. I’m not much of a cook, but I’ll peek in on your new website. Best of luck in this new adventure!
I always enjoyed your posts here and will miss them. But I do understand that only you know when it’s time to move on. Wishing you all the best, and true happiness in this new endeavor.
Debbie…I just read your newsletter!!!!….You are one of the very first of wonderful people that I connected with when I started blogging….You were such a friend of the new bloggers with that party that you had, The Newbie Blog Party….I so understand where you are coming from. You have to listen to your heart and decide what is best for you and your family. Blogging does take so much time out of our lives. I think your new adventure sounds wonderful and better yet, that you are doing it with your hubby.
Your projects are always creative and beautiful like the terra cotta pot!…I will look forward to your post in my email when you choose to post!….Have a wonderful weekend Debbie!!!!
That’s exciting. Ive followed your projects even though I’m not very artsy. I’m definitely going to check out your pressure cooker page. My folks just bought an insta pot and are still getting the hang of it. Those two sillies don’t do Facebook.
You do so much with your stencils and they are all fabulous projects. Love your imagination.
Hi Debbie, I hope I am not missing anything but I love the way you did the pot. It looks truly inviting and certainly makes an impression for the front door. Some ideas I could use this spring and summer in the garden.
Cindy do you mean the how to? I leave a link how to use plaster of paris in the post:)
Best wishes on this new endeavor! I won’t be signing up simply because we don’t own a pressure cooker, nor do we cook very much. My hubby is on a raw food diet (fruit, veggies, salads) due to medical issues.
You sound happy and that is very important! I’ve learned from you so it IS easy to teach an old dog new tricks….just sayin’ 😉
Thank you Jane:) I appreciate that so much.xo
Debbie, thanks for sharing this great project – I’ve pinned it ? and look forward to enhancing all my boring terra cotta pots!
Onward and upward, Debbie! Change keeps us young!
You’re stuck with me, honey! I may not be much of a cook anymore, but I’m always up for learning new things.
Thanks for all the crafty fun and I look forward to what’s next!
Love this stencil project! Everyone is talking about a pressure cooker – did I mess something? I have been behind due to my move. Sounds exciting!
I am looking for information on staining terracotta flower pots without losing porosity. Does RIT dye do this? Do you have info on how to do this?