
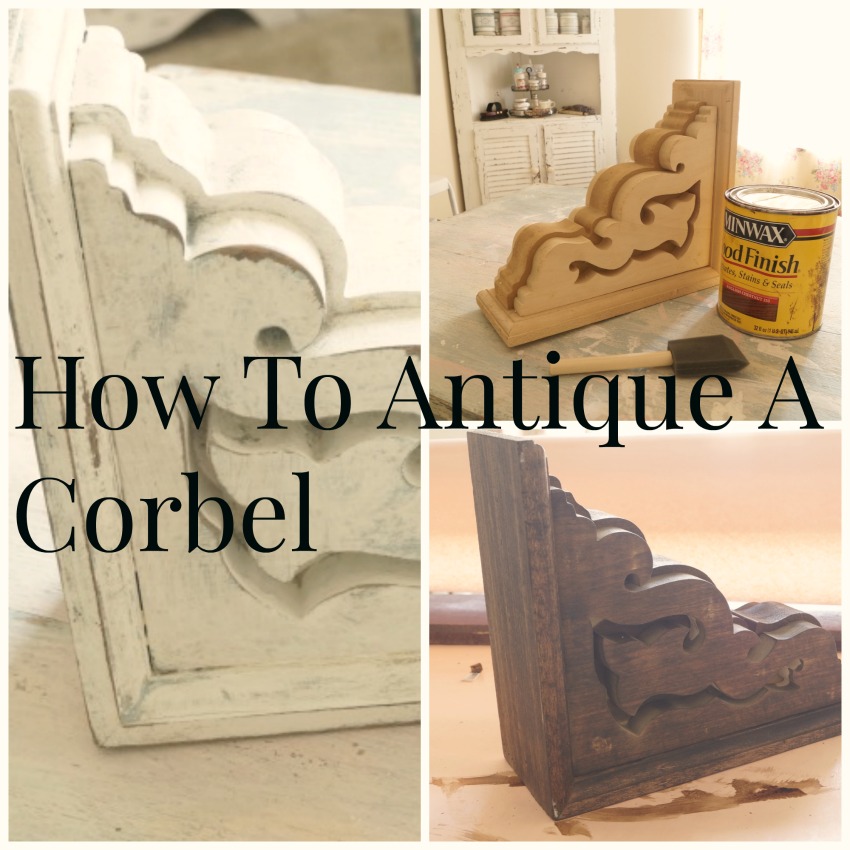
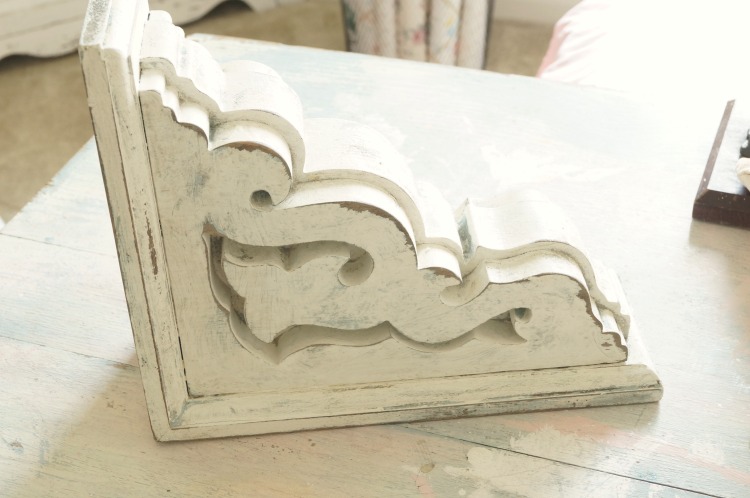
Antique corbels can add a unique touch of elegance and vintage charm to any space. However, these architectural gems can be difficult to find or may be out of budget. But with basic supplies and a dash of creativity, you can create your own DIY antique corbels that look like authentic ones.
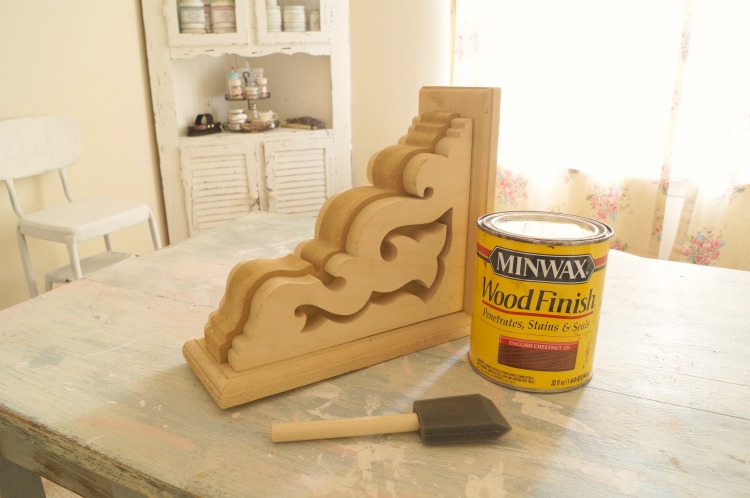
1. Gather your supplies
- Plain corbels
- Wood stain
- Two colors of chalk or latex paint
- A foam brush and a paintbrush
- Furniture wax
- An old white t-shirt cut up
- A sanding block with medium/coarse grit
Remember to wear gloves for safety and work in a well-ventilated space or outdoors.
2. Stain the corbels
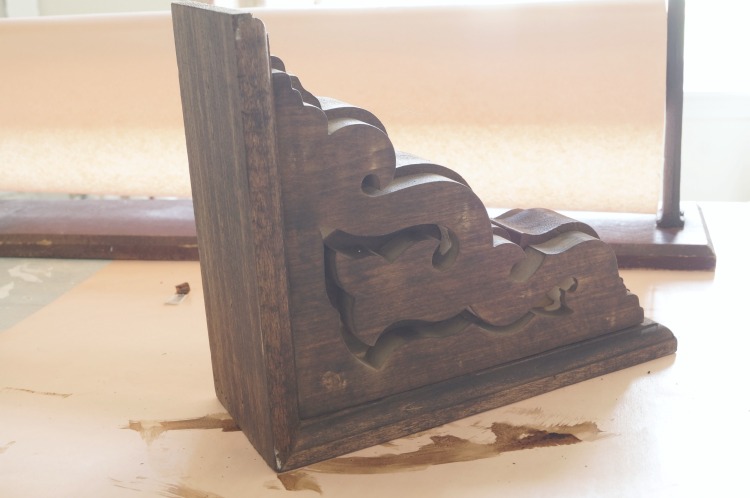
Start by using your foam brush to work the stain into the wood. Getting the stain into all the nooks and crannies can be tricky, but don’t worry if you can’t get it completely covered since the painting process will take care of this.
Once the stain is dry, wipe off the excess if you wish, but leaving it as it is can enhance the aged effect.
3. Paint the corbels
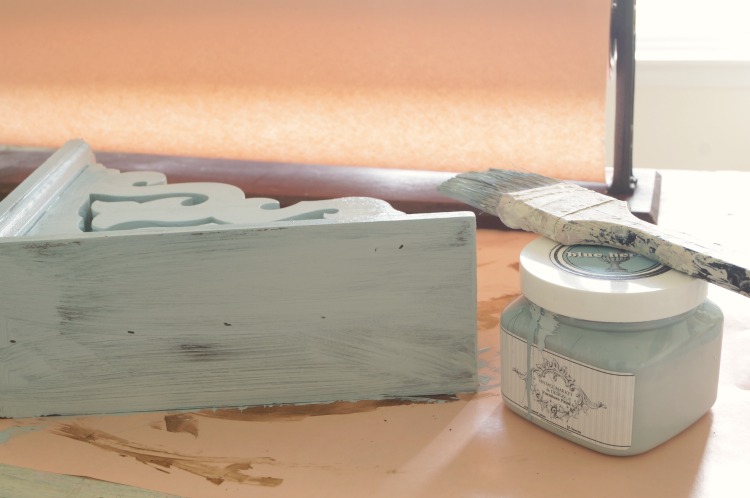

Apply a coat of paint to the corbels, insisting on the nooks. Since we’re going for the distressed appearance, a perfect paint job is irrelevant. Drips and imperfections are actually welcome. Allow the paint to dry before moving on.
4. Apply a distressed look
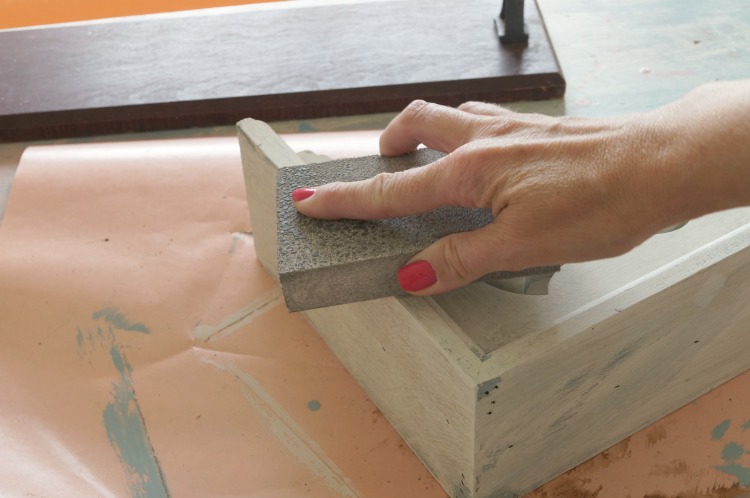
Using your medium/course grit sanding block, begin sanding the areas that would naturally get worn over time, such as corners and high points. Remove any leftover sand bits before proceeding.
5. Wax the corbels (optional)
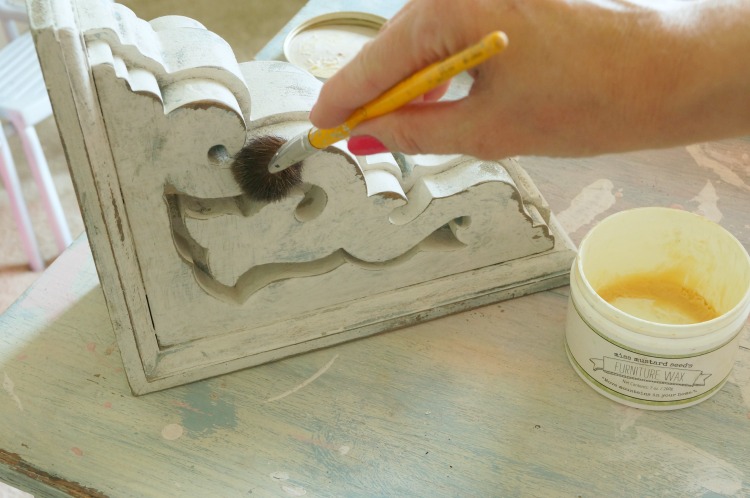
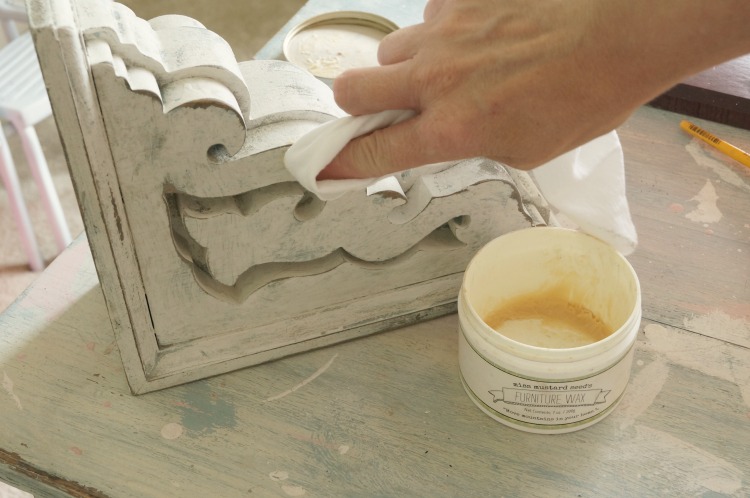
Waxing can enhance the different colors of your antique corbels and make them look more genuine. Apply the furniture wax to sanded surfaces using a clean t-shirt or cloth, and avoid the nooks unless you prefer them waxed.
These DIY antique corbels can be used in numerous ways around your home. They make great book ends when paired, or could be used in a garden to hold up a window box. For outdoors, use outdoor latex paint to ensure the corbels withstand the elements. Another great idea is to pair them with a chippy wood shelf to create rustic brackets.
Thanks to Anne from White Lace Cottage for this beautiful antique corbel project!
Your corbels look great Debbie! Thanks for the tutorial!
Wow, Ann! I looked at unfinished corbels at Lowes yesterday and wondered how I could get them to fit into our home…I am sooo going back to buy them now! Perfect timing!
Jessica
Great tutorial!
Debbie,
Great choice to have Anne today. She is so great with paint and reloving beautiful vintage items. I hope when you come in next summer we can all get together. Woooo Hoooo we girls could have some fun.
Kris
super tutorial Debbie! Pinned!
gail
Love it. Love the look, and I want to copy cat it. I love the genuine old stuff, but as you said, it’s so pricey!
Nicely done! Would love to use it as bookends in my home. I will have to try this!
your paints finishes are always lovely, anne! the corbel looks fabulous! tfs!
LOVE the way that turned out Anne!!
I wouldn’t have thought to stain it first…great tip!
Anne this came out great, love the choice of colors. I am going to o anther coat of paint in another color on a large corbel I did a while back. I want to give it more age. Brely have the house done and the projects are really mounting, LOL.
Cindy
Good Morning! I’m not sure how old this post is, but you did a great job! I was wondering where you bought the corbel. We are putting a large opening in our house to join two rooms and I’ve been looking online at corbels and haven’t seen anything remotely as pretty as the one you painted. Thank you!
This was a guest post. I believe though she may have found this at Lowes, or Home depot actually.
Thank you Debbie. I have already checked both websites and can’t find anything like this…….the search continues.