
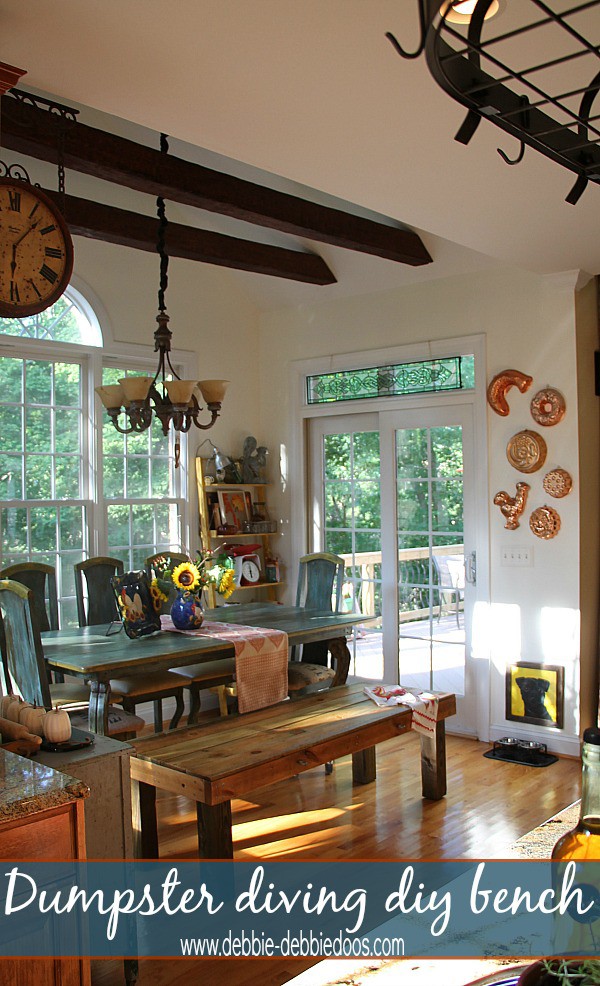
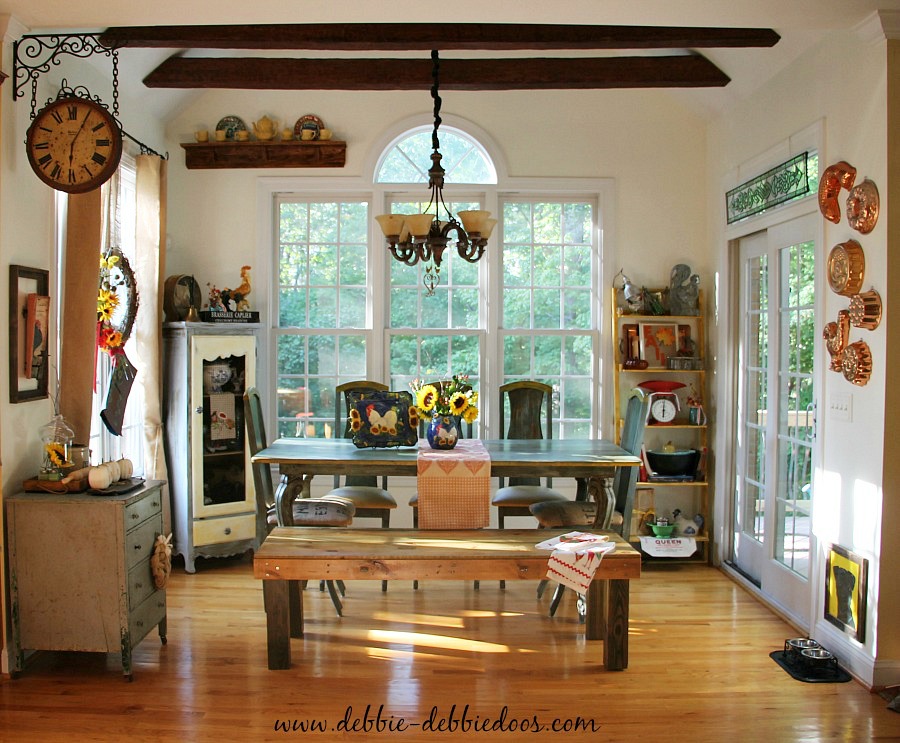
A DIY farmhouse bench is practical since you can add more seats to your kitchen or outdoor table for family meals or special occasions without pulling up extra chairs and without breaking the bank. Keep reading to learn how to craft a DIY farmhouse bench by spending around $50, even if you aren’t experienced in woodworking.
1. Gather your supplies
- Lumber
- Varnish (satin finish)
- Screws
- Gliders
- Electric sander
2. Measurements and planning
Determine the right size for your bench by settling on where to place the bench and how to use it – you don’t want to crowd the space. For instance, if you’re building a kitchen bench, measure the length of the table or the wall it will sit against while considering the walking space around the bench.
For a bench with more seats around the table, the height should be roughly the same as a regular chair – about 18 inches (46 cm). On the other hand, the height varies for a freestanding or garden bench, depending on your comfort preference.
The seat depth (how far the bench goes back) should be deep enough to sit comfortably but not so deep that it’s hard to rise. A standard seat depth is 15-18 inches (38-46 cm).
If your DIY farmhouse bench is meant to accommodate multiple people, consider how much space each person would need to sit comfortably without feeling squished. Typically, a seating width of about 20-24 inches (50-60 cm) per person is a good rule of thumb.
We determined our bench height by the height of our current chairs. You’ll need to measure the lumber accordingly for the bench seat and legs, then have the warehouse make precise cuts.
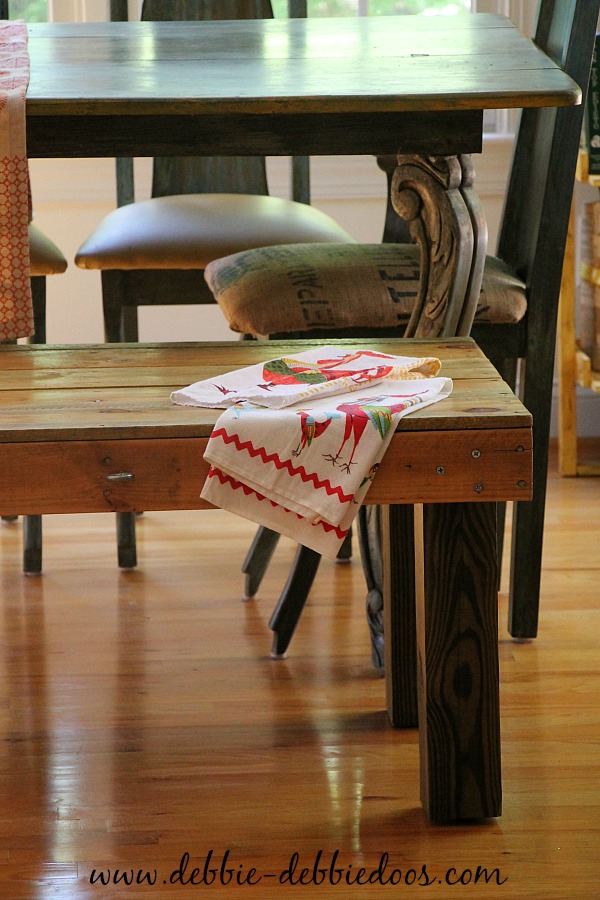
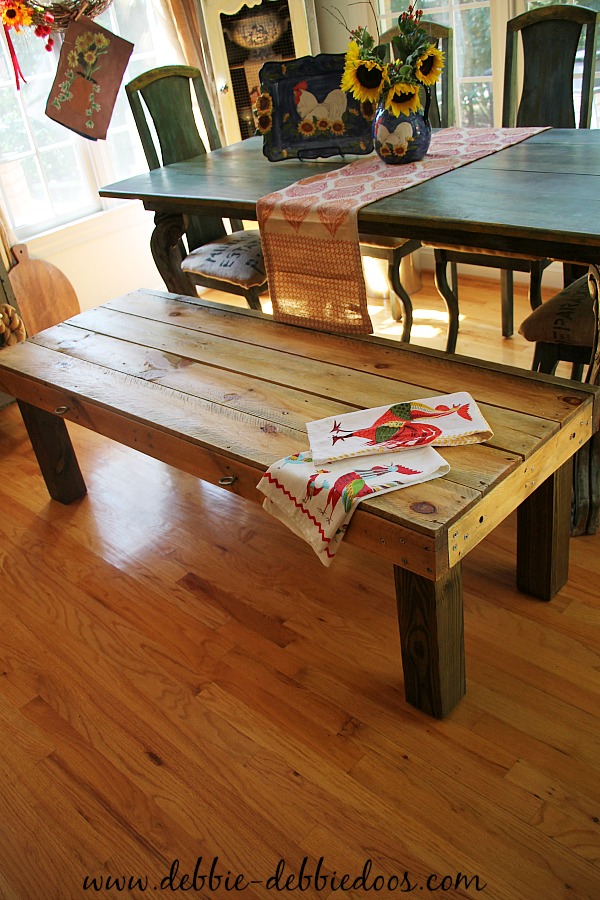
3. Assemble the bench
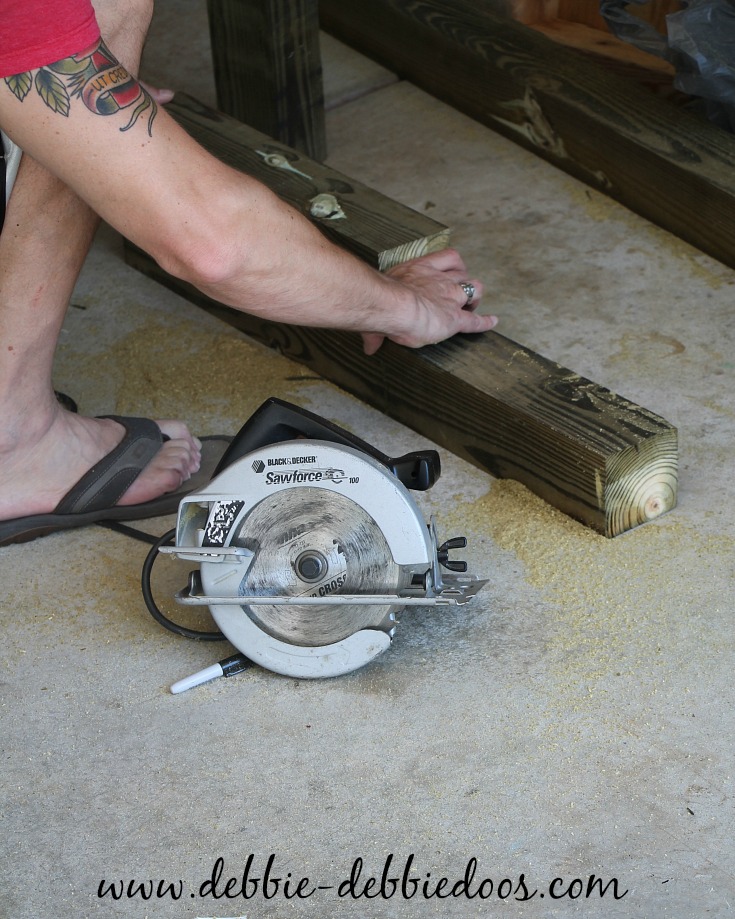
Start by placing the cut pieces of lumber into the shape of your bench, and then secure them with the screws. Double-check all joints so they are sturdy and able to hold the weight.
4. Make the finishing touches

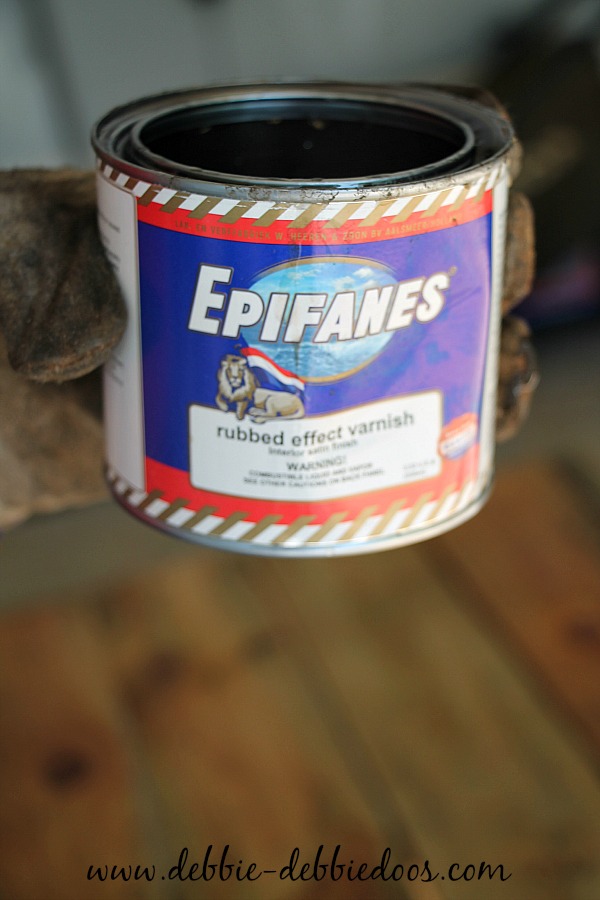
Sand the entire bench until it is smooth and free from splinters. Then, apply a finish varnish to protect the wood, making it durable and easy to clean. Finally, if you’re building the DIY farmhouse bench for interior use, attach the gliders to the bottom of each bench leg to protect your floor from any scratches when the bench is moved.
If you loved this project, find out how to craft a rustic bench.
Beautiful!
I love it Debbie!!! It is a sweet score. I always love when I am surprised with a dumpster dive that I wasn’t the one doing the diving 🙂 Happy weekend!
Debbie,
What a great find. It is beautiful.
Kris
I had no idea Mike had the dumpster diving bug! The new bench looks great there!
One would never dream it! LOL
Great job, Mike! Great find and it looks awesome.
Thanks Kim!
I think your blog is really really interesting and full of great informative things great stuff.
The bench looks great, Debbie!
Thanks Kathy, Mike is proud!
Great find and a great job Mike!
Best dumpster dive he ever had!
Love. Love. Love. What a great find, and it looks amazing in it’s new spot and home. Did I tell you how much I love that clock you have, where did you find it? Have a great weekend! xo, Liz
Clock came from Ballards at least 12 years ago. Thanks Liz!
Holy Cow!! What a score! Magnificent job Mike! You’re hired!
What and I for a treasure he did an awesome job bravo Mike keep digging in the dumpsters
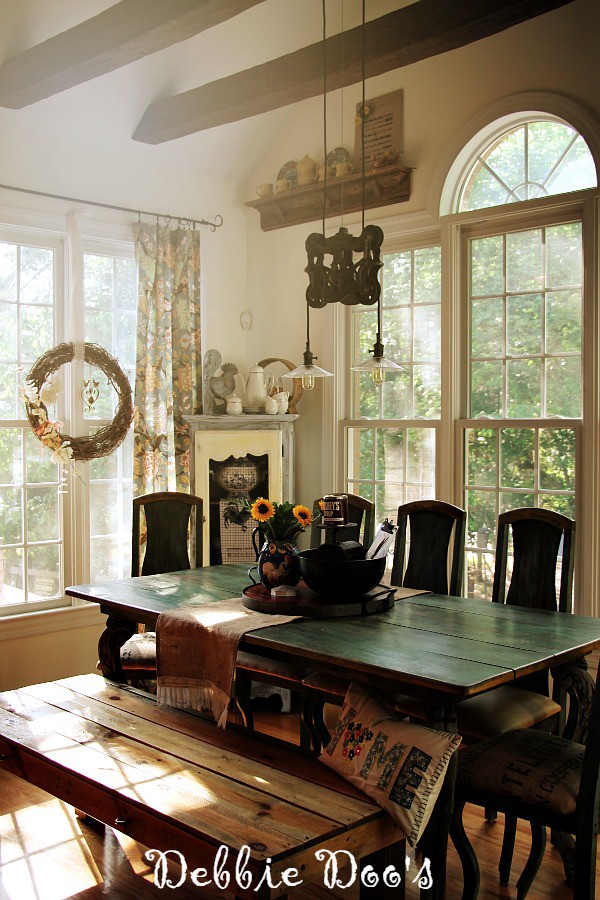
Great job by your hubby! I love the size of the bench and how it looks in your room. Well done!
Pam
He did an awesome job, Debbie. It looks great, and I absolutely love the way your kitchen looks — beautiful! 🙂 Have a fun weekend!
looks great!! What a good job he did, I love to have lots of seating at my table too!
Love it! Way to go Mike 🙂
SUCH a score. Bravo to Mike for the great find, and the great fix. Totally custom and perfect for your tall table. The kitchen looks gorge!! Still loving those beams too :)))
a year ago my husband and I were in town and I took a scenic route home and by someones house they had a wood office desk with one sm. drawer and one large draw for files. It also had a key board shelf that slide into the desk if you wanted out of sight. It was a dark cherry wood finish marked FREE with one scratch on top that looked like someone slide something across it. I just put a table runner over it for now. I always wanted a computer desk and just did not want to pay the price. We had my suv and was not sure if it would fit, the drawer would not come out so we had to lift that heavy desk inside the car. But it was worth it ! Great fine your bench.
That is a good looking bench!
Wow! This is totally awesome! He did a great job! I can’t believe someone would throw something so awesome into the dumpster!!! ~~Ang
He was shocked too! Glad he spotted it as driving by.
Wow..Great job Mike..love it. Fits so well in your kitchen area.
Thanks Jessie:)
Love the bench especially how wide it is! Looks so good in your dining room
Thank you Carol. Yes we like the width of it as well.It’s pretty comfortable!
Such a cool bench and talented hubby! It’s the perfect addition to your awesome kitchen! Lucky girl!
Thanks Becca! I bet you are getting in the Fall mood!
Goooo, Mike- how fun! I need to figure out how I can get Richard to start d-diving for me. 🙂 The bench looks great, and looks like a good size for a coffee table, too, if you ever decided to change things up again.
What a great idea Sheila, never thought of that!
I’m a 73 yr. old woman, so I don’t presume to know it all in carpentry, but I am a DIY person, who does all her own work. I noticed that some of the ends of your boards on the bench have splits in them. Just a tip for your husband, if you’d rather not have that from here on in. Drill the ends of the boards with a very small drill bit before hammering in the nails and you won’t get any splits. Love the bench tho’…. splits and all!
The ends of the boards were like that already. My husband only attached the legs and he did that from the bottom. Remember this was a dumpster dive, and it was some sort of sign so those nails were pre existing. Thanks for the tip though.
The bench is SO nice! I love it and I love when you write about Mike. You two are the best couple! 🙂
I love it! I love a man who will dumpster dive, too. I’m pretty sure I could convince my husband to dive IN, but I would have to do the seek and find first. You have a keeper for sure. (The bench, too… but I was talking about the husband. ) Going to look into that varnish.
Hi Debbie!
Loved seeing this dumpster dive project. It looks great there at your table…very rustic!
We use a combination of chairs and a bench too. With all my little grand-kids here most days… it sure comes in handy!
I Love it!1 He scored Big Time. It is exactly Perfect for that Room.
And I am going to have to Agree with Your Husband on The Marine
Varnish. When someone sees a piece of furniture outside they say oh that’s
going to get ruined etc.. I say Use Marine Varnish!! Bravo on two points for Him lol
Looks Beautiful and a Great Addition.
Lisa.
It is a great product indeed!
Debbie, it just looks so nice! Great when it all finally comes together! Now I spied the dog’s bowl and loved the black dog pic at his level. How cute is that! And I love the fact that you are smitten with chickens. My daughters don’t understand my affection for them. I enjoy your posts!