
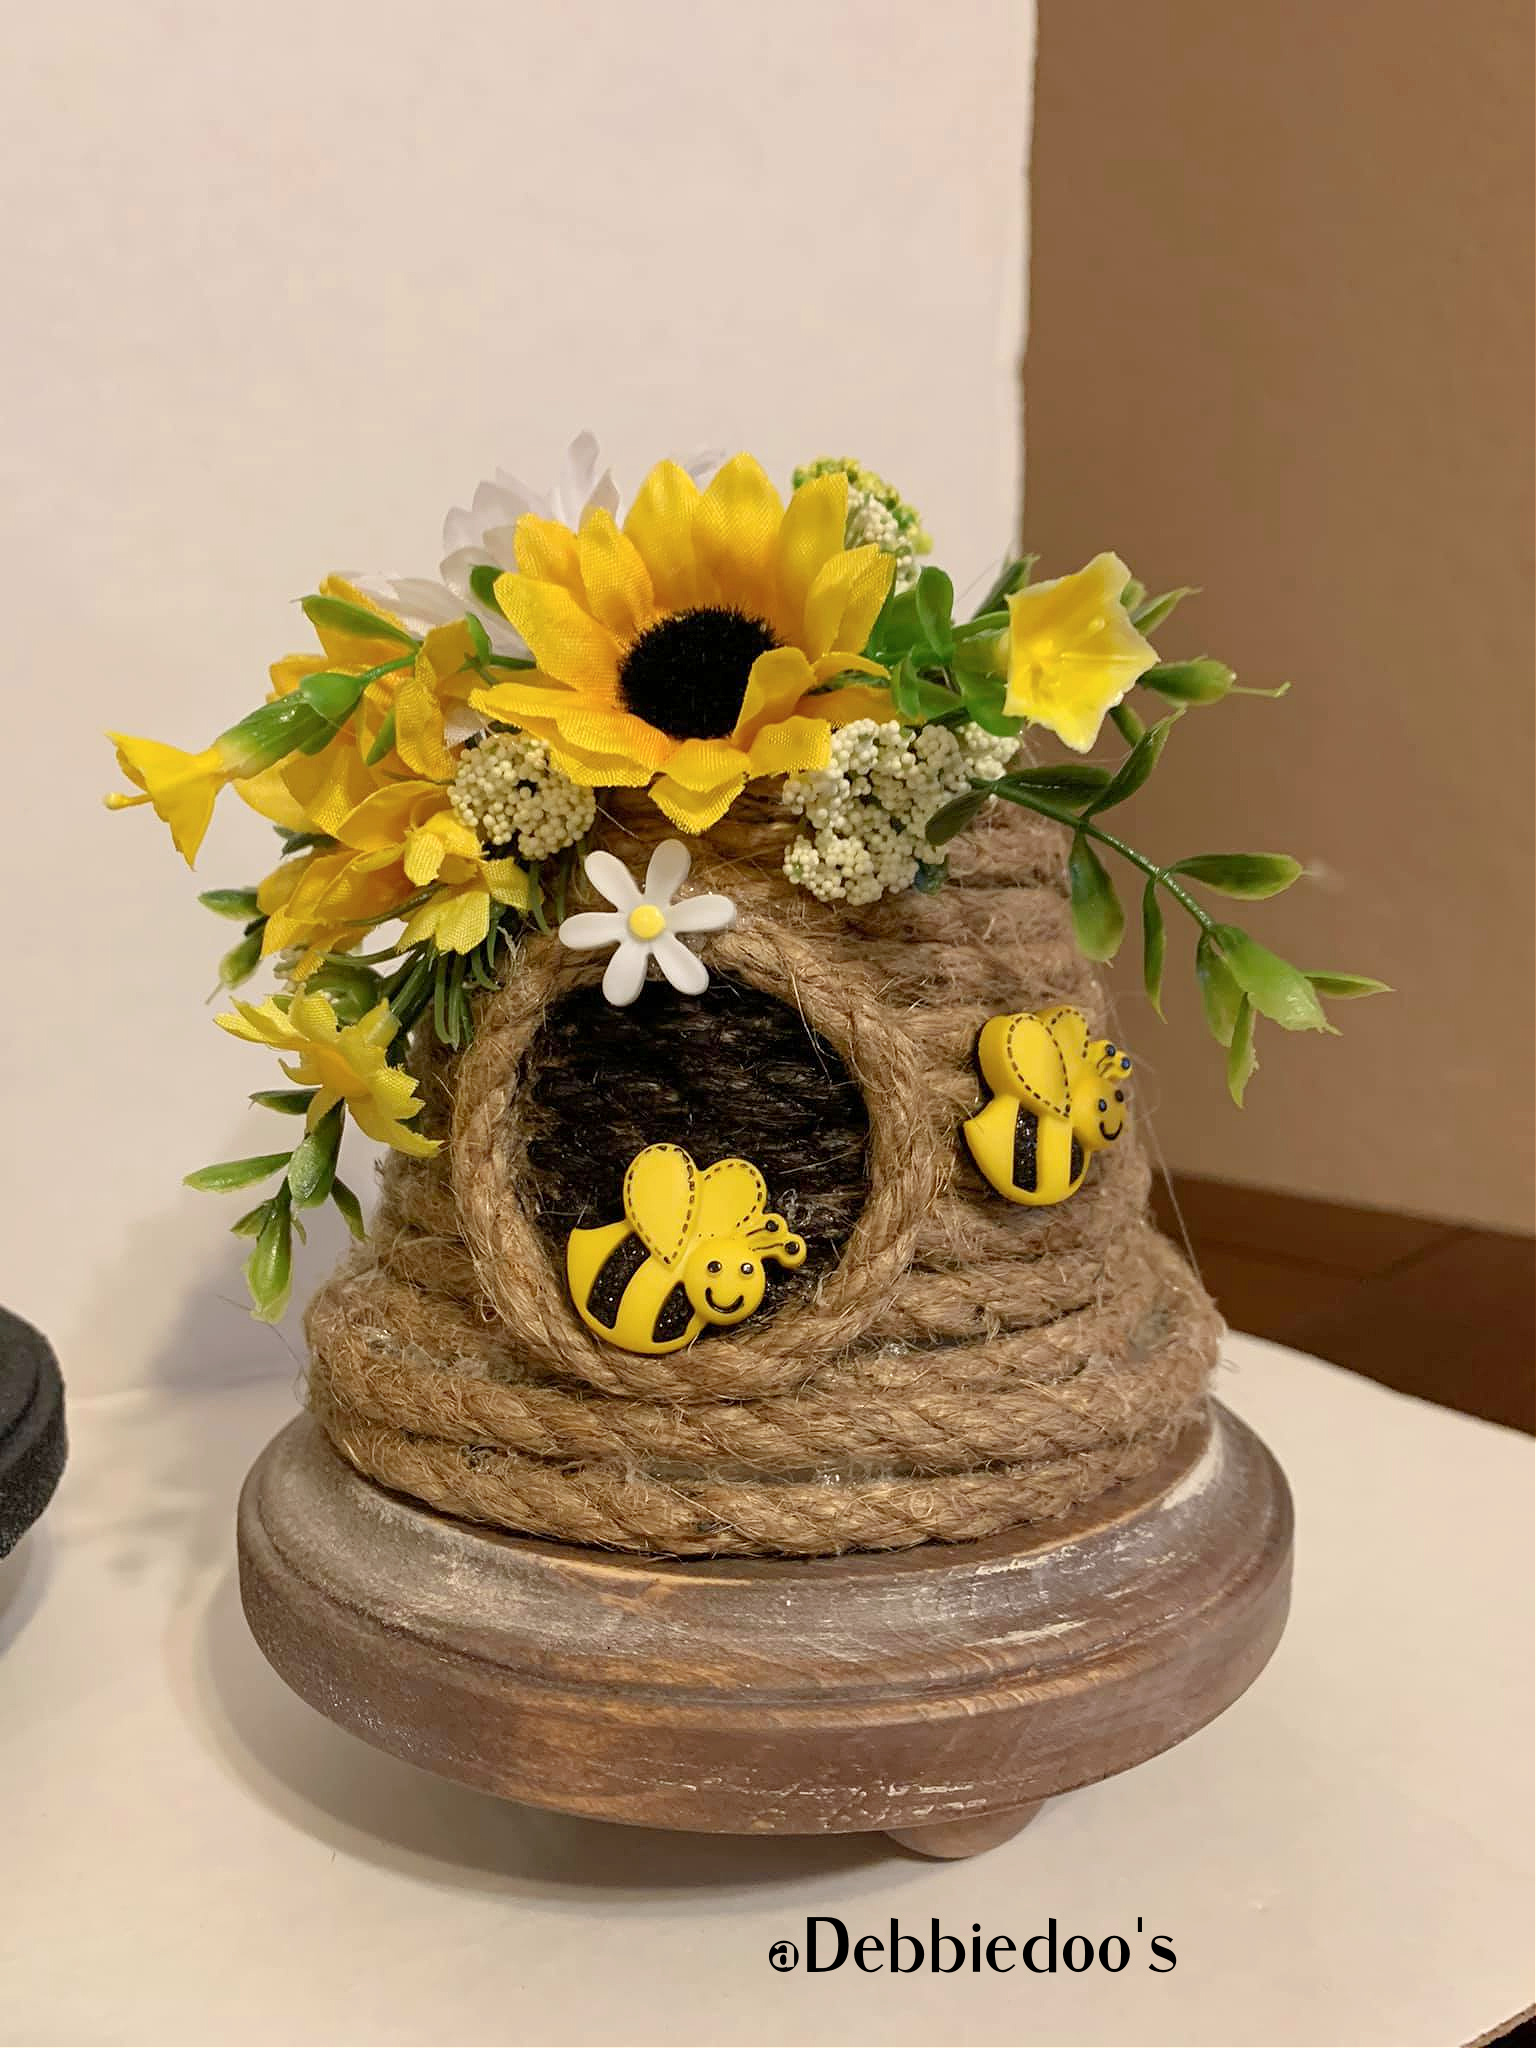
A delightful DIY beehive decor project is a fantastic way to embrace the sweet charm of spring. Using simple, budget-friendly materials from Dollar Tree, you can transform a garden pot planter or a glass vase into an adorable beehive centerpiece.
1. Gather your materials
- Garden pot planter or glass tulip vase
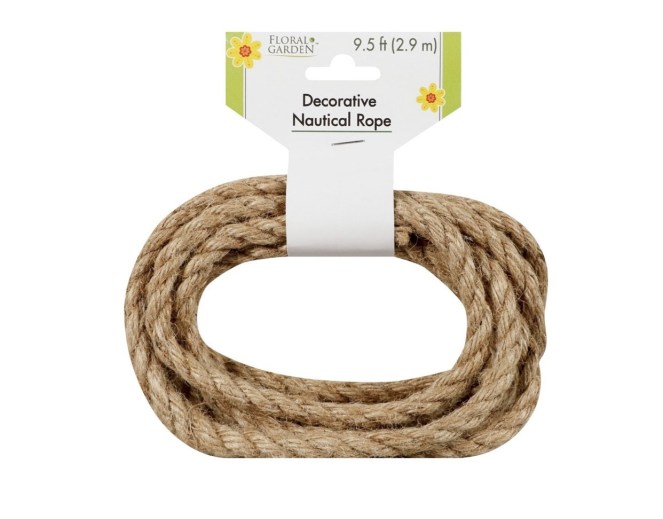
- Jute nautical rope
- Paint
- Hot glue
- Embellishments such as faux flowers or ribbons
2. Select your base
The core of our project is the Dollar Tree garden pot planter. When selecting your planter, choose a size that suits your desired location for the finished decor piece.
3. Prepare your base
Whether you choose the planter or the vase, the first thing you need to do is make sure it’s clean and dry. For painting, pick a color that matches the theme of your decor. A light brown or honey yellow can mimic the natural look of a beehive. Apply your paint evenly, and remember to let it dry completely before moving on to the next steps.
4. Create a beehive effect
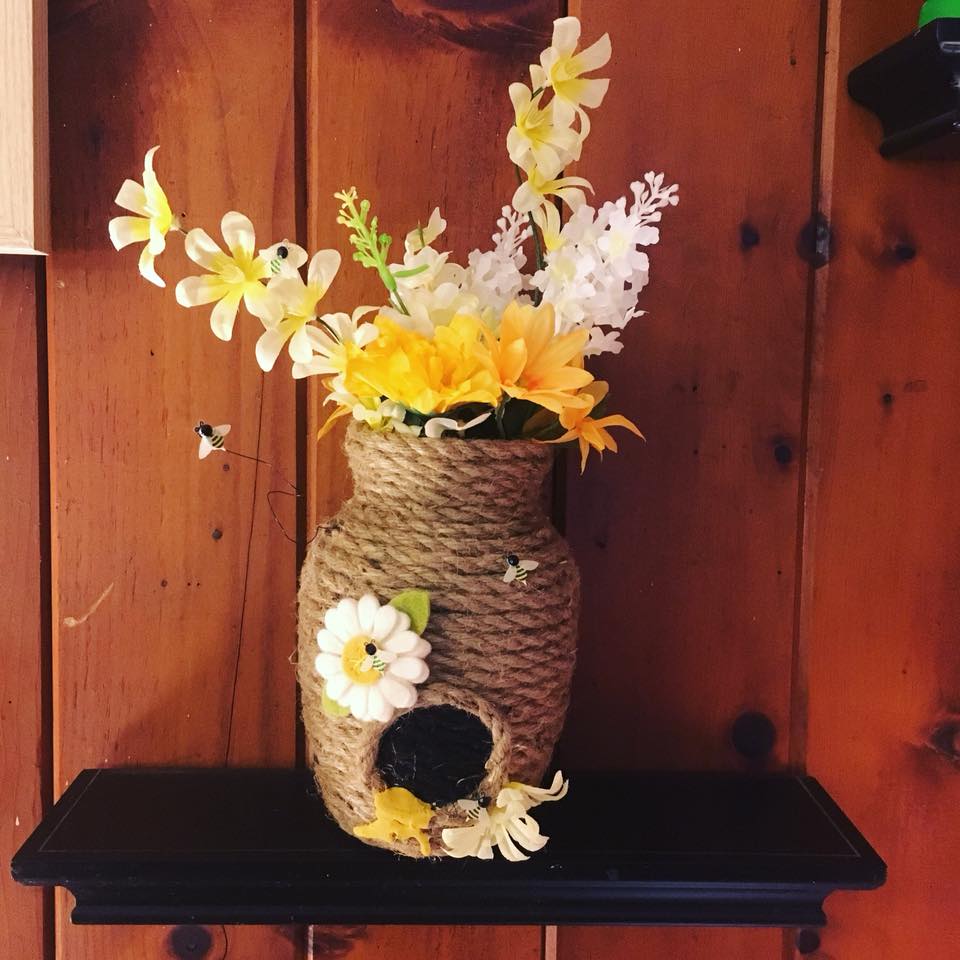
The key to achieving the beehive look is to carefully apply the jute nautical rope. Start at the bottom, securing the end of the rope with a dab of hot glue. Wrap the rope around the planter, adding more glue as you go along to ensure a sturdy result. Try to keep the rope layers even as you go.
5. Add personal touches
Once your beehive structure is ready, it’s time to make it pretty. Use faux flowers and ribbons to add an extra dash of color and life to your beehive. Adorn the rope layers with vibrant faux flowers, or tie a charming ribbon around the middle or top. Don’t hesitate to use other embellishments of your choice. Remember, the goal is to create a piece that resonates with your personal taste and blends well with your spring decor.
6. Finish the DIY beehive decor
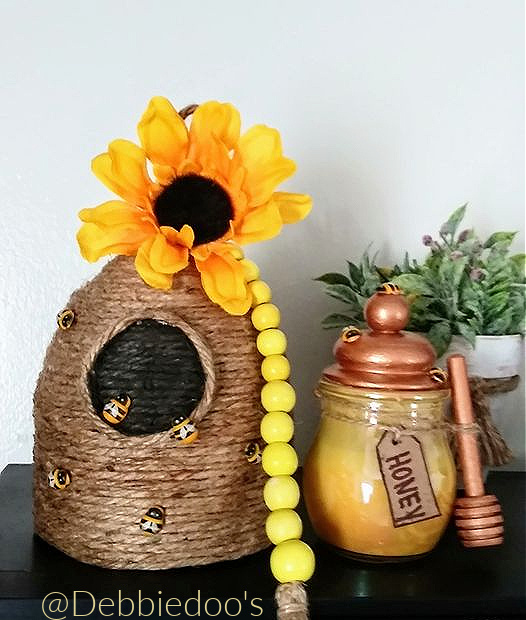
Once you’re satisfied with your decoration, do a final check. Ensure all the embellishments are securely attached and the rope is well-adhered. Finally, find the perfect spot to display your creation. It could be the centerpiece of your dining table, a charming addition to your garden, or even a bright spot on your front porch.
What a wonderful idea!
The beehive is adorable! Thanks for sharing this great idea!
I love your beehives. Great job!
They are sooo cute, thank you for sharing. I think I just might make one too! I’ll have to get to the dollar store.