
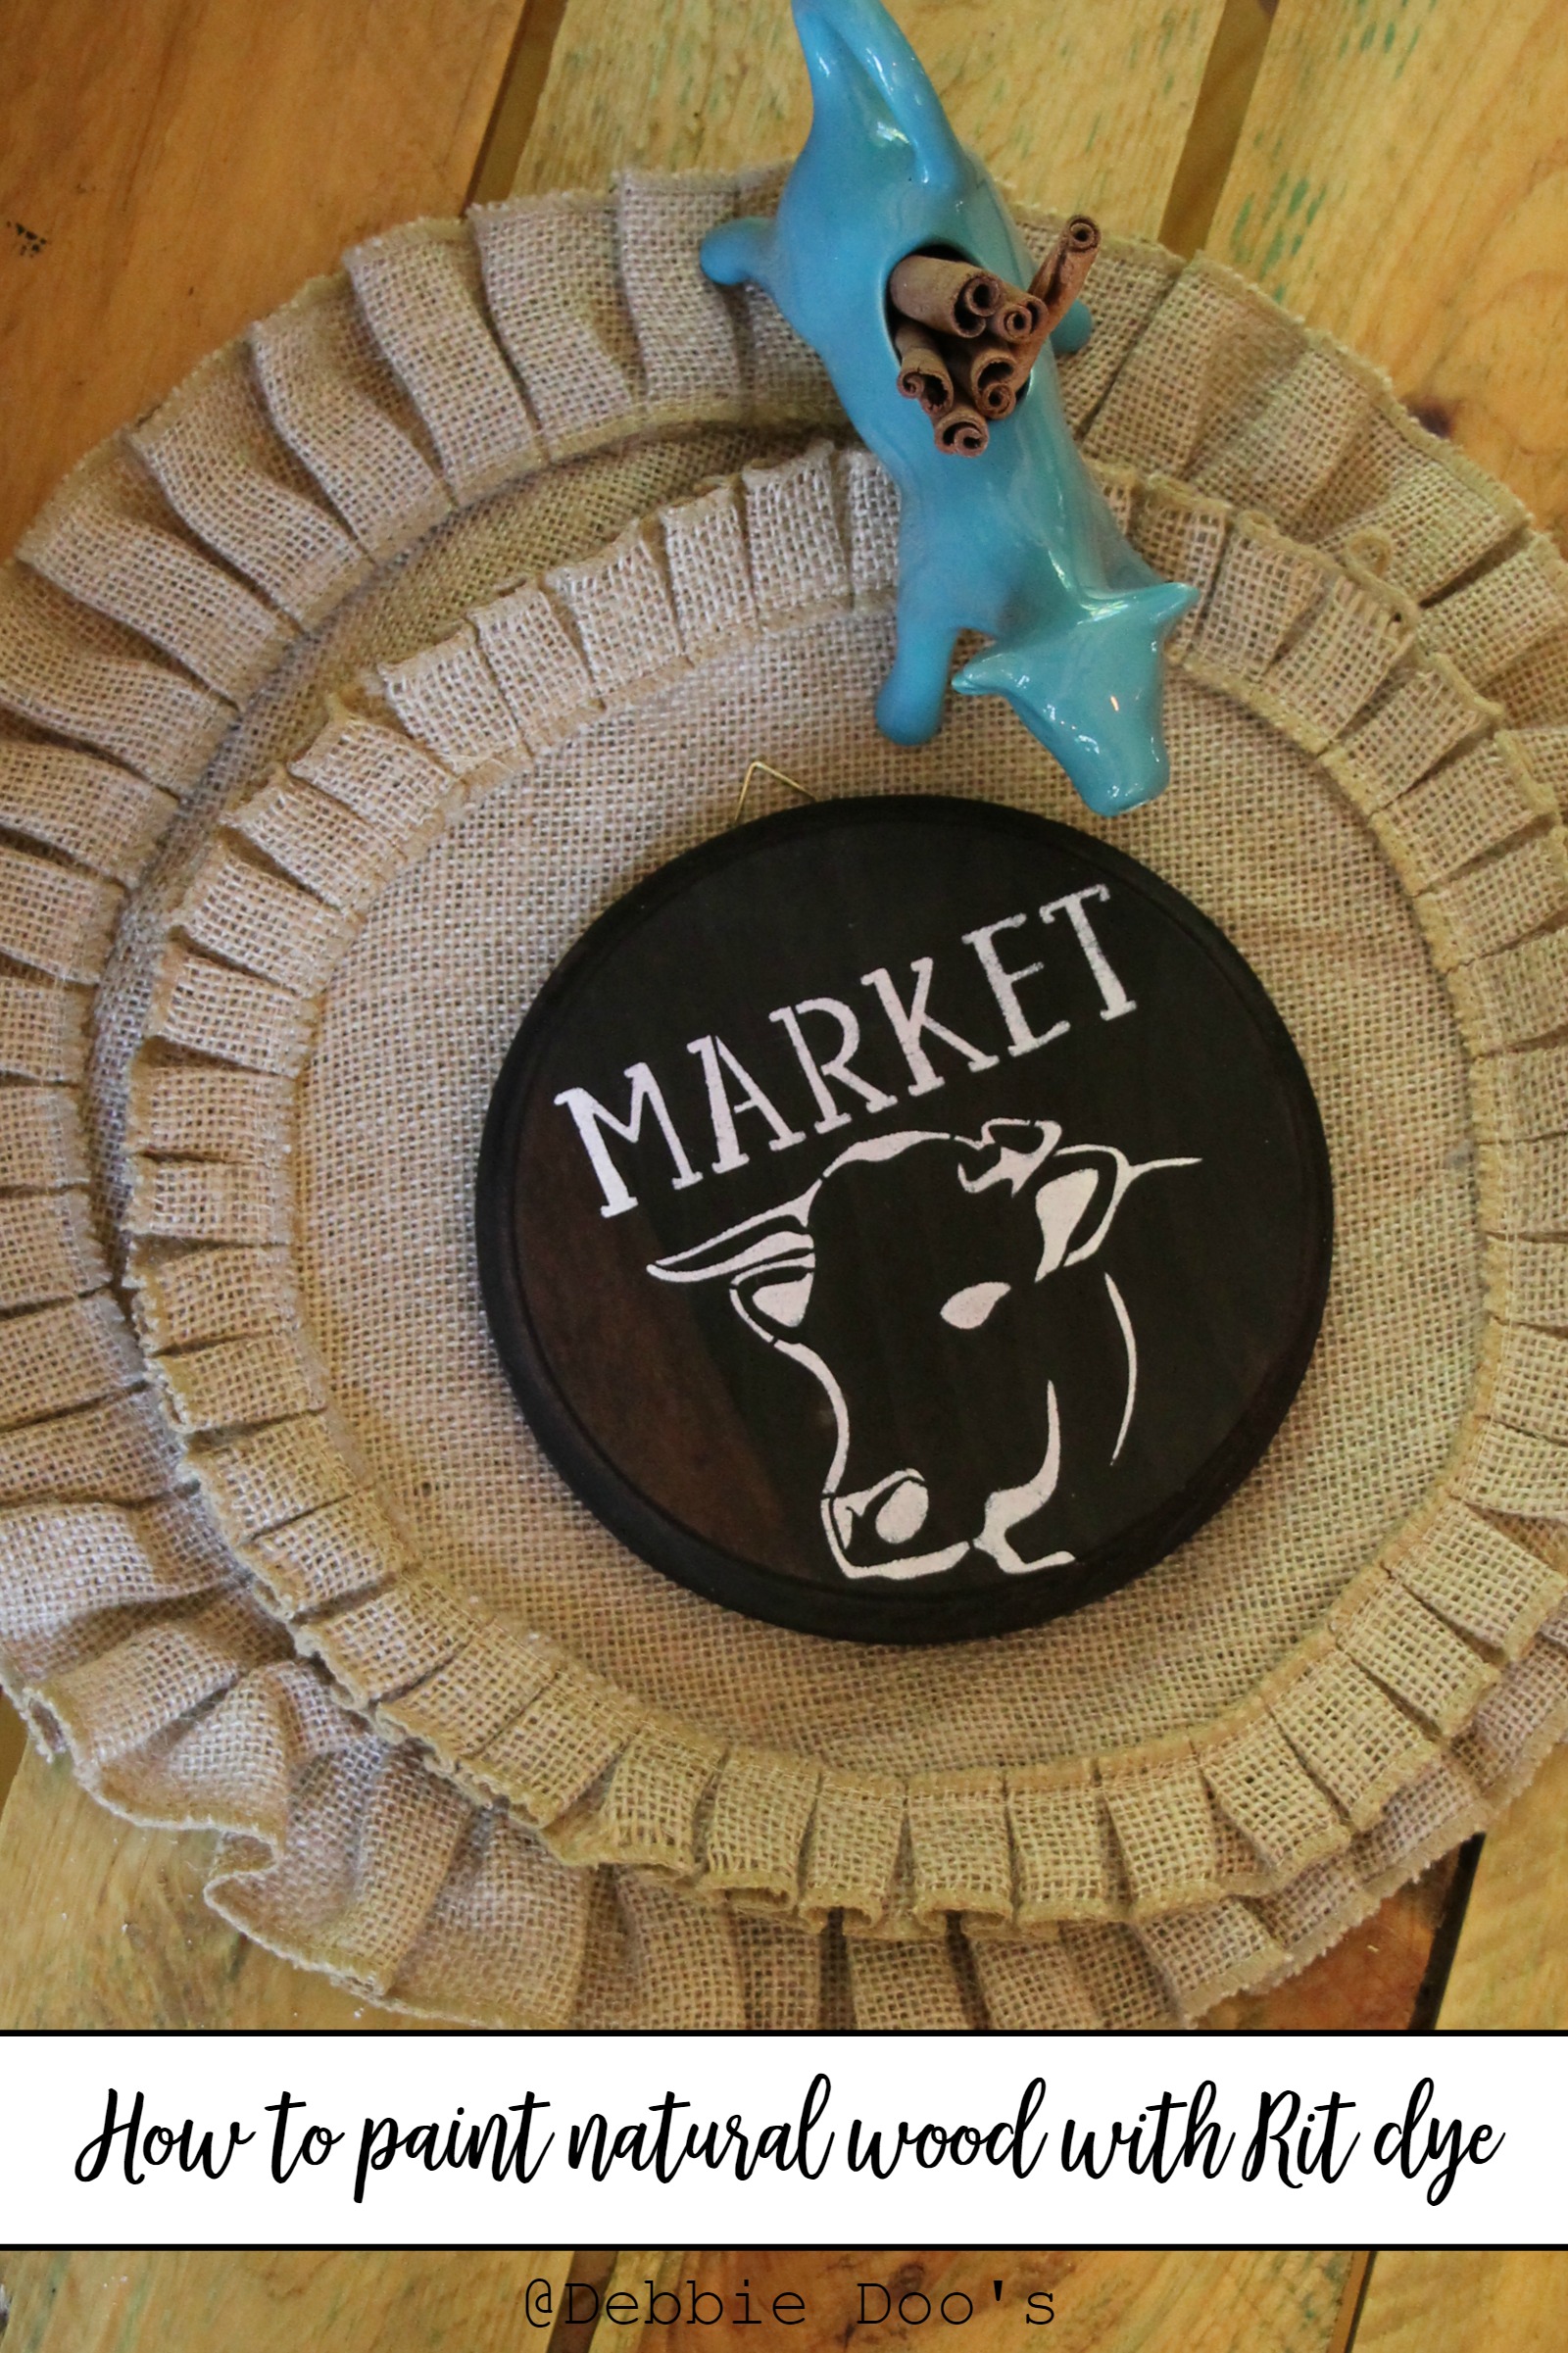
How To Paint Natural Wood With Rit Dye
Good day all! Today I am going to share with you how to paint natural wood with Rit dye. This said here project was the culprit of my Facebook drama. Well it was the start of the drama. The painting part was kosher. All hell broke lose during the stenciling process. OMG, it’s backwards. backwards.backwards. do you know it’s backwards. GRRRRRRRRRRRR…I now despise the word backwards. Now I can look back and totally crack up at this. For real, can you believe it? A little simple craft wreaking havoc on Facebook HA!!~ Well let’s check out the process shall we? It really is simple, fast and fun. And it’s not backwards:)
I am leaving you a short video tutorial at the end. I am starting to learn how to edit my videos down from facebook. That way you don’t have to sit and watch 30 minutes of yip yapping. We will get right to it.
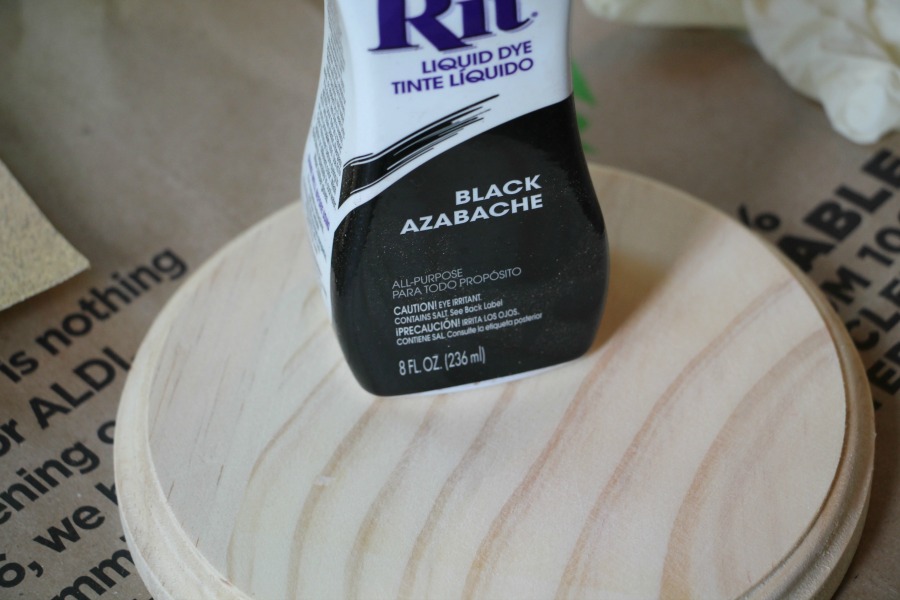
I mention I like the liquid Rit better than the tablets.
As you can see here, this is a simple round wood plaque I found at Walmart for a few bucks.

The black Rit is pretty darn black so only one coat did the job on this plaque. You can make it as dark as you would like though.
The dye soaks right in and dries quickly.
Please though for the LOVE of God, make sure you have a plastic bag down, and wear rubber gloves. And do not accidentally knock over the bottle or the bowl. Did I scare you off now? Hope not, just proceed with caution. It really is simple.
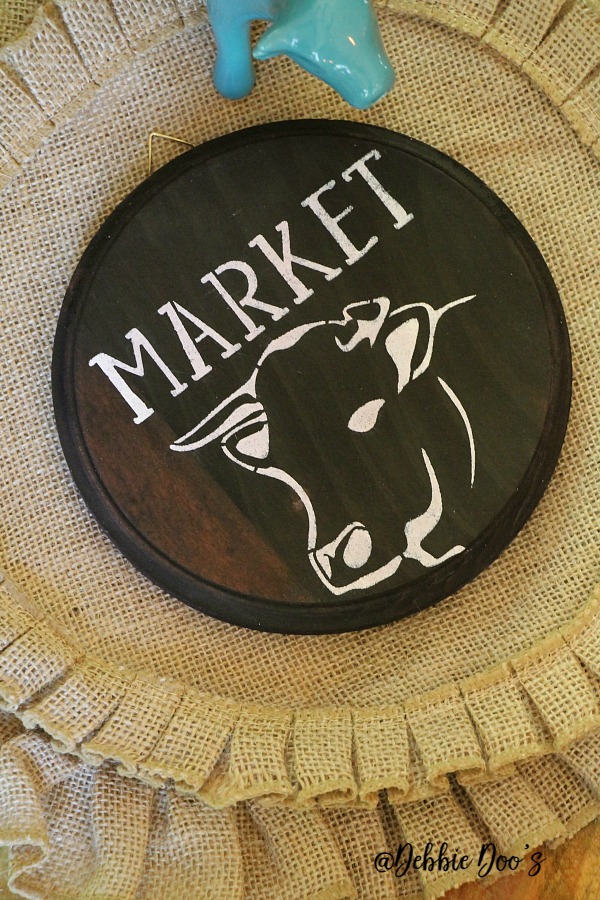
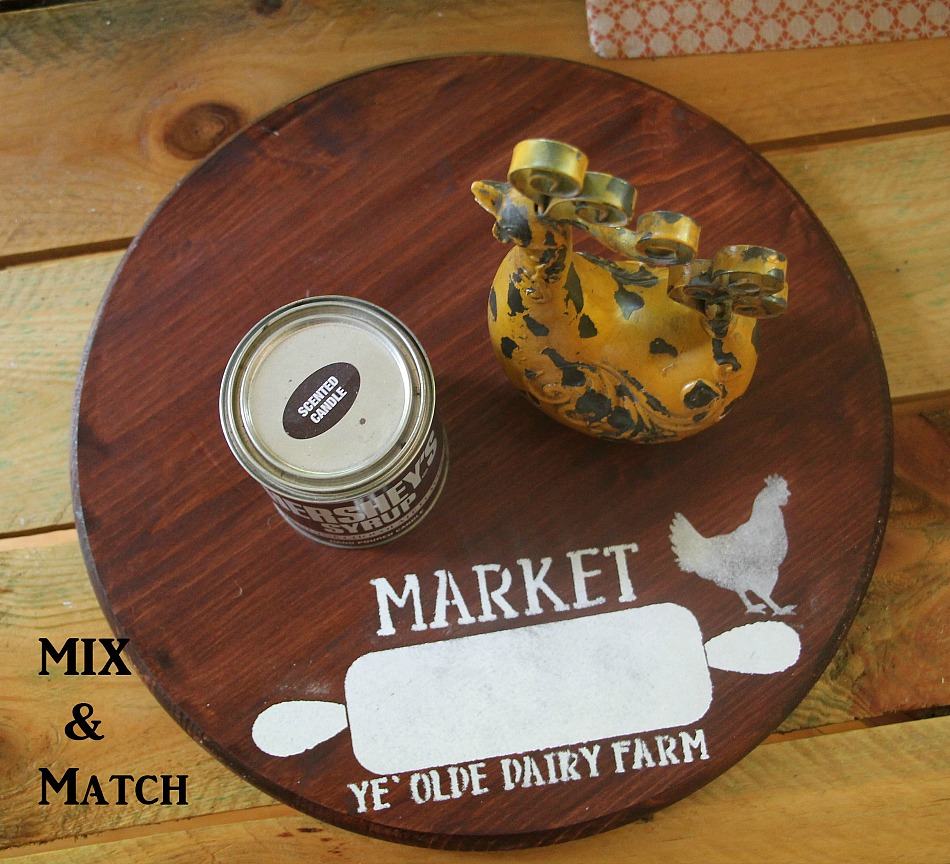
After the wood plaque dried in no time at all ( less than an hour). I stenciled my market cow stencil. Just a small portion of it as you can see. I love how I can mix and match the stencils, or just use certain parts of them. Like I did here with my DIY lazy Susan.

Rit dye gallery of ideas
Affiliate links for supplies:
Natural wood plaques
Latex gloves
Rit dye
It sure is cute!
Enjoy.
Thank you for your visit today!
I share all things, thrifty home decor, crafts and a recipe or two on occasion.
If you would like to commit to becoming a subscriber, I would love for you to join me.
L.O.V.E.
Love this and your talent! This is so cute. I never thought of using Rit dye. Don’t you love it when we can laugh about things? You are amazingly talented and don’t ever let anyone steal your joy! Keep those posts coming!!!
Thanks Beverley! I appreciate your kindness so much.
Looks great!!
Hi Deb, thank you for sharing. I did make the lazy Susan and it was so easy to make. I used gel stain and it goes on easy and it turned out nice. I haven’t stencil it yet, but will.
Looking forward for your next project. Going to try the dye.
Awesome Jonita! So glad you made a lazy Susan. They sure are simple and fun to make.
I’m glad you are doing better! I told you last week that there are some real jerks in the world and to concentrate on all your loyal friends and followers! Glad you are smiling that lovely smile again. I love this idea. Definitely going to get Rit dye. I think this is easier than paint on raw wood.
Without a doubt Linda it is easier:) Thank you.
As always, thanks for sharing with us. I’m going tomorrow to get some of the dye and will try it on some of my projects.
Keep the ideas coming.
Thanks Lynda:) Have fun!
Hmmn, interesting, Debbie. I wouldn’t ever have tho’t of using dye but it seems to be easy and turns out quite nicely. Do you put any sealant over it? And yes, the stencils are great. I have the cow one and am dying to use it when I can find time.
Thanks for the interesting post!
Hi Namoi. Yes you can use a poly on it or leave it natural. If I were doing a large piece like a bookshelf, yes use the poly.
Yep, just another reason I’m not a fan of facebook. So sorry people can be such stinkers sometimes 🙁 Loving all your stencil projects, you are the stencil queen.
UGH! I have a ton of nice people though on my facebook page so those are the ones I pay attention to:)
I love painting with Rit dye, you got me hooked a few years ago with jars and vases. Love the wood idea. Keep the idea’s flowing. I love them all. Hugs!
Wow, thanks for that, never thought of Rit when it comes to dye as we use so many other stains but this looks great! It’s awesome for the DIY’er.
Blessings,
Elizabeth
This is awesome! I’ve used Rit Dye on several fabric based projects but this is a wonderful ringa..ding moment. Thanks so much for sharing this tutorial. All your crafty things are so nice.
Thank you Lynn! Have fun. This is one of my very favorite ways to paint wood.