
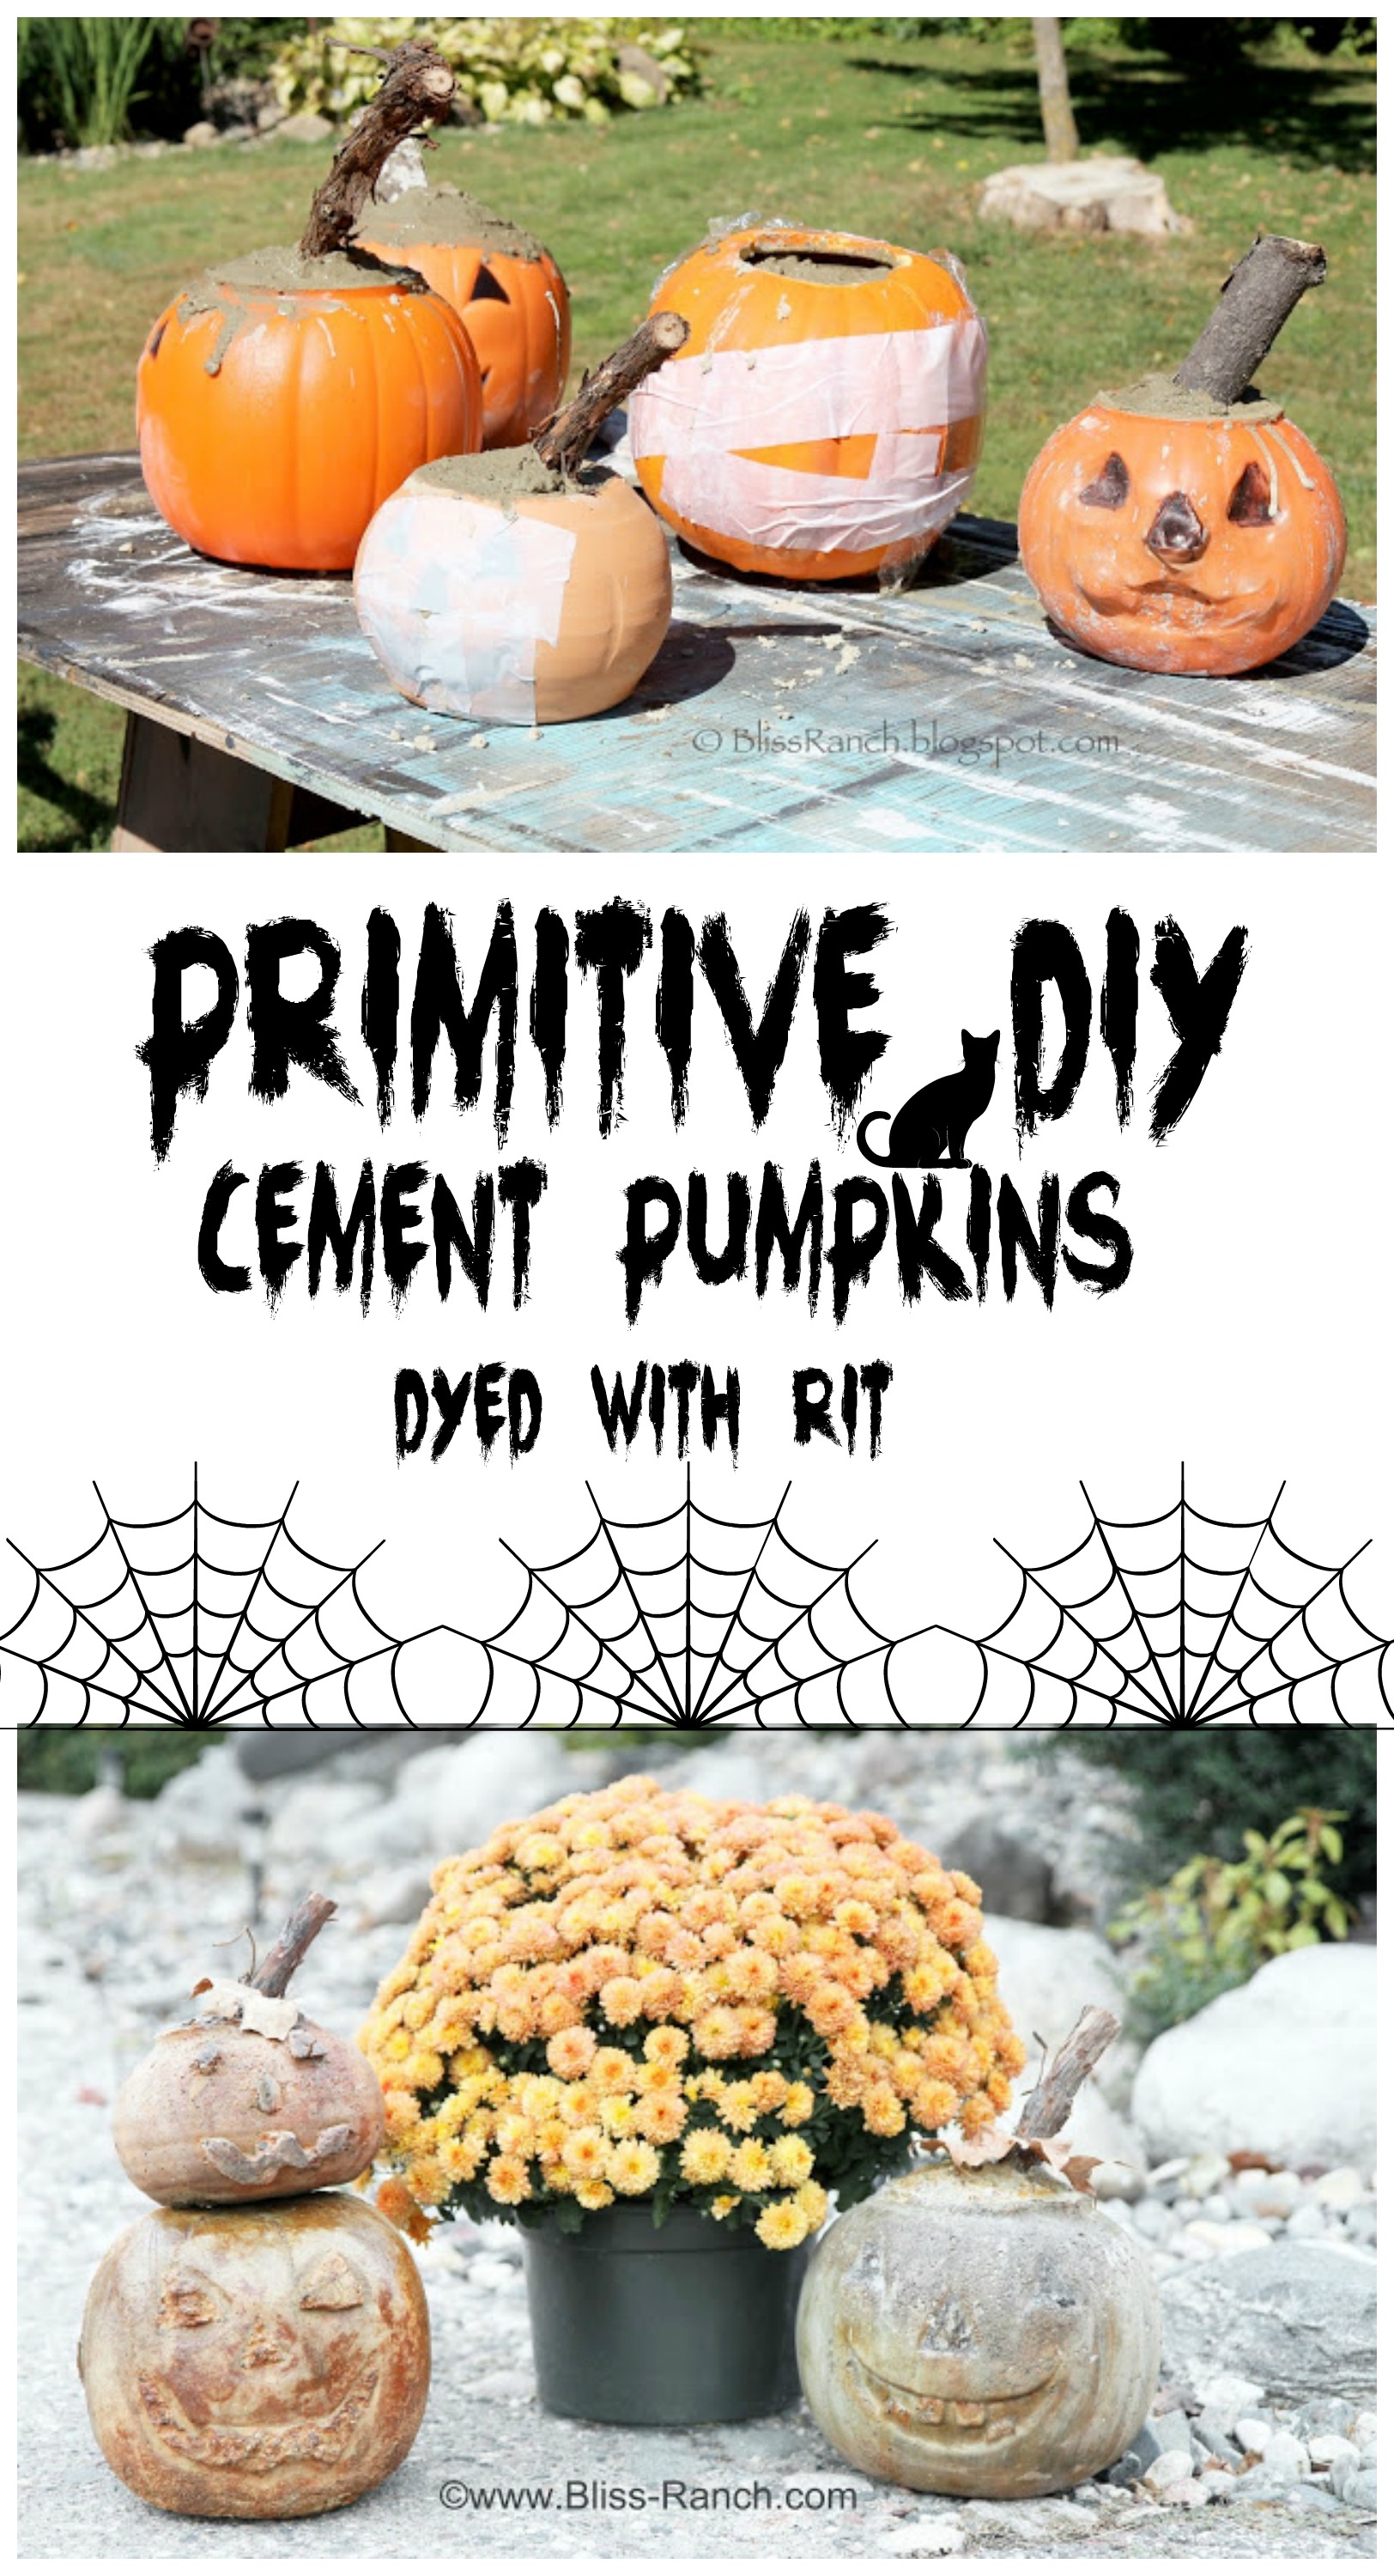
Rit Dyed Cement Pumpkins
Welcome BLISS from Bliss ranch.
She tried her hand at a rit dye project and she wanted to share it over here.
OH yeah!
Let’s see whatcha got!
It comes in handy when you read blogs and something sticks in your mind. Miss Debbie-RitDye-Doos has dyed her way into my memory and saved me from a gaggle of pink pumpkins.
Over at Fox Hollow Cottage I spied a guest post from Shayna for some concrete pumpkins and I knew rit right away that I was gonna make me some.
 |
| Pumpkins waiting to hatch |
I’m Bliss, and I won’t bore you with the tutorial details here on Miss Doo’s blog because this post is all about the dye, but you can pop over to Bliss Ranch if you want to try your hand at making some or stop and visit Shayna’s post. With detailed steps as well as some tips I learned along the way, you can be morphing your own plastic pails into a concrete patch of jack-o-lanterns.
Basically you start with a mold of some kind, ceramic, plastic, whatever, and fill it with quick set cement.
 |
| Rit Dye Experimental Labratory |
Debbie Queen of Mod Podge, is who I reference when I need to find something out on using Rit Dye. She has figured out more uses for Rit Dye than the Rit Dye people!
 |
| NOT a Rit Dyed Pumpkin |
The cement pumpkin above was made following the tutorial at Fox Hollow. I liked the concrete look, but I have lots of concrete grey around here so I wanted to add some color (although not THAT color!). I’ll say now, if you use Rit Dye once, you will probably be hooked.
I thought regular orange food coloring would work so I tried it on my first test pumpkin. Nope. It didn’t. He’s pink. Or maybe it’s a she?

Due to unforeseen circumstances regarding one of the plastic pumpkin molds, I ended up with two test subjects. Yes that is a pumpkin on the left. From Mars.
You can see the difference between the Rit Dye, and the food coloring on the right.
I wanted the pumpkins to have a rustic primitive look. Pink wasn’t gonna work. I purchased black and orange Rit Dye, then I started experimenting by mixing the colors. Mixing the colors gave them various shades of a burnt orange and the dye reacted different on each pumpkin giving off the the final look.

As you can see the little feller in the back isn’t pink anymore. He’s flat on top and he can act as a pedestal for a plate.
I put a concrete sealer on them and that reacted with the Rit Dye yet again to give them another look. You really can’t be set on what your finished project will look like using Rit Dye, because you just don’t know!

The nice thing about these pumpkins is they don’t have to be gutted, they won’t rot and I can leave them out if the snow flies early.
The bad thing is I can’t make a pie out of them.

I intend to make some more now that I understand the process and the Rit Dye.

I will probably send the one that looks alien out into the woods to crumble and decay.
I don’t think rotting cement will hurt his looks any.

Thank you so much for visiting with me today.
If you are new here, I am also very excited to share my new stencil line with you.

Farmhouse/rustic stencil line by Debbiedoo’s HERE
Thank you for your visit today!
I share all things, thrifty home decor, crafts and a recipe or two on occasion.
If you would like to commit to becoming a subscriber, I would love for you to join me.
This is fun!! I love it and the way they turned out. I am really liking how you just don’t know exactly how they are going to turn out & the rit dye takes on it’s own.
This is such a cool and rustic pumpkin project!! The fact that once you make these, they’ll be around for almost ever. Great idea for teens, too!!
I love these SO much, Bliss! Thanks for the tutorial…pinning!
Wow – is there no end to what we can do with Rit Dye?? Love these rustic looking pumpkins and this would be great due to the FL heat. We basically have to carve pumpkins the day before Halloween or it gets ugly really fast! Love this idea – thanks Bliss. And long live the the Rit dye Queen, Ms. Doos! 😉 Pinning!
Love it, Miss Bliss!!! I may need to try my hand at these Rit dyed beauties!
🙂 Linda
I like the poor alien outcast! He’s spooky. Fun project and I am constantly amazed at the things you create.
These are wonderful. What a terrific idea. You can hide them in your landscaping all year and bring them out for fall. Great tutorial.
These are great. Love the colors from the Rit dye. Super cute.
Kris
Super cute! Lots of work but I bet they last for years as long as they don’t stay out all winter. I lost my concrete fountain that way..ugh.
I love the subtle colors….so rich.
The finished results are awesome!!! They look super cool and a little creepy, too.
F-A-B-U-L-O-U-S. Love the look.
I LOVE them Bliss!!
What a great idea, they turned out perfect and so unique.
They looked good before but I love the addition of the RIT dye!! Such a cool patina on them now!
They are adorable – and I think every pumpkin patch needs a pink pumpkin too (buy some pink Rit)!
Kelly
Love the addition of color to your rustic pumpkins. I never would have guessed your coloring secrets 🙂
super job Bliss! I love your creativity!
gail
LOVE this project!!! Thank you for posting it! Do you just mix the dye according to the directions on the box and then paint it on or mix it into the cement?
I really like the look you got when you put on your sealer!
Please don’t “banish” little Marzy! I will adopt him! 😀
Yes mix according to the box, Paint the dye on. You can also buy the liquid rit dye already mixed.
How do you apply the dye?
I am not sure how Bliss did it. However, I would recommend a spray bottle. Of course, be sure to prep your area well and not do indoors near walls, etc.
Can you tell me how you mix the liquid dye? Do you add water….if so, how much? I’ve experimented with tangerine (light orange) and black dye but can’t quite figure out how you mixed it to get that primitive looking rusty orange color. Mine are coming out with a red tint. Please help! I’ve got a lot of concrete pumpkin friends I’ve made that are just waiting for color.
This is a guest post. However, I have used Rit Dye often and never have mixed the liquid dye with water. I believe when the dye settles in the concrete it takes the look of the rustic orange and not so bright. You could also try mixing the orange with a tad of the black. Have fun!
If your pumpkin turns out pink, remember October is Breast Cancer Awareness Month.