
Hey there!
There is nothing better than a freshly painted room, is there?
Just in case painting is on your to-do list, I thought I’d share a quick tip that may apply to your project:
How to paint over those blue plastic wall anchors that we all use.
While they serve a great function, they don’t make painting a wall very easy when they aren’t going to be used again.
Perhaps you plan on putting that picture or shelf in a different spot after you have fresh paint on the walls. If so, how do you remove the anchors?
Answer: You don’t.
What you want to do first is gently hammer the anchor into the wall further so that the rim is flush with the wall.
Be careful not to damage your wall. You will probably see a slight indentation from the hammer, but that can be fixed at the same time.
The key is to get the anchor into the wall deep enough. You should not be able to feel it if you rub your hand across the wall.
The next step is to spackle it. Be sure to fill the hole completely.
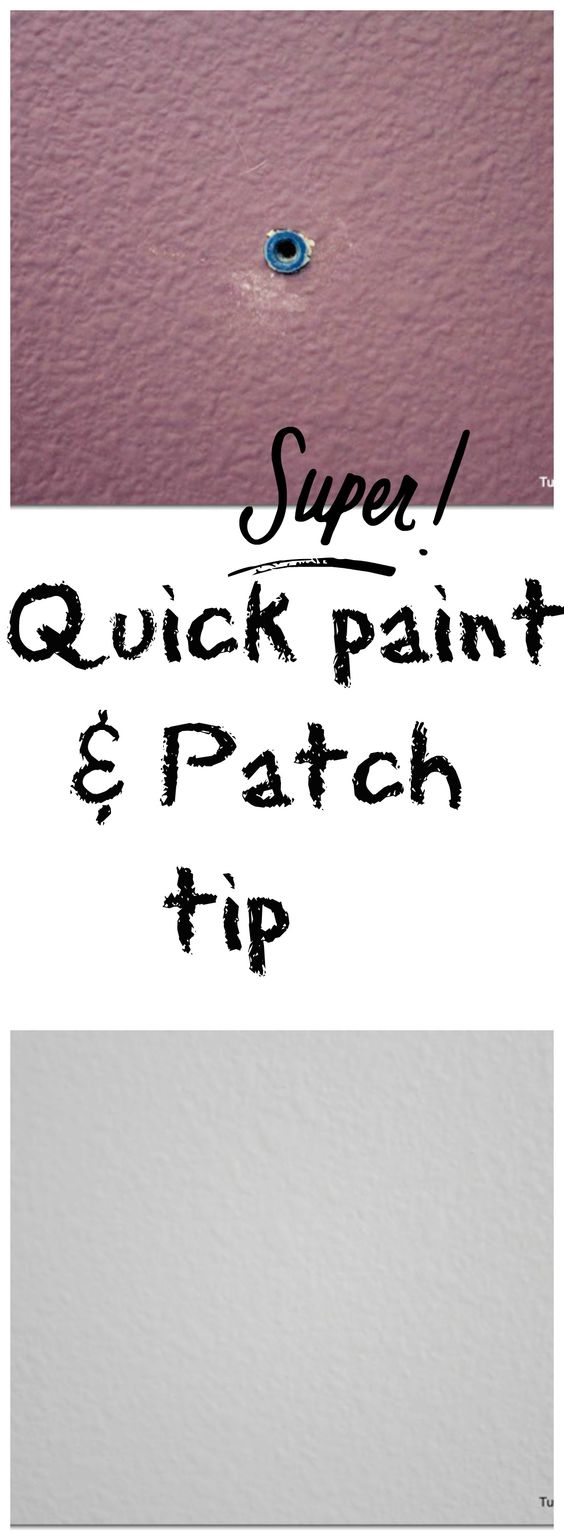
Rather than try to fill it and have a smooth top layer even with the wall in one application, it is best to do it in two applications.
Fill the hole, let it dry, then apply the final layer smoothing it out to be even with the wall.
There will be no protrusions from the anchor, and that the spackle is an even finish.
After it is dry, sand the excess spackle off.
It is now time to paint!
…and one invisible blue anchor.
Thanks for stopping by today! Hope you stick around.
If you are new here, welcome! I am also very excited to share my new stencil line with you.
I also have a Home pressure cooking website. If you don’t have a pressure cooker you truly don’t know what a game changer in the kitchen it is!~
Join me over there as well.![]()

[envira-gallery id=”32693″]
To view my stencil gallery projects you may check out my Debcreates.com page.


Great tip. To pull those things out of the wall makes a huge mess. Never thought of doing it this way.
Great tutorial. Looks fabulous. Hugs, Marty
How funny Debbie. Just yesterday, I removed a towel bar in the bathroom, and removed those ding dang anchors, leaving a gaping hole in the wall. I have spackled it now, but I wish I had done it your way…How easy!!!
xo Kris
Thanks Shari. I am faced with repainting the sitting room ( once a bedroom) walls this weekend. There are a couple of these in the wall and was torn between pulling them out and making a HUGE mess and what to do… you have solved that for me 🙂
Hugs, Gee
Great tip, Shari! Thanks for passing this along.
wow== great tip….. I’ll be doing this on several walls. thanks
Thanks for the Awesome tip!! Those anchors are HANDY and PESKY all at the same time 🙂
Have a great day!
xoxo
I have an “oops” spot that is an eyesore right now from curtain rod hanging gone bad. This is great!!
xo, Tanya
Thank you!!!This came at just the right time,great tips.
great tip thank you Shari 🙂
That is the exact same shade of purple as the wall in my living room. I do have some of those anchors, and I’m moving soon so I’ll need to paint the wall a more neutral color, so this is quite helpful.
This is perhaps a tip within a tip….
Instead of hitting the anchor into the wall directly with a hammer, which can mean a little damage to the wall, try this:
Turn a screw a couple of times into the anchor, then hit the screw head with the hammer. The anchor will go in, the wall is not damaged and you just take the screw out again.