
Discover the timeless beauty of stained glass artistry as you create your very own stained glass lantern in this comprehensive guide. Learn the step-by-step process, from designing your unique masterpiece to illuminating your space with a warm, enchanting glow.
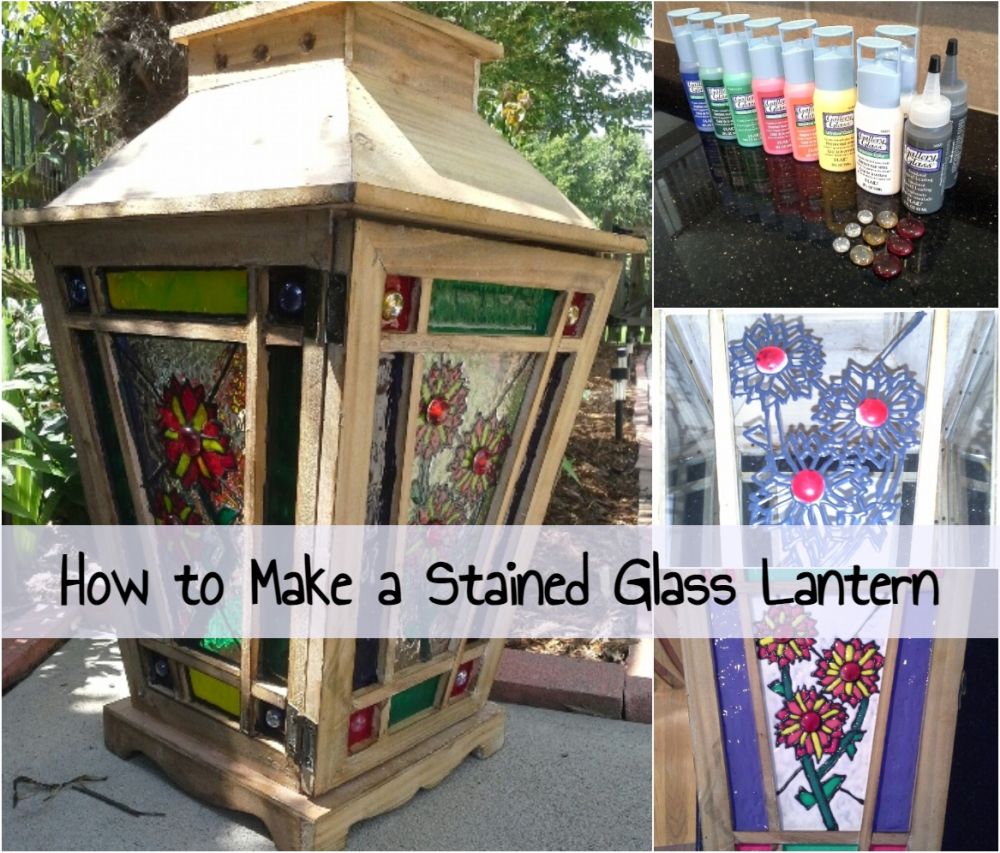
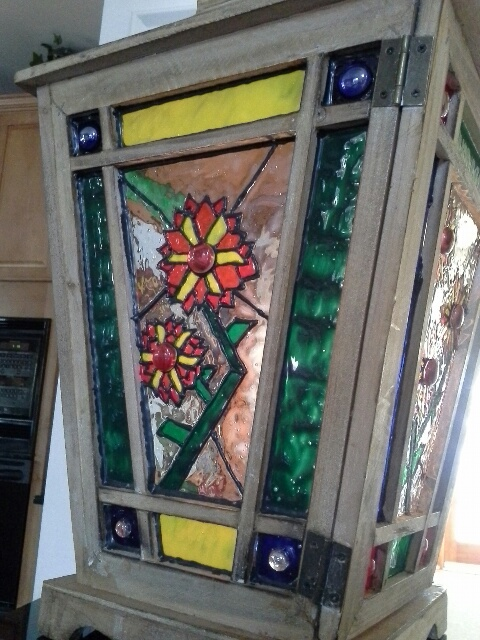
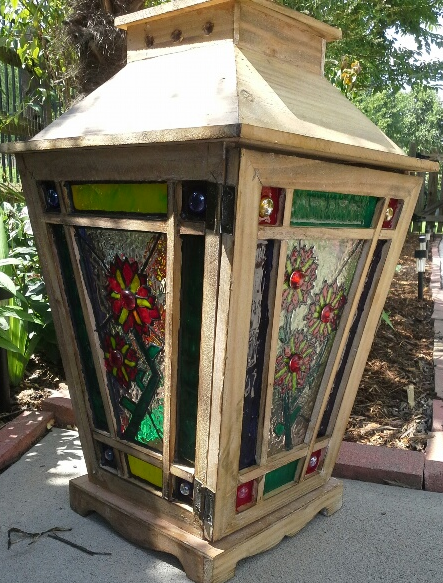
A stained glass lantern is a decorative lighting fixture that combines the intricate art of stained glass with the functionality of a lantern. It typically consists of a lantern frame with multiple panels made of colored and textured glass pieces joined together in a specific design or pattern. When illuminated, the light source within the lantern shines through the stained glass, creating a warm, inviting atmosphere. Stained glass lanterns can be used as focal points in interior design or as outdoor accents, adding a touch of elegance to any space.
In this guide, we will walk you through the process of creating a stained glass lantern: gather your tools and materials, prepare the glass lantern and choose your design, pick the stained glass colors, apply the lead lines, add decorative gems, color the design, and let it dry.
1. Gather your materials and tools
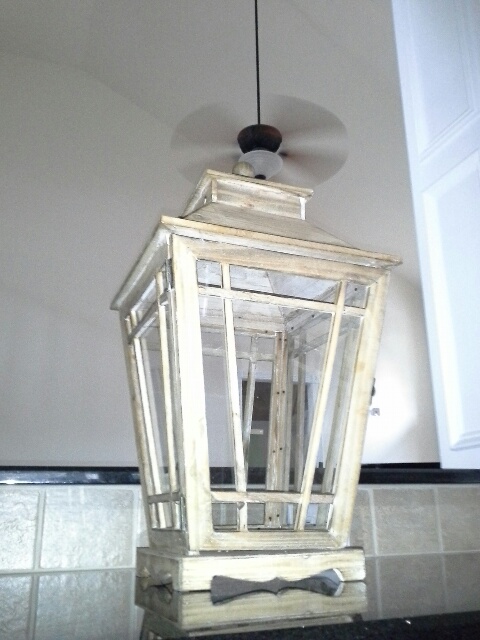
- Plain glass lantern
- Drawing paper
- Tracing wheel or another tool for tracing
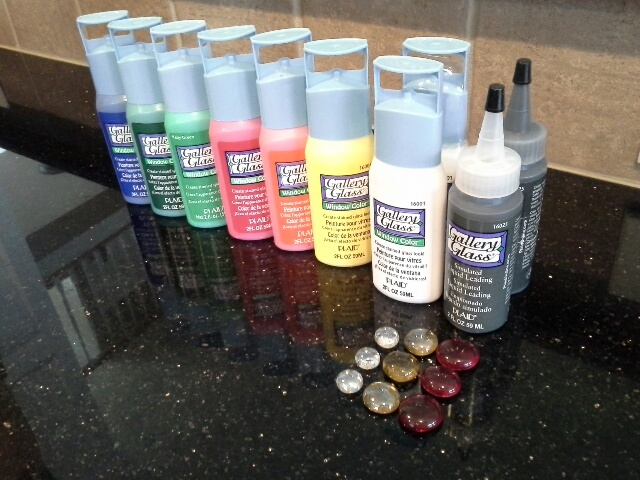
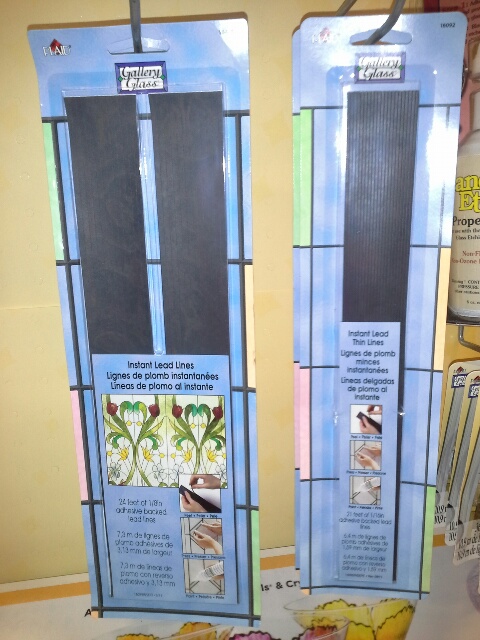
- Plaid’s Gallery Glass products (colors, liquid leading, ready lead lines)
- Tape
- Wax paper (optional)
- Gems
- Chopstick or another tool for creating texture
2. Prepare the glass lantern and choose your design
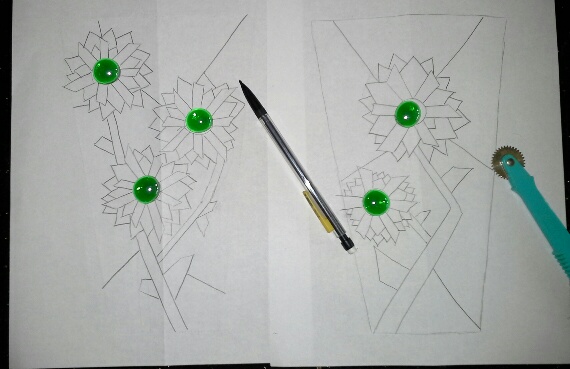
Before you start, ensure that the glass lantern is clean and dry.
Tracing the design area on drawing paper will help you create a template for your artwork. Place the paper over the glass lantern and use a tracing wheel or another tool to outline the area where your design will go.
3. Pick the stained glass colors
Once you have a template for your design, choose the colors you want to incorporate. Plaid’s Gallery Glass products offer a wide range of colors and the option to use either liquid leading or ready lead lines. Consider the overall aesthetic you want to achieve before making a decision.
4. Apply the lead lines

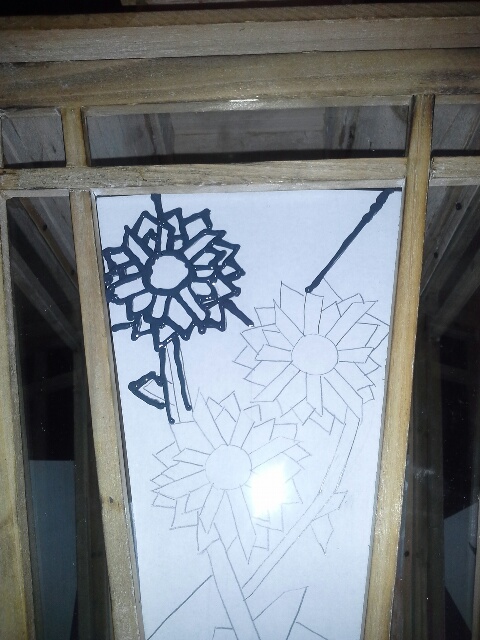
With your design and colors chosen, tape the design template to the underside of the glass lantern. Begin to apply the lead lines, using the design beneath as your guide. The consistency of the liquid leading is similar to glue, so practice on a piece of wax paper if needed. Allow the liquid lead lines to dry for 24 hours or start adding color immediately if using ready lead lines.
5. Add decorative gems
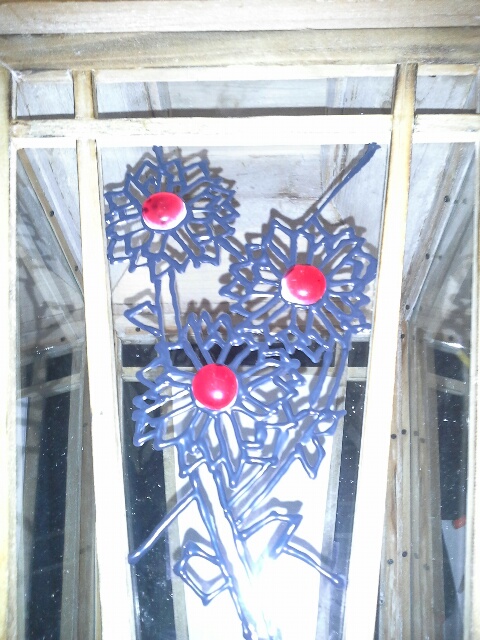
To enhance the visual appeal of your lantern, consider adding decorative gems. Apply a small dot of clear gallery glass to the bottom of each gem and press them gently onto the glass. The clear gallery glass will not affect the gem’s color once dried.
6. Color the design
After the leading has dried, apply color within the lead lines. To avoid colors running into one another, be careful not to oversaturate the areas. Create texture in larger sections by applying the color in a swirled or zigzag pattern, using a chopstick or another tool.
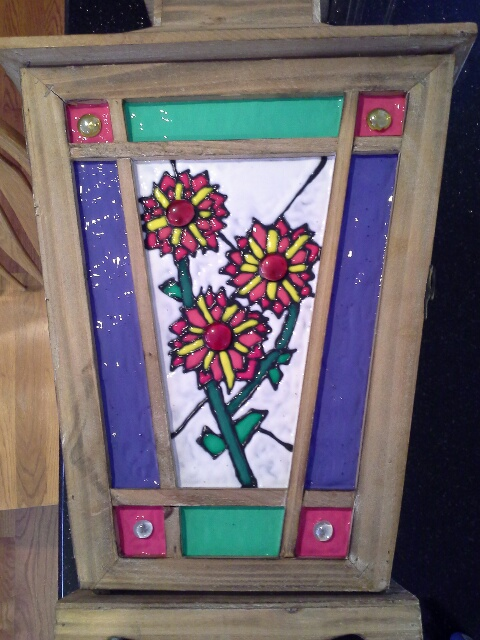
7. Let it dry
As you complete your stained glass lantern, ensure that you have allowed adequate drying times for both the lead lines and colors. This is particularly important in humid climates, where drying may take longer.
Learn more about the history of stained glass windows.
Great job and it looks like real stained glass! Love it- xo Diana
That is so awesome looking!!!
xo Kris
Oh wow! What a great job Natalie. Nice project and a wonderful tutorial. It’s so neat how you can just customize it too!! Super versatile technique. Thanks for sharing 🙂
hats off !!!
This is wow….
So sweet! Love the way this looks, especially in the outdoor light.
Just gorgeous!! I love that.
I also love that pear project from yesterday and plan to try it.
Oh, the plans I have. The fact that they generally stay in the planning stage should not be held against me.
HI Debbie Dear! Oh, your friend is good. Isn’t this pretty! Hope you’re doing well.
be a sweetie,
Shelia 😉
This turned out great and what a process! The end result was definitely because the whole thing was so well planned. Thank you Natalie!
Wow! This is so cool! I love it.. Amazing job!
Wow that’s amazing!!! She did a fantastic job!
I love it..great job Natalie,Thank you.
This is AMAZING!!! It looks like it was actually bought that way. Had I not seen the pictures I don’t think I would believe you did it yourself. FANTASTIC job!!! It’s Beautiful!
wow Debbie….you are a true artist..that looks like it was a lot of work. Great job!!!
Thank you so much for the tutorial, Kim will want to do this.
Have a great weekend, Ginger