
How to Stencil on furniture.
Oh how I love theeee!
Love thee what you ask?
I love to stencil…you know that already if you are a regular.
But I truly love to stencil on furniture and am going to share with you my recent project and some tips and tricks.
The best part about stenciling, is it really takes not much of your time at all.
When cutting edge offered my readers and I stencil credit of 75.00, you bet I was all over that.
Cutting edge has a gorgeous selection.
The quality of their stencils are remarkable.
Believe me I would know, I have used A LOT of stencils.
In fact you may see my ceiling medallion that I did a year ago…
That too came from Cutting edge
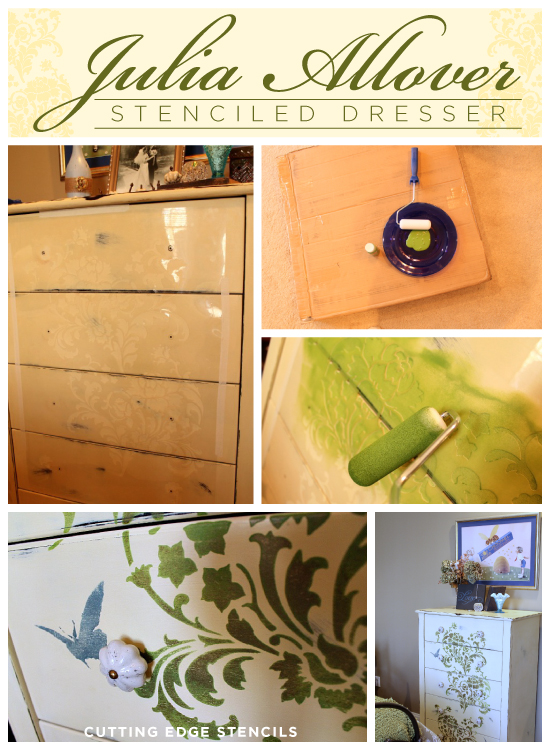
This is real life stenciling here, so the next few pictures are nothing fancy.
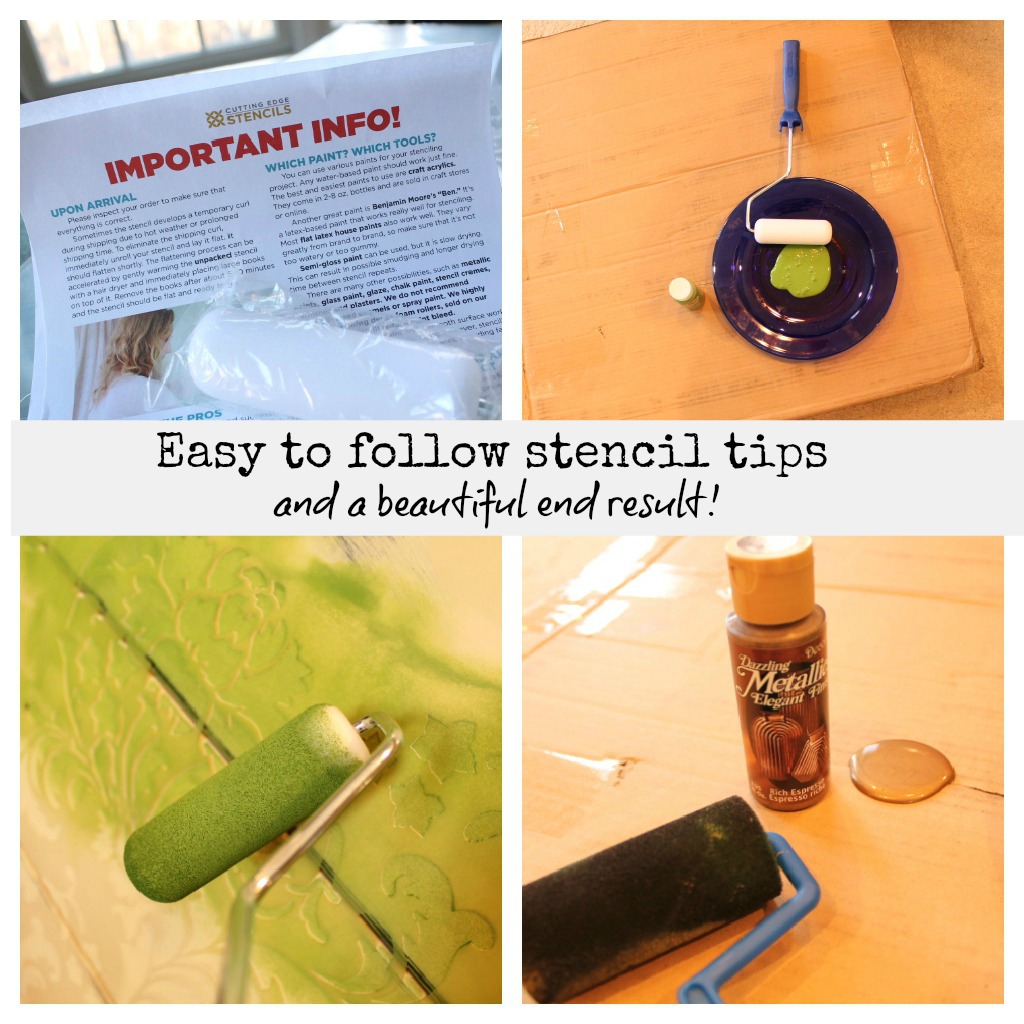
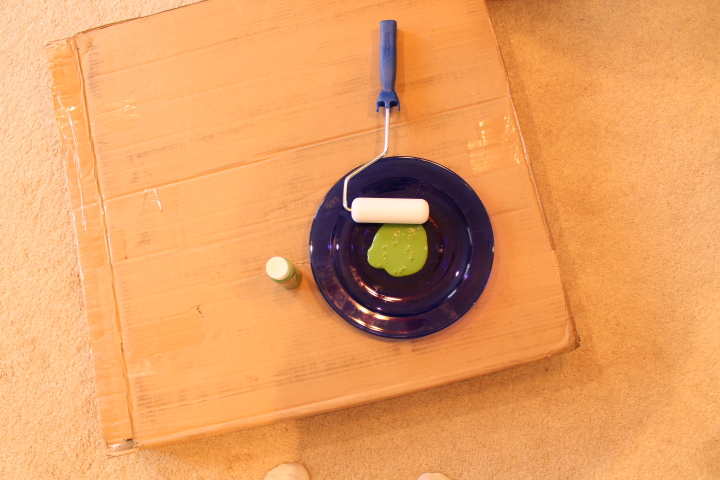
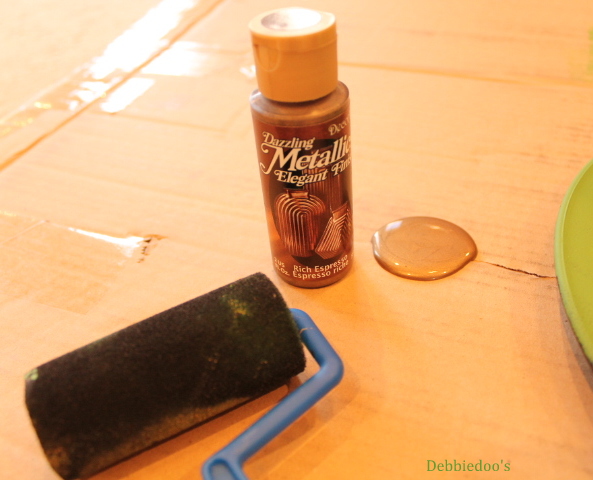
I have this old plate that I like to use for my acrylic craft paints.
You receive some pretty detailed instructions with your stencil and they do recommend paints to use.
This is sort of hard to tell, but my specific stencil came in a large sheet, along with a level.
Because I was NOT using this on the wall, I did not use the level.
I would recommend the level when stenciling on the wall.
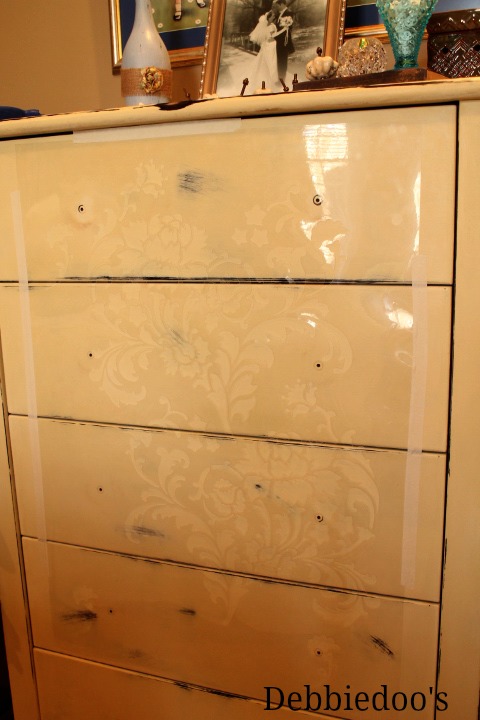
I used stencil tape on each side, top and bottom to keep it in place.

The key to stenciling, is NOT to over saturate your roller, sponge or brush that you are using.
It is always better to use too little,
than too much.
If you use too much paint, it will bleed
and you will not have that professional hand painted
artist look that you should have when
your project is complete.
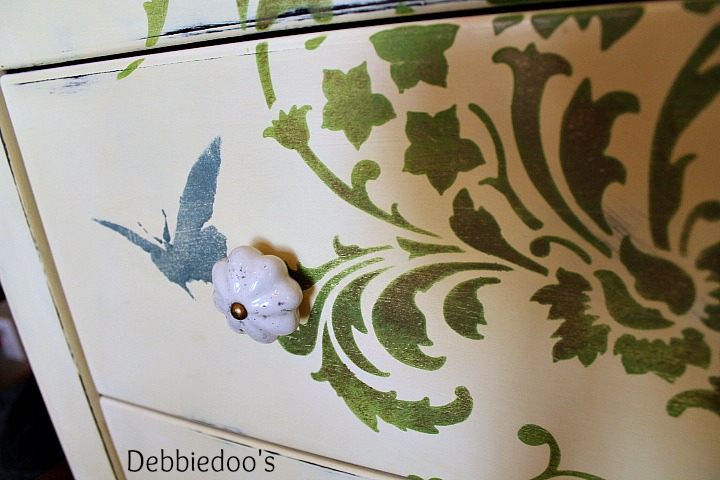
As you can see
I have NO bleeding at all
a perfect smooth edge.
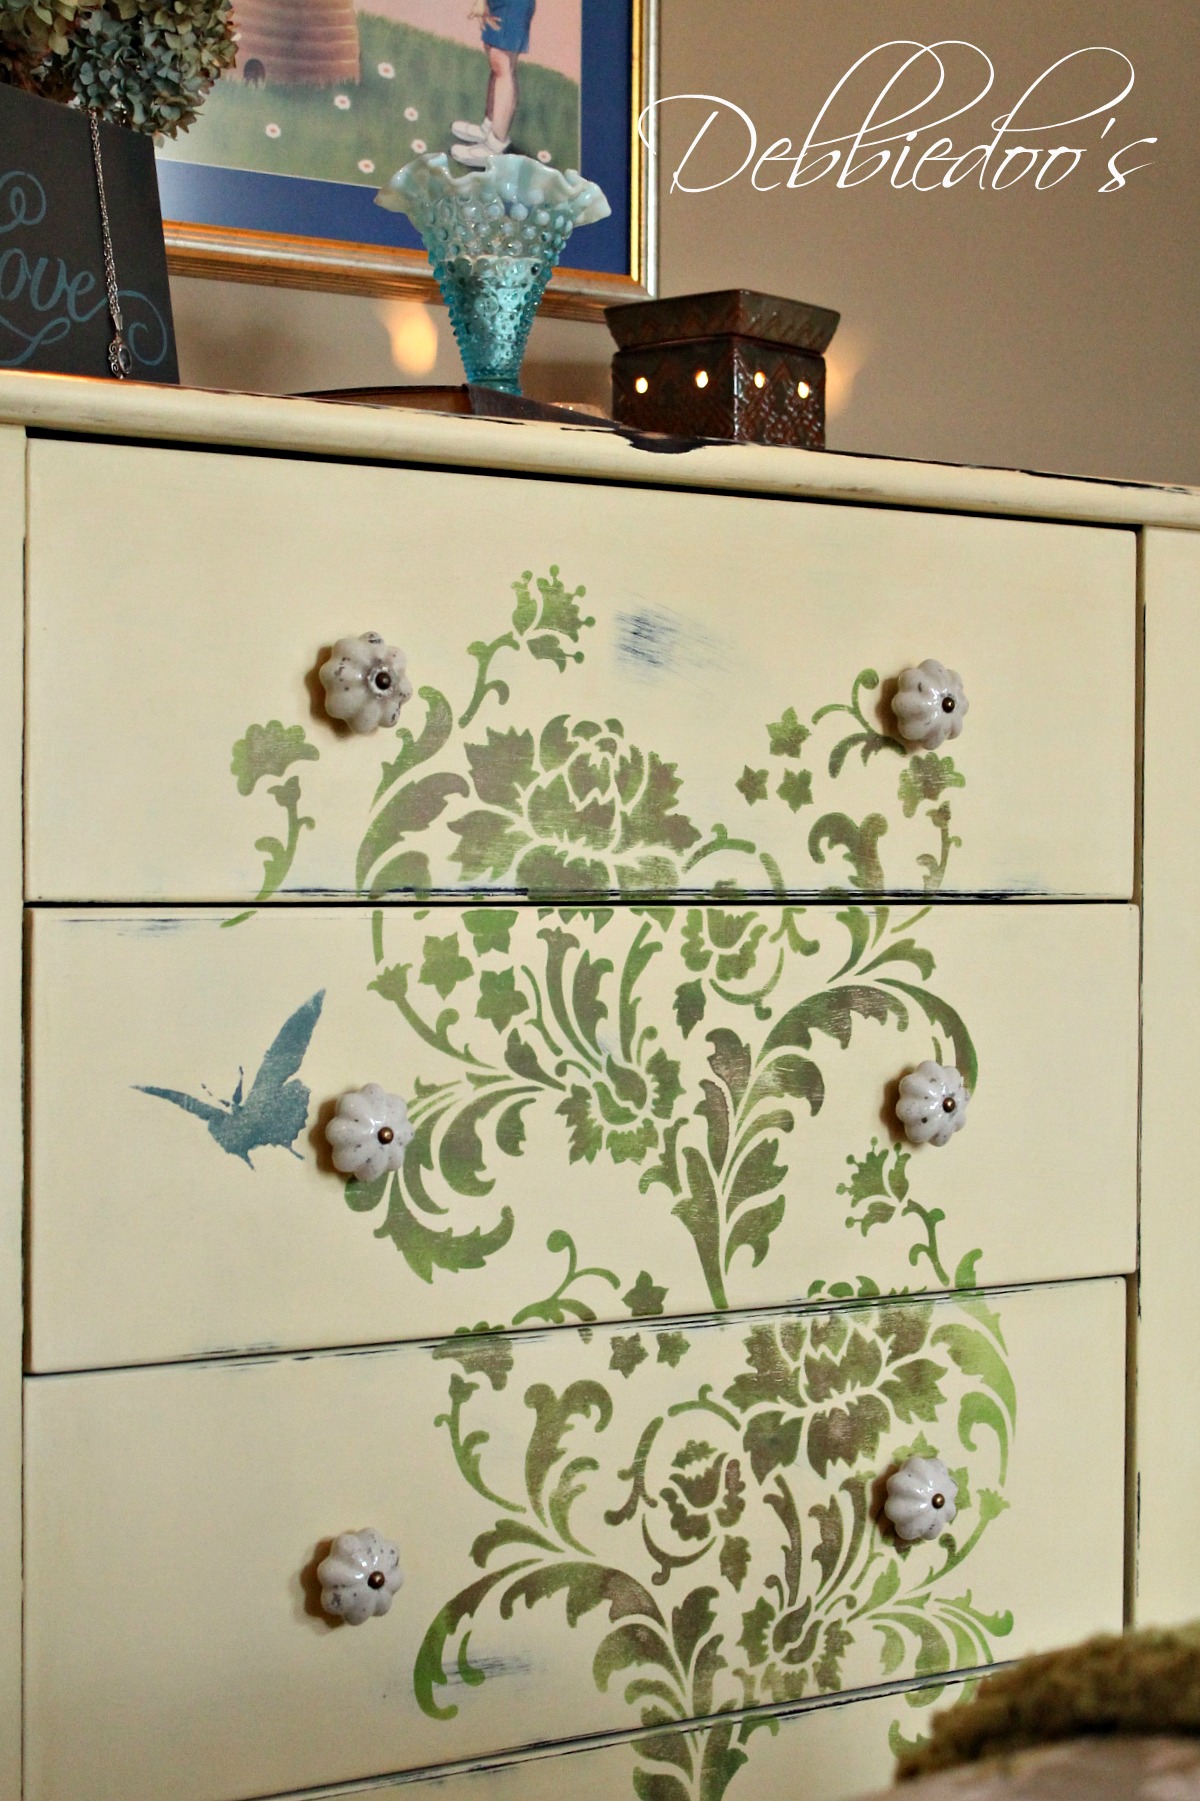
This stencil also came with a small cut out butterfly
You can randomly place the butterfly in between the beautiful scrolls and flowers.
I used two colors on my stencil
First the green
with using it’s own individual roller.
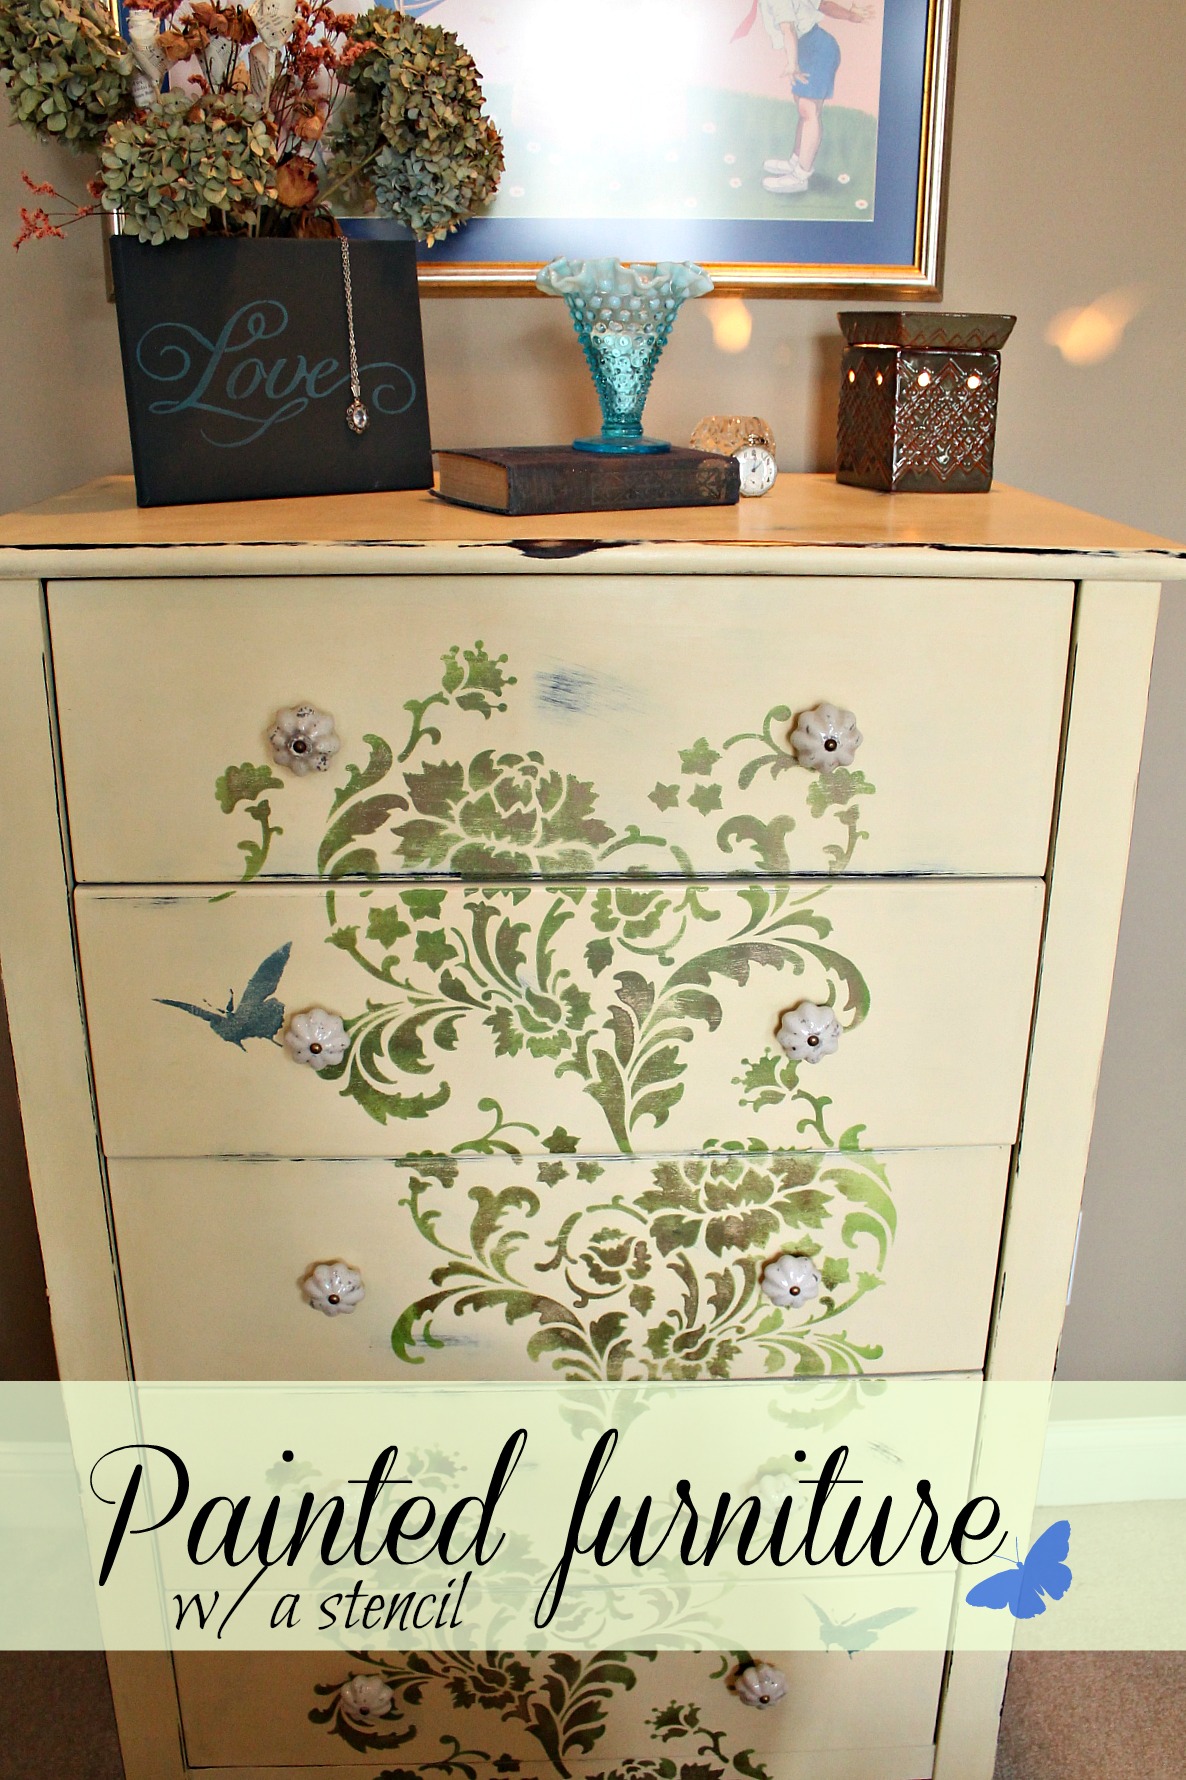
Then I used this espresso color using another roller I had from previous stencil job.
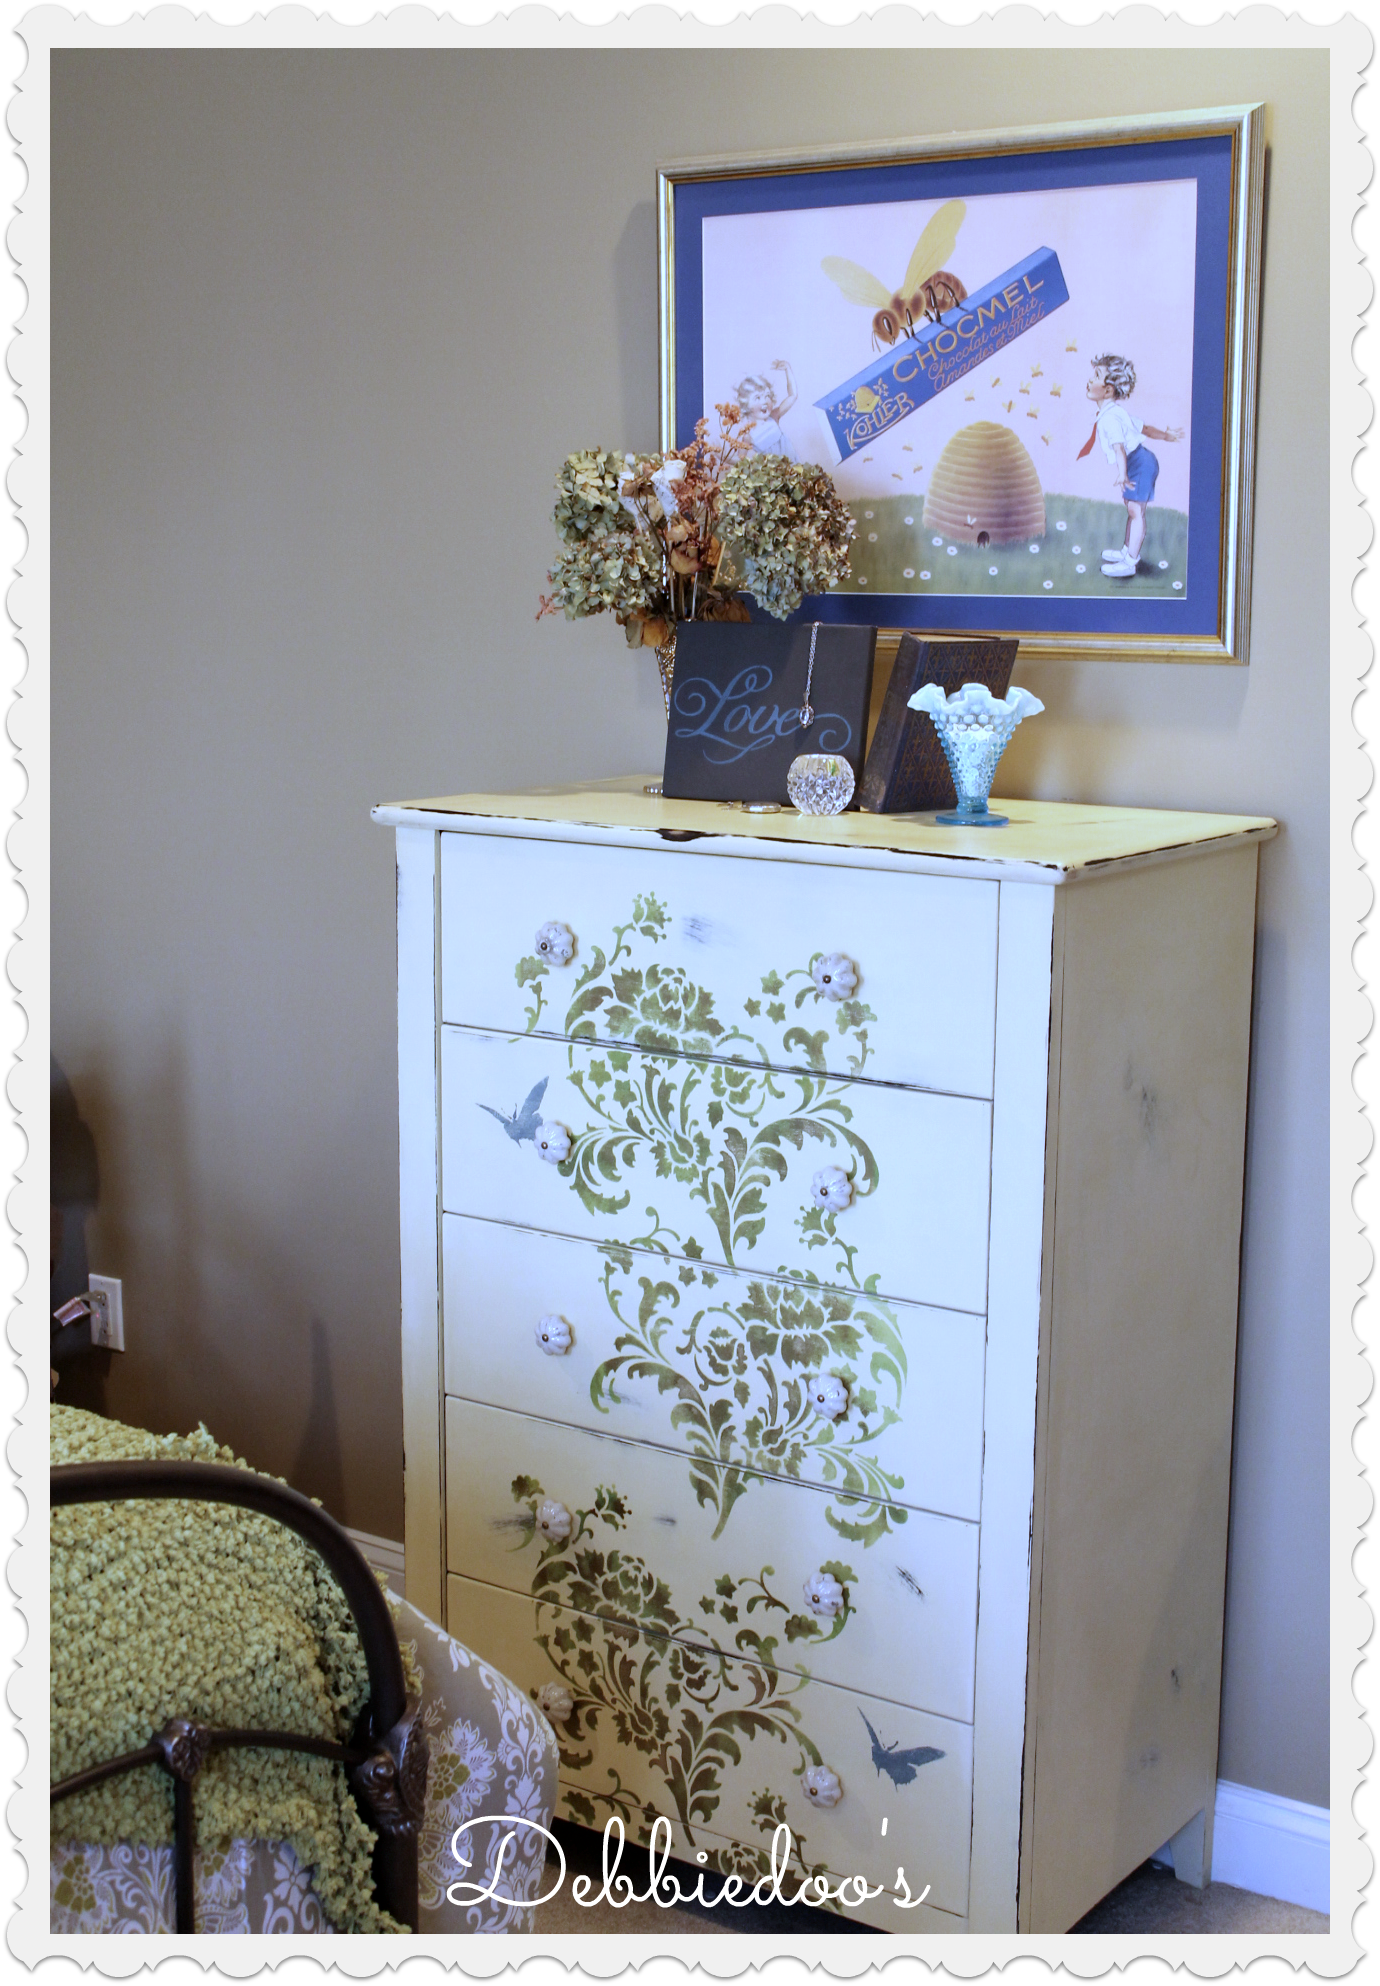
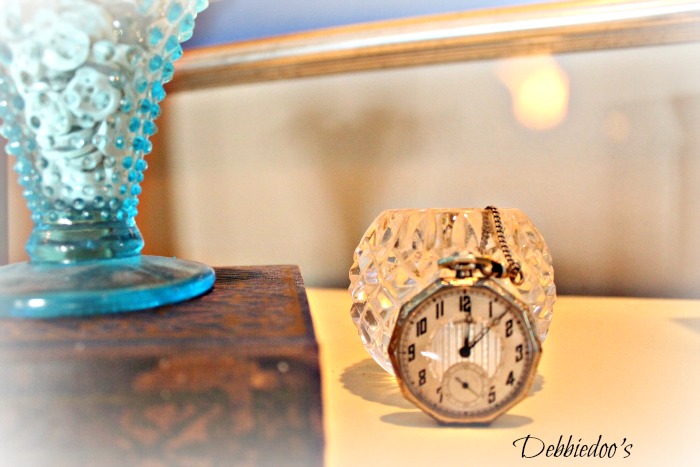
I will show you more of our Spring Bedroom soon.
Check out my Stenciling gallery while you are here!
Speaking of stencils! I have created my very own exclusive stencil line.
Thank you for your visit today!
I share all things, thrifty home decor, crafts and a recipe or two on occasion.
If you would like to commit to becoming a subscriber, I would love for you to join me.
Wow, your dresser is so pretty, Debbie- I love it and I love CE Stencils, my favorite!
Love it Debbie!
iam in love with the dresser love the colors you used .Those stencils are amazing 🙂
I’ve used a Cutting Edge stencil on a wall before, but never on furniture! What a great idea and yours turned out fabulously!
Debbie,
Your chest looks great…well you must know that you are the stencil queen!!!
Blessings,
Linda
I love this idea! I have always wanted this look but do not have the artistic ability! Such a great way to get the look! XOXO!
Very pretty, Debbie! Love the colors!!!
The dresser looks so pretty. I love the design and the layered color. Great job!
Your dresser turn out really nice.. Thank you for showing
us this Stencil page.. I’ve been wanting to do a floor rug
under my dining room table, the stains are getting out
of hand and not cleaning properly… I did find the perfect
stencil and will send away for it.. but first I entered your
giveaway with hopes of getting it for free… big smile here!
Thanks again
Sandy
Looks great Miss Deb! What did you say the name of the stencil was? I think I missed that somewhere.
Love it, Debbie! I’ve used their stencils as well {my bathroom wall for one}. I love the level, which I used on my bathroom stencil project.
Wow, it’s beautiful! You’ve gotten my painter creative juices flowing with this post. Thanks for sharing. 🙂
Wow Debbie the dresser came out beautiful. What an amazing transformation. Now that little dresser has such big personality. Love it.
Kris
Wow….this turned out fabulous! Love the blue butterfly touch!
The colors you used look most excellent with the green bed throw I can see a smidge of. When I was young, you know back before the dawn of time, I used to stencil often but they only came in little hard to work with sizes. I am happy stencils have evolved.
Bliss
Character and personality…I love your dresser, the stenciling was the perfect added touch! 🙂
The dresser is incredibly beautiful, I would love to learn to stencil
That Dresser Looks Beautiful, and you made it look so Easy
Lisa
Absolutely beautiful! I love the way you blended a few different colors…just gorgeous!
The dresser turned out spectacular!!….You make it look so easy!….I just love the pattern and color..and love how you layered the colors!…A real beauty Debbie!!
Love that stencil on the dresser and using two colors really enhances it. Never thought of using two colors.
Thanks for sharing. I have one of their stencils and would love to have others.
Blessings,
Audrey Z. @ Timeless Treasures
Love the dresser Debbie! The layering of the colors takes this to another level. Great job!
I have a table I’m been wanting to stencil. I think I’m finally ready. Love your two color idea as well.
Love the inspiration. Thank you.
I love stenciling, too, and yours turned out fabulous! I love the little butterflies added, so cute. I really have to get some of their stencils, they are so awesome!
I have a question, in your post you say ‘The stencil I used is called’ but the name of it is missing.
Debbie 🙂
I just added it Debbie, I had forgotten the name and meant to go back….it is there now:)
Heading out to the barn for that old dresser now. LOVE this and the instructions are great.
Debbie that dresser looks AMAZING!!!
I haven’t commented in a while but I do still read, ha!! I love the stenciling on the dresser. Beautiful. Also, I want to say how much I’ve enjoyed all your pictures from Ireland. Your boys are getting so big, I can hardly believe it.
I ‘pinned’ this a while back and I’m sooo excited I just found it in my Pinterest file ‘Home Decor” because i want to stencil 1. a bathroom which I’ve try to do in a ‘turn of the century (20th) French style and 2..a piece of furniture I want to put in my dining room ’cause I want to change to a Shabby-Chic look. And also glad you gave us the name of a good stencil company. The craft stores don’t seem of sell a lot of stencils lately. Also – I ALWAYS put on too much paint. Luckily it’s always looked really nice…. but I’ll remember your advice!!
Great! Enjoy and best of luck.
Hi – I’m new at stenciling and I’ve stenciled an old pie safe. Would you please be so kind to tell me how to clean up my stencil bleed? I don’t have a lot, but enough for me to think I need to clean it up.
Thank you so much
Kathy you can take a light grit sand paper and go over the work. That usually cleans it up. Or you can take a small razor and go around the edges a bit.
Are you aware your link to your stencils is incorrectly formatted?
It’s in as http://www.https//www.debbie-debbiedoos.com/home-decor-projects-using-stencils/.com.
IOW, it has an extra www. in the beginning, which makes it a dead link.
There aren’t many who know how, or will take the time to figure this out.
I, however, am a determined soul.
Just thought you would want the link to work.
Thanks for the years of hard work you share!
Thank you so much. I fixed it. I appreciate you letting me know.