
Hey, hey there everyone!
Pretty excited to share with you my new Tulip for your home line of Stencils, accessories and more.
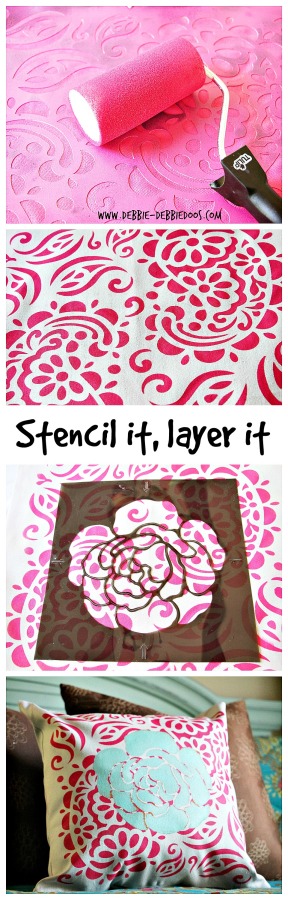
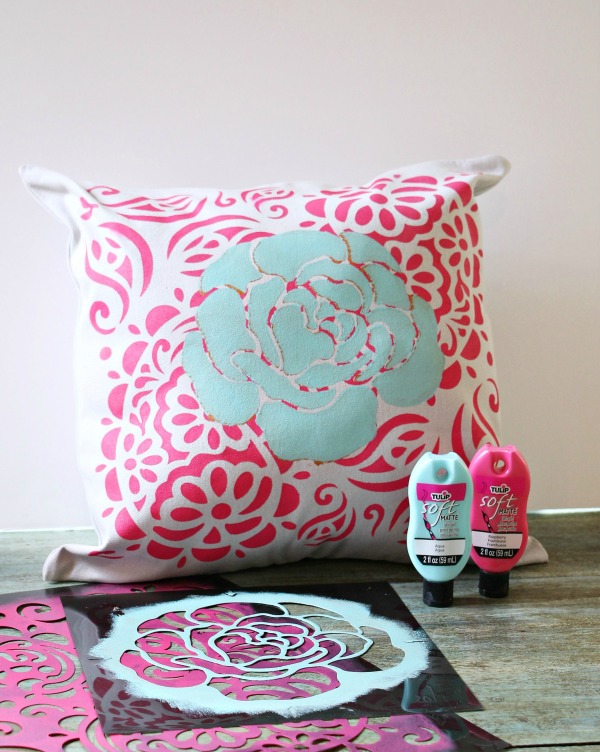
I made the cutest Spring/Summer pillow for our guest room.
You already know I am no stranger to stencils, or making pillows for that matter.
I have to say though a few of the things I am sharing today are new to me.
Just when you think you saw it all!
I can’t recall ever layering stencils or even using Stencil adhesive.
I usually hold it down or just use painters tape. No more of that nonsense. I’m a professional now {wink}
I loved the stencil adhesive.
So easy and stayed in place perfectly. Tulip for your home is a new line of stencils, supplies and paints you certainly will have fun playing with. In fact, while doing this project I was thinking about other projects I want to do next.
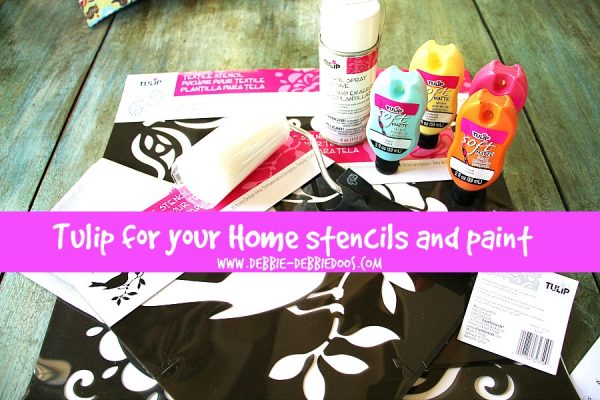
The colors I chose were Raspberry and Aqua

This is the adhesive I mentioned. Spray the adhesive on the matte side of the stencil, and apply paint to the shiny side of stencil using a roller.
Remember just to finely mist the spray adhesive, and let it dry a minute then proceed to press onto the pillow cover.
First, I used the pillow insert that came along with my supplies. You can find pillow inserts now at any craft place. I then slipped inside the insert a piece of wax paper so the paint did not bleed through. You can use tin foil as well.
Second, I sprayed the back of the stencil with Tulip Stencil spray adhesive. {See above instructions}
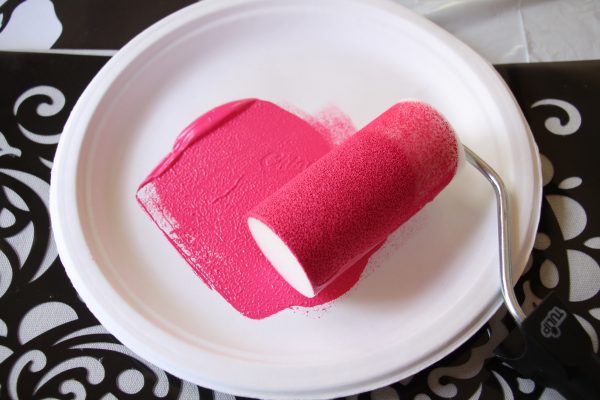
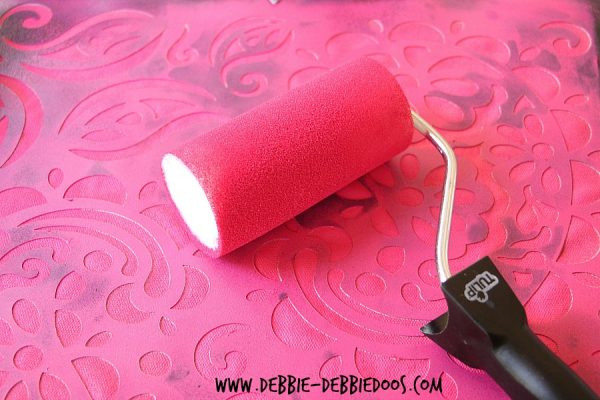
I like to use a paper plate to put my paints on and roll the sponger roller as shown.

After rolling evenly I revealed the first design and let it dry thoroughly before applying my second motif stencil.
Less is more when painting stencils. Be sure your roller is NOT over saturated with paint using very little paint. It is good to let paint completely dry before peeling back stencil.
It does not take long.

Applying the same technique I used for the base stencil I did the same for the layered flower on top of my paisley design.
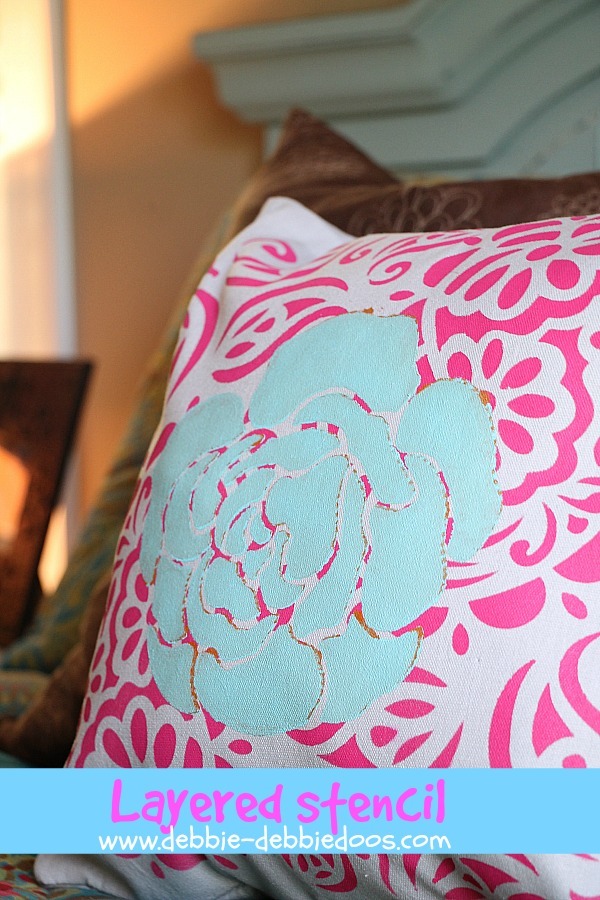
Absolutely gorgeous! As I said this was a first for me layering and I love it!
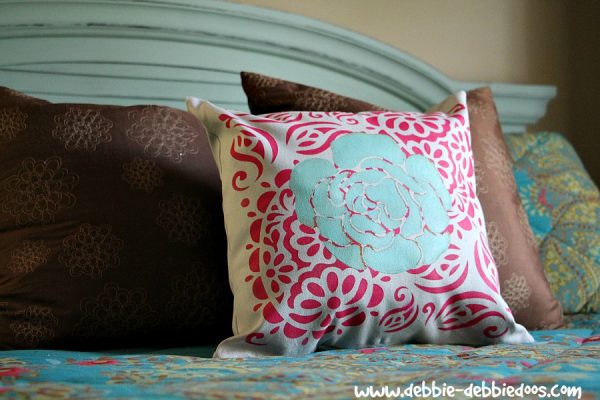
It coordinates with my current bedding and will be my Spring and summer look.
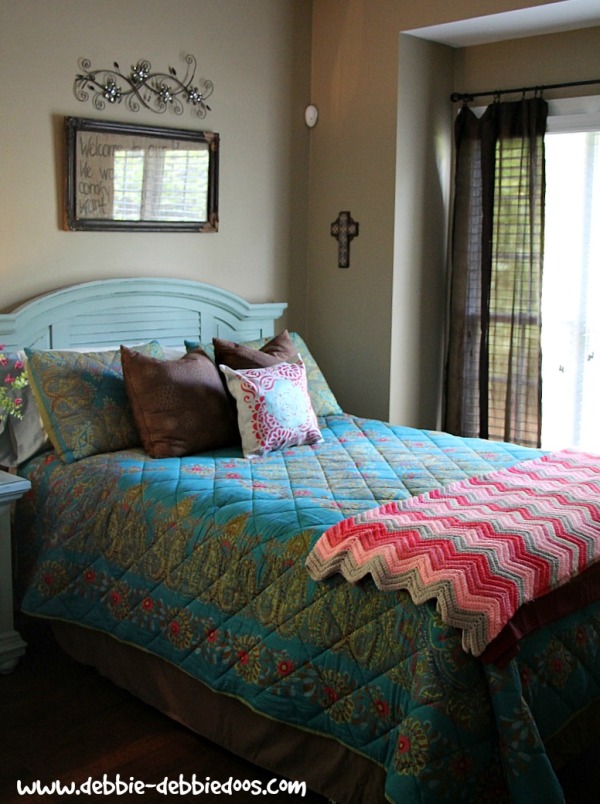
I also found my grandmothers crocheted blanket and layered the bed with that as well.
Been a long time since I have seen that blanket. I was cleaning out my closets and ran across it. What fond memories I have of this here blankie.
I will enjoy seeing it every day along with my new pillow.
Happy Creating!
And please do check out the other awesome creations below!
Thank you so much for visiting with me today.
If you are new here, welcome! I am also very excited to share my new stencil line with you.

[envira-gallery id=”32693″]
Sign up today and receive a few freebies. 12 months of seasonal printable art.

If you would like to commit to becoming a subscriber, I would love for you to join me.
Check out my stencil gallery of ideas while you are here.
Love The Pillow Debbie
I have never heard of stencil adhesive before, what a great tip. It’s so hard to keep them in place. Your pillow turned out perfect 🙂
Your pillow turned out fabulous Debbie…cute cute cute!!
i love this idea so cute and the colors are great ,wow what a supprise to see Grandmas blankie and the pink in it goes perfect 🙂
This is adorable…the stencil adhesive is amazing. I have used it before and it makes the job so much easier!
SO cute, Debbie! I love the colors you chose and how you can make it to match your personality and decor! FUN!
Your cushion is lovely, the rapberry and aqua colours go together perfectly. Well done on finding your Grandma’s Blanket, how fabulous to find such a gem. Have a great weekend.
Very cool Debbie, I was happy to see you are feeling better on FB!
Cynthia
I would never have thought of layering stencils, but wow, I love the way it looks! So many options, this opens up a whole new way to paint.
Debbie 🙂
Oh my Debbie, this is awesome! I have never heard of this product, your pillow looks like it was professionally done, love this!!
XO
Kristin
I love those stencils and the colors you chose Debbie! Gorgeous!
Gorgeous pillow Debbie. What kind of fabric did you use for pillow cover? I Love the doubled stencil on cover, it’s gorgeous. I saw that technique years ago, glad to see it’s been brought back. Now if I can find that paint, the stencil adhesive and the stencils. It’s hard to find things in Grand Junction, they’re not quick to get new products here. Hope I can find them. Maybe I’ll do a search to see.
I’m in mood to make some new pillow covers, mostly using drop cloth, so would love to try this. We’re reformulating our color pallet due to some lovely gray background with white design curtains. Painting walls a light gray, love curtains, so fresh and bright in our living room that tends to be dark. Love all your projects and your blog.
You and your hubs make a handsome couple. Happy weekend
I saw them at Walmart the other day:) You can check there.
The fabric is just a pillow insert. You can certainly use drop cloth and that will turn out excellent too! I have stenciled many times on drop cloth and it works out well. Enjoy!
I love that you have so much color in your home. Gives everything a happy look.
Thanks Lori! I didn’t hop on that white wagon like so many have in the past two years. Looks gorgeous in their homes but not mine:)
Gotta get some of that stencil adhesive! I am just about to stencil the back of a big hutch and this will certainly come in handy! What a great pillow, Debbie! So pretty! LOVE your choice of stencils!
This is gorgeous! My head is full of ideas, thanks to your great post… can’t wait to buy these products!
Your pillow is gorgeous! I love the color combination.
I love it, Debbie … so colorful … love the layering … and, it looks perfect in your happy and beautiful guest room!
Hi Debbie,
Love your work.
I too love paisley! I know you said you had the stencil, but…. Do you remember where it’s from. I am an American now living in Melbourne Australia. They sure don’t craft here the way we do in the US.
I an struggling to find something just like your pattern. Email me if you have any tips on locating a good online stencil shop. Silly thing is some do not ship overseas!
Kindly, Bernadette