
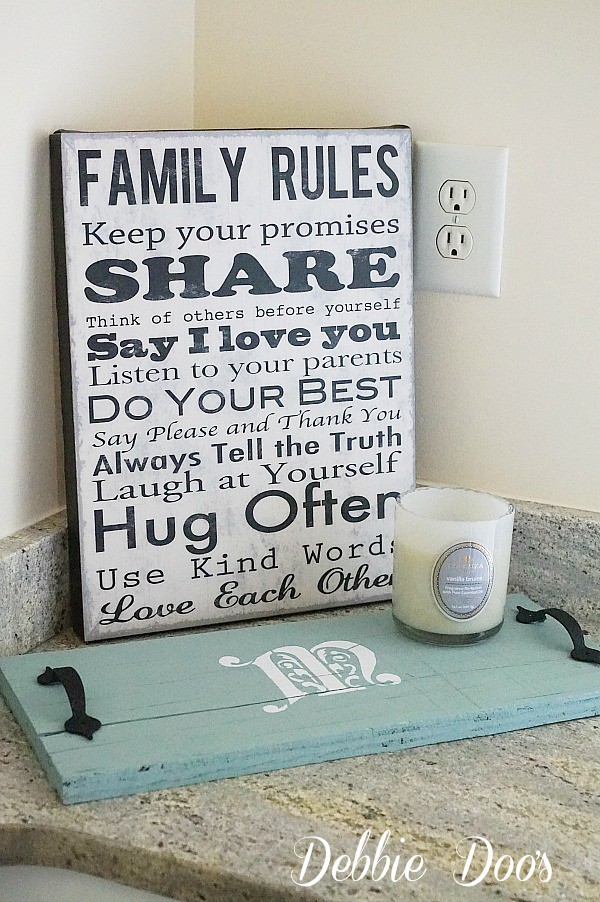
A DIY bathroom vanity tray is a fun and practical project that makes your bathroom feel more personal. It’s also a thoughtful gift for family and friends, especially for a housewarming. Read on to discover how to make a custom bathroom vanity tray.
1. Gather your materials
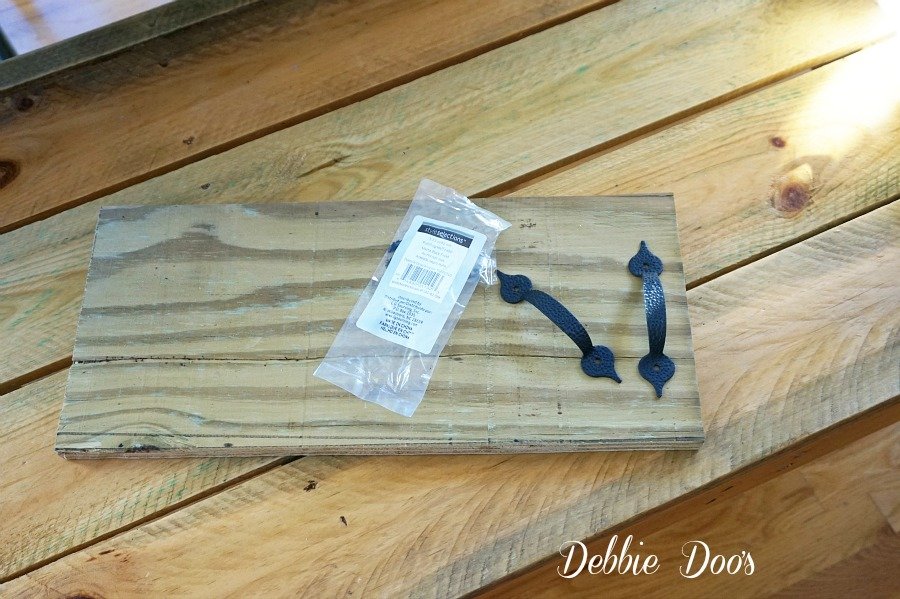
- A piece of scrapwood. It should be large enough to hold all your bathroom essentials without taking up too much space on your vanity. I used a leftover scrap from the industrial bakers rack.
- Two metallic handles or wood knobs. They’re functional and add a touch of sophistication to your vanity tray. Choose ones that match your bathroom fixtures and overall decor. If using wood knobs, you can paint and simply hot glue them to the scrap wood.
- Wood paint for the vanity tray. It should suit your bathroom decor.
- Paintbrush.
- Stencil. I used a monogram.
- Acrylic paint for the stencil. It should contrast the wood paint.
- Hammer or screwdriver.
- Sandpaper.
- Painter’s tape.
- Wood glue if you’re using wood knobs.
- Rag for making a distressed look (optional).
2. Prepare the scrapwood
Get ready to paint the scrapwood by thoroughly cleaning it to remove any dust or grime. Then lightly sand the scrapwood to create a smooth surface for painting.
3. Paint the vanity tray
Apply a coat of paint on the scrapwood using even strokes. Wait for the paint to completely dry before adding a new coat. Otherwise, you can create a distressed look by using a rag to lightly wipe the coat of paint before it dries out completely.
4. Add the stencil design
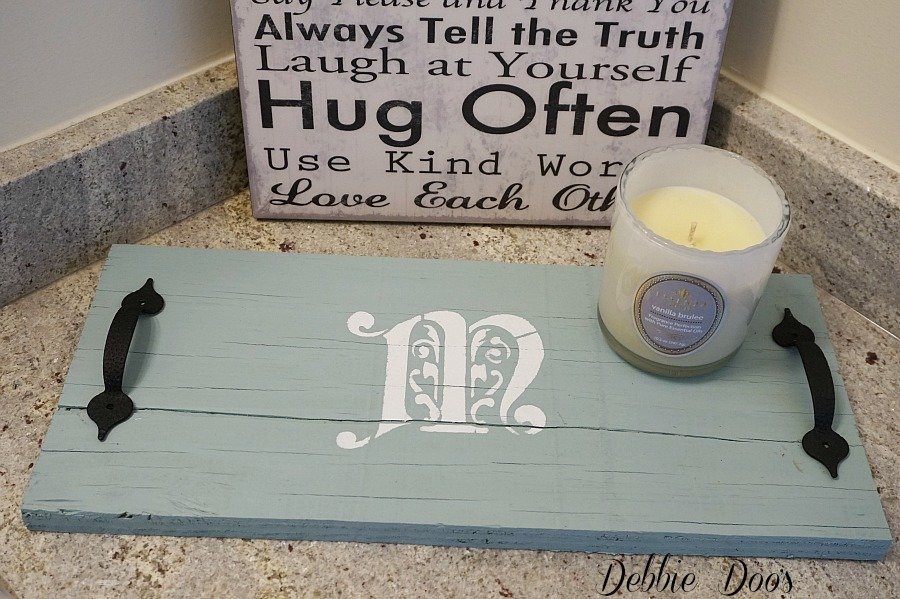
Once the painted wood is completely dry, it’s time to add the stencil. Place the stencil on the wood and use painter’s tape to keep it steady. Next, use acrylic paint to fill it in. When you finish, gently remove the stencil and allow the design to dry.
5. Add handles to the vanity tray
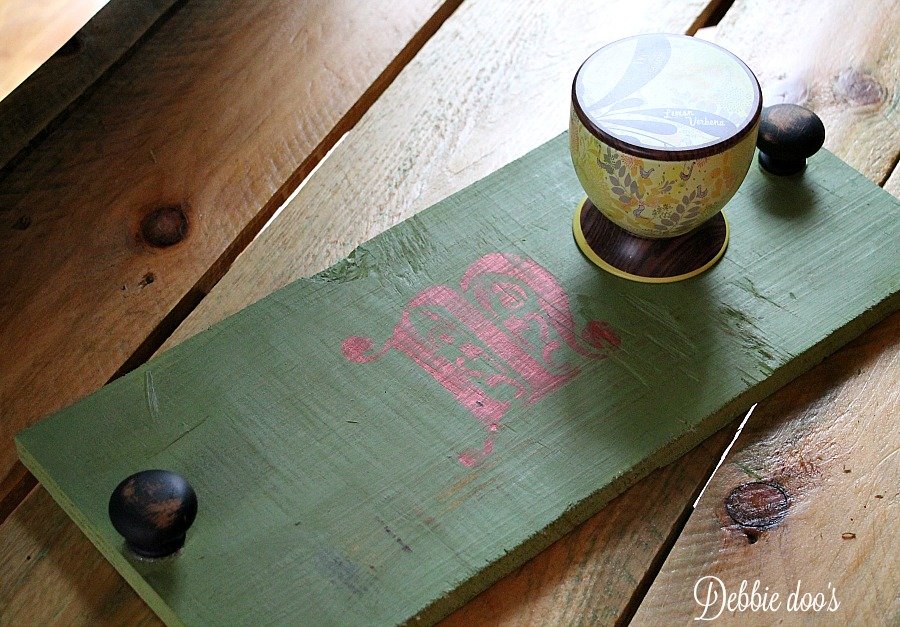
To install metallic handles, mark their position on the wood and use a hammer or screwdriver to secure them in place using the nails or screws they came with. If using wood handles, attach them to the vanity tray using wood glue and apply pressure for 5-10 seconds.
6. Make final touches
After installing the handles, examine your vanity tray for any imperfections. For example, touch up any areas where the paint or stencil design may need improvement, then allow your vanity tray to dry fully before using it.

Your newly created bathroom vanity tray is now ready for use. It can hold items like cosmetics, perfumes, or other bathroom essentials, providing a neat and organized look. Remember to clean it regularly to keep it beautiful and durable. If you’re making several vanity trays for yourself or gifts, consider different styles so each tray will be unique.
Love these! It’s too late for this year but will definitely make some for personal gifts next year. In the mean time, I’ll make some for myself. 🙂 Thanks Debbie!
For sure! Don’t forget housewarming, birthday or just because gift ideas! Thanks Regina.
Love it, Debbie! Several years ago I used barn wood and handles and use it as a tray of sorts on my dining room table. BUT, I never thought of a stencil! My brain is certainly churning out ideas right now! As always, thanks for the inspiration! Merry Christmas to you and your guys!
Awesome Judy! So happy to inspire you!
i am definitely doing these for birthdays this year! thanks
Awesome! Have fun creating them. You will love it.
Thank you Debbie! This is absolutely something I can use for myself and gifting. I have everything I need. I tend to fish out of the trash can any wood that my husband has leftover from his projects (he is not a saver at all) anyway, I retrieve them and whisk them away to stash under my workbench in the basement. I have the hardware and stencils (novel idea), paint and sealer. Gifts are bought and wrapped, baking done and frozen so I can make something this for me tomorrow. Love it!
That is awesome! I am so glad you have everything you need too on hand. That is the secret to crafting and creating. It is so much easier when you can grab the goodies and get started. I would love to see your project when finished. Please snap me a photo. Thanks! Merry Christmas.