
Hi there everyone!
You may recall a few weeks ago I talked about a home improvement idea in the kitchen, and even shared some pretty examples of kitchens with fauxwood beams.
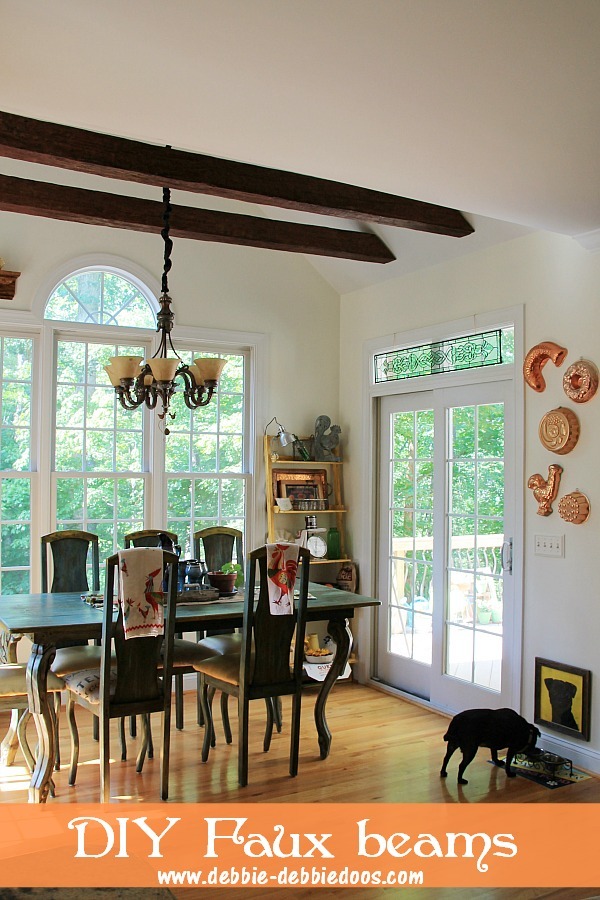
I am NOW so excited to show you our diy Faux wood beams in the Kitchen project.
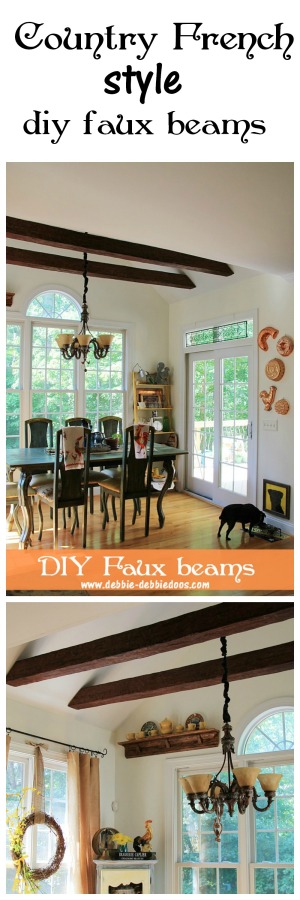
If you have a room in your house that you’d like to add a little character to it…maybe make it look a little beefier. Adding some wood beams just like these is a good way to do it. Now, you can buy real wood beams OR you can use the faux wood. They’re much lighter — much less expensive.
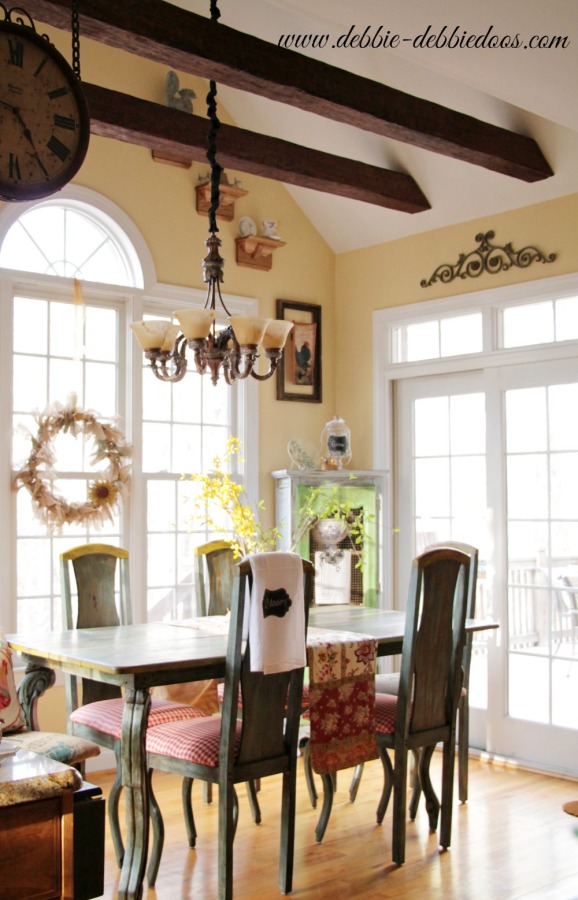
Just the right finishing touch in our Rustic Country Kitchen.
I would like to take credit for the diy part, however, I owe it all to my husband on this one.
I did hand him a tool or two but that was about it.
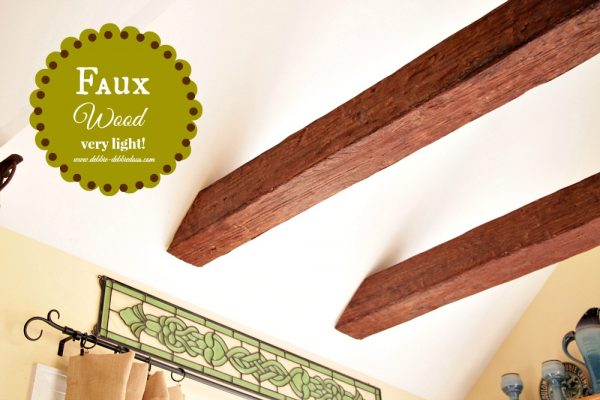
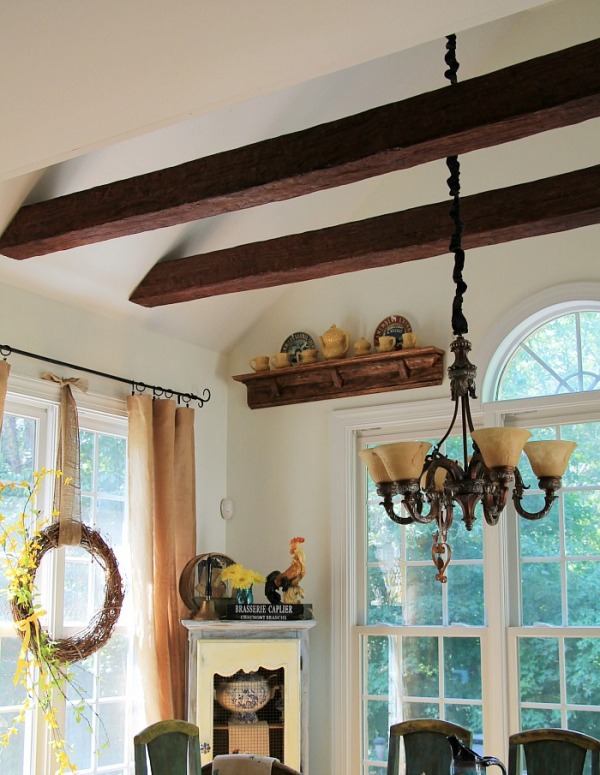
The faux beams are pretty light, in fact I was surprised how light they were when I picked one up.
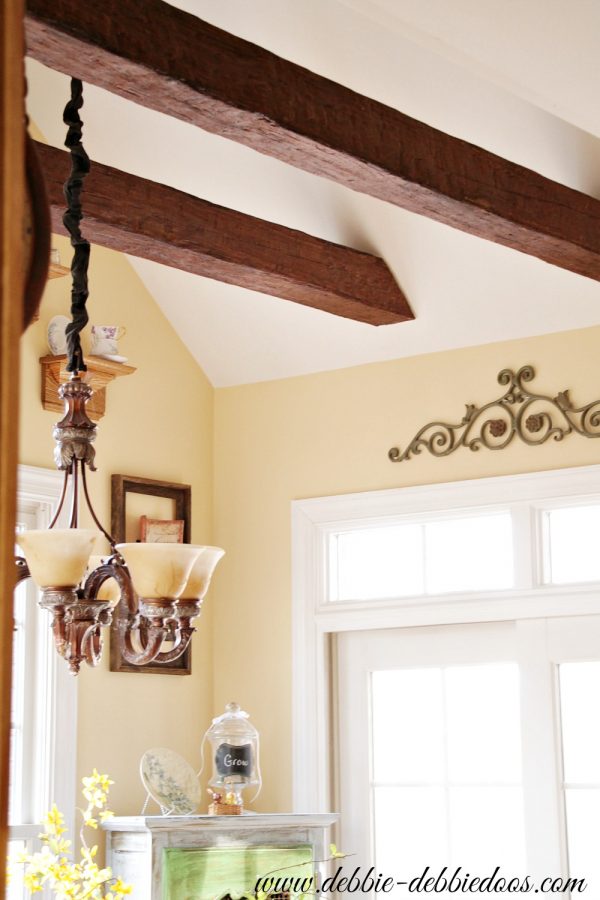
Amazing how much they look like real wood, with the carvings, and variations of color as well. Which I love the color we chose. Rustic, burnt brownish with a slight red undertone.
Description: 4-sided – Walnut Timber fauxwood Beams
This is where my husband comes in now…
Take it away Mike!
SUPPLIES NEEDED:
Orbital jig saw , file , electric drill , 2″ by 6″ wood plank, 1 & ½ black wood screws , 4 toggle bolts , sharpie , ½″ wood drill bit , angle finder . tape measure , level , painters tape , two ladders, a helper
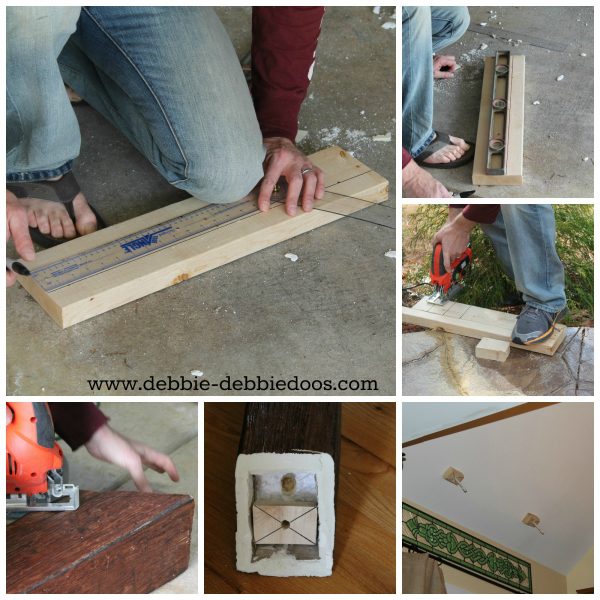
Step one – Determine where beams are to be placed and then measure distance between area. Also, using a measuring tape determine your desired spacing of the beams and place a vertically oriented strip of tape over the area of placement.
Step two – If needed , use angle finder to determine the angle of the cut to the beam that is required. If you are positioning beam on a vertical wall this step is not needed. If placing on a cathedral ceiling use the angle finder to find the angle then use the following equation to determine the beam cut . Whatever your angle is minus ninety degrees equals final number. For example, my angle was 130 degrees (130 degrees – 90 degrees = 40 degrees) 40 degrees will be the final cut to the beams
Step three – Measure the distance needed on your beams, remember if angled your measurement will represent the bottom of the beam so that will be where the beam is widest. use the angle finder to stencil on the beam what is to be cut.
Step four – Cut beams to dimension required using jigsaw. Tip – If using the four sided beams, the ends are comprised of approx. six inches of solid foam and then 1 & ½ ‘ foam inserts then hollow and file.
Step five – After hollowing beam , hold beam with assistance to area which it will be ultimately placed. After leveling , make mark on bottom on both sides of beams onto the painter tape strips placed earlier.
Step six – Cut wood sections that will be used to anchor beams. I made 2″ by 3 & ½″ segments. I , also, tapered the two edges of the segments that would be facing the beam to ease later placement. Then, find the center of the segment and drill a ½′ hole through.
Step seven – Using marks on the painters tape, determine where you need to place your anchors then drill ½ inch hole. My measurement was 8 & ½ inches up from the mark , it is however open to interpretation. I would recommend a slightly higher placement as you have account for the anchor digging into the bottom of the beam.
Step eight – Fasten anchors to ceiling using toggle bolts.
Step nine – With help slide beams over anchors. Using wood screws attach the beam to anchor. Then, slide ladder to other side and attach beam to anchor while helper is holding in position.
In conclusion , We are very happy with the quality and final outcome of the project. If your space does not require an angled cut , it will certainly make your life easier. With that said , if you take your time and due diligence you too will be very proud of your new beams.
Thank you Mike:)
This post is sponsored by FauxWoodbeams.com.
You can check out their website for styles colors and how to’s as well.

The Beams were sent to me as compensation for review of such product.
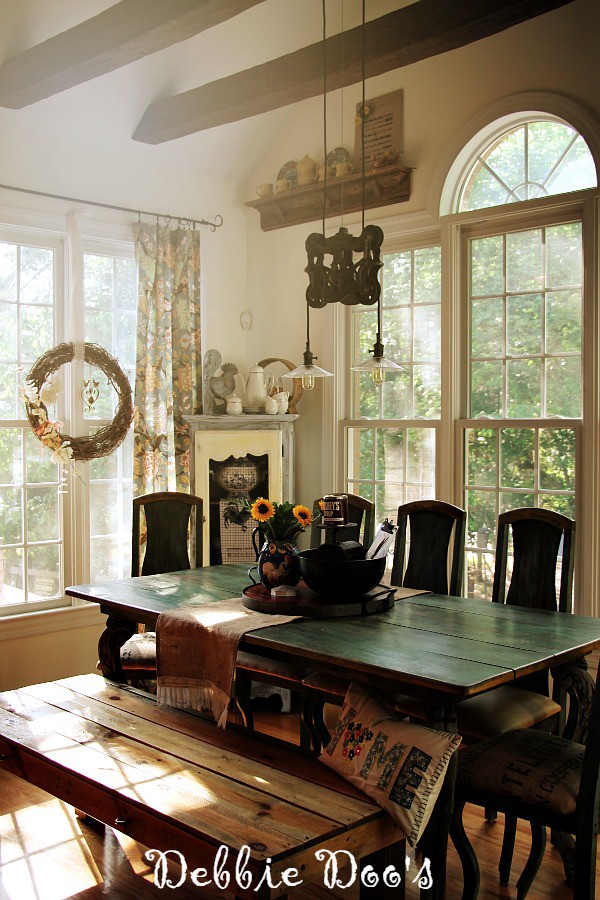
In the meantime, we have painted the kitchen to make the beams POP!
you can read about painting the Kitchen with Bavarian cream Benjamin Moore Aura paint.
Thank you so much for stopping by today.
You may follow us around if you like.
Updated kitchen light from Restoration hardware.
Debbie,
Wow just gorgeous. They really are beautiful in your eating area of your kitchen. Beautiful.
Kris
I Love It!
Wow! They look great, Debbie! I just love the look. Love Mike’s directions, too. : )
They look awesome. Wish I only need two and hubby is like no way!
They look awesome!! I want some! What a difference they make in your room! Love, love, love them and Mike did a great job:-)
Wow ! Love the beams , they look great !
They look fantastic! We are considering wood beams in our kitchen remodel, didn’t know about this brand!
Blessings,
Cindy
They look stunning!!! It really added character to your kitchen.
Wow Debbie!! They turned out amazing! Just beautiful!
What an AMAZING difference! I’m considering wood beam manufacturers for my farmhouse project and had received some beautiful samples from this company. Now that I know how easy they are to install, they may be a front runner. WELL DONE!
They look great in your kitchen. You and Mike did an awesome job of getting those up on the angle cut.
Audrey Z. @ Timeless Treasures
Love your new beams! I’ve always been fond of beams and think they add so much to one’s home! Great look, Debbie!
Tell Mike I’m so impressed with his DIY skills and his step-by-step instructions! Once upon a time, we had real beams in a kitchen, but I swear that these look just as realistic! Great addition to your rustic kitchen!
WOW! They look so amazing, Debbie! They are the perfect compliment to your kitchen. You must be thrilled!
Oh I have always loved wood beams and yours look fabulous!!! You both did a fantastic job!!~~Angela
Talk about adding value to your home. This is an amazing project and carried out professionally. Way to go Mike!
Wow…lucky you, Debbie! I have seen these before and they are great looking faux beams. I am pinning them!
JP
Wow! They look great, Debbie, and make a HUGE difference in your kitchen!
I love this look so much! It’s perfect for your space! Great job to you and Mike. 🙂
That looks amazing! Those angled cuts were hard I’m sure but that’s part of what makes it look great.
The beams are fantastic! I have some real beams that need to be redone, and it’s going to be a pain to tackle them. With high ceilings in many areas of our house, faux beams would really add a lot. I’ll add it to the list….
They look fantastic … add such character to your already fabulous breakfast area. I’d love to see a full angle shot!
They look so real, Debbie! I think they enhance and compliment your breakfast room’s vaulted ceiling. So pretty! Great job!
What an impact those make. Wish I had high ceilings to do that too!
Wow what a talented Son inlaw hes awsome Mike they look amazeing love the color too 🙂
Stunning.. Mike did an awesome job..and his directions were great.I do like the color too.They add so much to your rustic kitchen..so happy to see the reveal.Thanks for sharing
They look great Debbie and a perfect addition for your kitchen. Peggy
Oh Debbie, I love this!!!! Ray and I have talked about adding beams to our house for years, it’s on our wish list but other “stuff” has taken over. It adds such character and charm and looks like they have been there forever, not just added. Fabulous job!!!
XXOO
Kristin
Debbie and Mike, The beams look so good. Better than good. They are perfect. They so compliment your home. They were just meant to be there!! Don’t get a kink in your neck looking up too much now 😉
Those beams look like they have been there forever. Your hubby did such a great job.
I was so excited to see this post. The past two years I have been trying to sell this idea to my hubby. He’s not a DIY kinda guy, as we lack all the fun tools needed for these sort of projects. On a scale of 1-10, how difficult would you say it was to get those beams up and adjusted properly? I can’t wait to show the hubs this post. I am so envious, and those beams look A M A Z I N G in your kitchen….LOVE, LOVE, LOVE!!! The color of your walls with those warm-rich-colored beams, DREAMY!! 🙂
oh man, this is so you guys (just, you know, coming from a total stranger who doesn’t actually know you but only knows you on your blog). this just seems like it’s right up your alley. well done to you and mike!
Whoa!!!! What a transformation! Love this look….great job! Thanks so much for sharing details!
Love love the way they look Debbie!! I’ve been thinking of maybe adding them in our living room.
Kuddos to Mike for doing a fabulous job!
Debbie these are gorgeous. I would love to add beams to the house in our eating area if the budget warrents it but this is a great option. PINNING!!! Thanks friend.
Looks nice… I notice the shelves in the background up high. How do you dust off your ceramics things ???
Do you use a ladder once a month ??/
LOL..every couple of months I get up there with a ladder.
GORGEEEEEEEEEOUSSSSSSSSSS!!! Now I have to go figure out where to put more beams in my house. lol
Debbie, those are just gorgeous, and they totally MAKE the kitchen. I have always loved your kitchen, and you managed to bump it up yet another notch.
Fabulous look! Great idea too!
They look fabulous, Debbie & Mike! So real and with your slanted ceilings, they look perfect! I remember the other post about planning on this project, it’s awesome to see it completed. You must love the look of your kitchen now…I sure do!
Debbie 🙂
Oh I so want to do this in our angled ceiling bedroom! So wonderful. Way to go Mike!
WOW! The beams looks so real and they are gorgeous Debbie. Mike did an awesome job. You know that I adore your kitchen.
Could have fooled me! Your faux beams look fabulous and real! Love them. They really add a lot to your kitchen. Well done Mike!!!
Love, love, love them!
Debbie
They look fabulous Debbie!!!…I had them in a previous home…the “used home” we bought…when I saw them, I thought those beams were real, then the homeowner said they were made of styrofoam…I loved them…and love yours!…
The beams are the perfect addition to your kitchen! They look wonderful!
Thank you everyone for your sweet comments. Mike has been reading every single one of them!
The beams look fantastic!
Wow, that turned out really cool, Debbie! I think the fact that you have that peaked ceiling going on is what really makes the beams work.
Debbie,
These beams add so much charm to your kitchen…luv the color that you went with. GREAT JOB MIKE!!!
Blessings,
Linda
The beams are fabulous. I love the look and your DH did a fantastic job. Great tutorial too.