
Making your very own pizza oven outdoors comes with its benefits. One of which is you wouldn’t have to worry about what ingredients are being used because you decide what is in it.

Also, you can make tasty pizza combinations any time, from the comfort of your home. The DIY pizza oven outdoors setup is easy, cheap, and should help keep you busy.

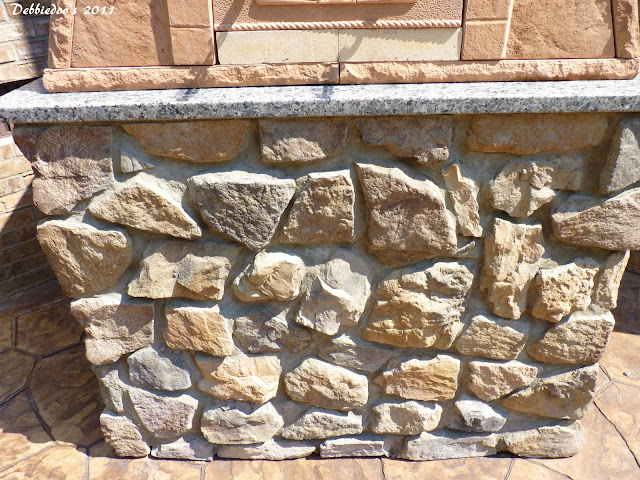
DIY outdoor pizza oven you’ll need to build:

The items required for your homemade pizza oven depending on the style of pizza oven you intend to build, what you plan to cook in the oven, the location you prefer (is it a backyard pizza oven?), and your budget.
However, for a standard brick pizza oven, you would need the following items;
- Cement
- Brick
- Builder’s sand
- Sharp sand
- Wood Saw
- Wooden Pallet
- Screws
- Drill
- Trowel
- Spade
- Celephone sheet
- Bucket
- Chipboard
- Old foam pieces
- Aggregate
How to build an outdoor pizza oven step by step
Step 1. Construct A Base
Now that you have gathered your items for the pizza oven and decided on a good location for the oven to be placed, you would need to create a solid base by placing your wooden pallet on the floor.
With that done, cut a piece of the chipboard with your wood saw and ensure that it fits the pallet’s base.
Cut strips from the chipboard that measures up to 50mm in height and use them to create a perimeter around the pallet’s top. This would be used to hold concrete.
Step 2. Mix Concrete
For a perfect concrete mix, you would need to mix 1 part of cement with 2 parts of sharp sand and 4 parts of aggregate.
Make use of the spade to place the concrete mix in the wooden base. Be sure to flatten the concrete mix with a wooden stick as this should serve as the perfect base for your DIY brick pizza oven.
Step 3. Organize The Bricks
With your base ready, you can arrange the bricks on the base to get an idea of what the outside pizza oven should look like when relating to size.
For more flexibility with your pizza oven style, It is recommended that you cut each brick in half as this creates more options.
Step 4. Construct The Archway

The arch acts as the roof of your oven and should be measuring at least ⅔ of the oven’s entire height.
To create your arch, make use of the foam pieces as your support area. You can also create your arch with chipboard cut-offs and ensure it forms a curve that your arch bricks can rest on.
Step 5. Cement The Bricks
Start by cementing the ground layer of the bricks first by using 3 parts of sharp sand and one part of cement. Also, work toward cementing the arch while doing this.
Use the Cellophane sheet here to cover the base layer to prevent the sand used for cement from sticking to the wet cement inside the oven.
Fill up the first layer with sand, this would help in creating a mold where each individual brick can be cemented upon.

Place the bricks and begging to layer them from the Cellophane sheet’s side. As your oven begins to take shape, you can then proceed to place the bucket at the top with cement to form a chimney.
Your Chimney should be a bit higher than the oven doors so as to ensure smoke passes through the top of the oven alone.
Step 6. Create the Outer Layer With Concrete

Using the same concrete mix of 1 part of cement with 2 parts of sharp sand and 4 parts of aggregate, create insulation for the oven by pouring and spreading the mix with generosity over the body of the pizza oven.
In addition to providing insulation for the oven, this also helps in giving the oven a pleasing exterior.
Step 7. Take Out The Sand And Support

With the inner and outer layer of the oven already dry, proceed to remove the supports used for creating the archway. Next, proceed to take out the sand. Be careful when doing this so you don’t damage the oven.
Step 8. Create A Small Fire


Make a small fire inside the oven to ensure that the oven stays dry. And prevents cracking along the way. With that done, your outdoor brick pizza oven should be complete.
OMG Debbie, love this!!! Sending it over to my hubby and pinning 🙂
Love your oven. What glue was used for the blocks. I am building a pizza oven and really do not want to work with mortar. Your help would be a appreciate.
Just checked with hubby. He used concrete adhesive for the blocks.
What would you say was your overall cost for the project?
About 2,500-$2,700 Totaly cost compared to $7,000-$8,000 having it done.
I would LOVE to have a pizza oven. PLEASE share where you got you oven pieces…..If you dont mind. Everything I have look at is outrageously expensive. Thank you. My email above if you dont mind emailing that information.
Hey Debbie,
What are the measurements of the oven and base.
I will have to go out and measure for your Denise…I will email you when I do. thanks.
We are planning our pizza oven project with the Roundboy oven, same as yours. Is there anything you’d have done different? Also, have you posted a pizza dough recipe? I see the sauce recipe. Your oven is beautiful!
No, we have never made our own dough. We wind up getting it from our local pizzeria. I really can’t think of one thing we would do differently. The toughest part as I mention is the stone work but once we figured out the consistency the mortar should have been we pretty much had the system down pat.
We are considering the Roundboy oven and wonder after several years of pizzas, etc., if you’re still loving it and would do Again.
Absolutely YES!