
Hi there everyone! Today I am sharing how to paint a book shelf with rit dye.
I am so excited to share this! It was a lot of fun.
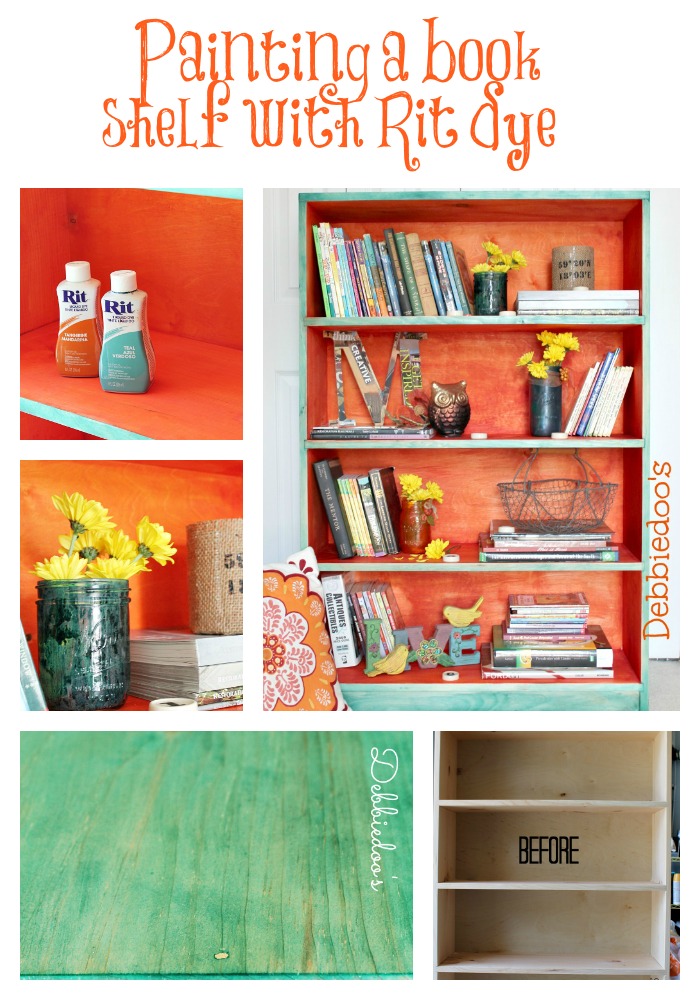
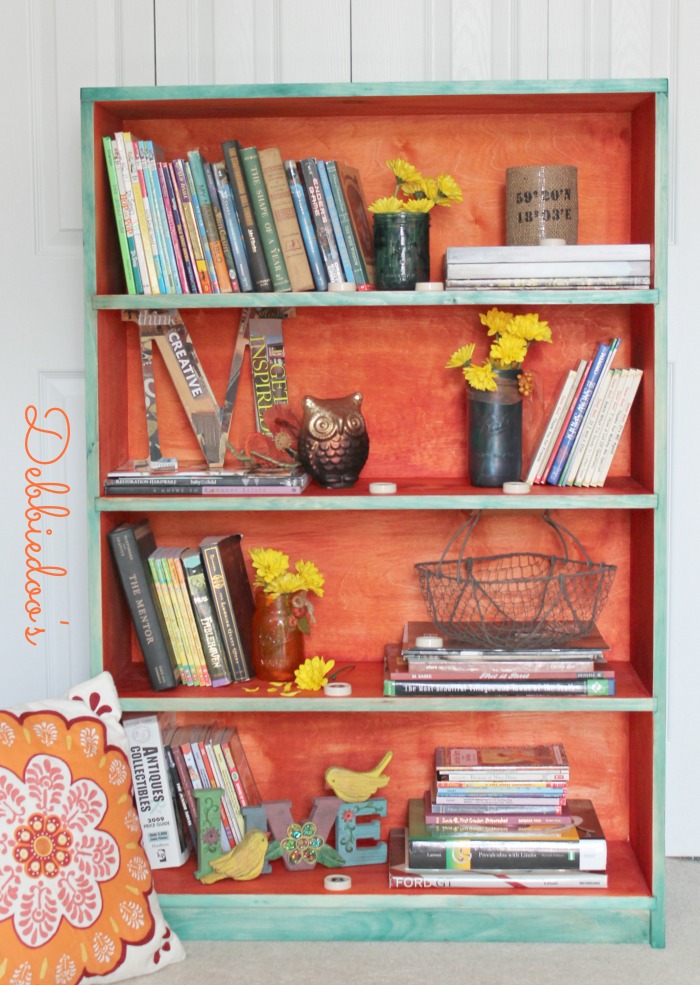
Teal and Tangerine were my choice of colors.
SUPPLIES needed:
Drop cloth
rubber gloves
dye in your color of choice
bristle brush
foam brush
rag
steel wool pads
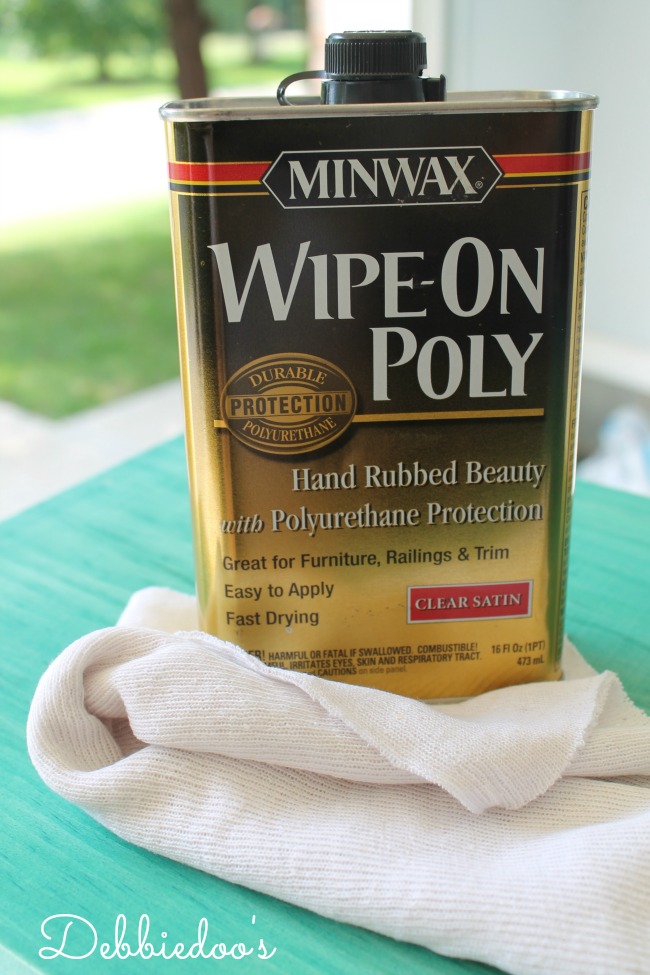
polyurethane {Satin finish}
Untreated wood works best. My book case is pine. If working with finished wood, strip paint, varnish or wax from the item. Scrape and sand surface until smooth; wipe with tack cloth.
Step 1:
– Cover work surface with a plastic drop cloth.

Step 2 and instructions:
– Dye Preparation: Wearing rubber gloves, measure and mix ½ cup of Teal {or color or choice dye with 2 cups very hot water.
Stir well.
Note: Test dye color on a scrap piece of similar wood or underside of chair. {I tested mine on the back of this shelf}
If color is too light, add more dye; if color is too dark, add more water. Dye will appear lighter when dry.
– Wearing rubber gloves, apply dye to chair using a foam brush, bristle brush or old cloth. Spread dye solution evenly over surface. The shape of the wood piece or the area may determine which to use. I used small foam brushes for the nooks and crannies inside the book case.
For example, a cloth works well on the legs. A bristle brush gets into the details around the joints and a foam brush covers large flat surfaces evenly, like the chair seat.
Let dry and, if necessary, reapply dye to achieve desired shade.
Note: When staining wood, keep dye hot for better absorption. Cover dye with plastic wrap and heat on high in the microwave for 1 – 2 minutes.
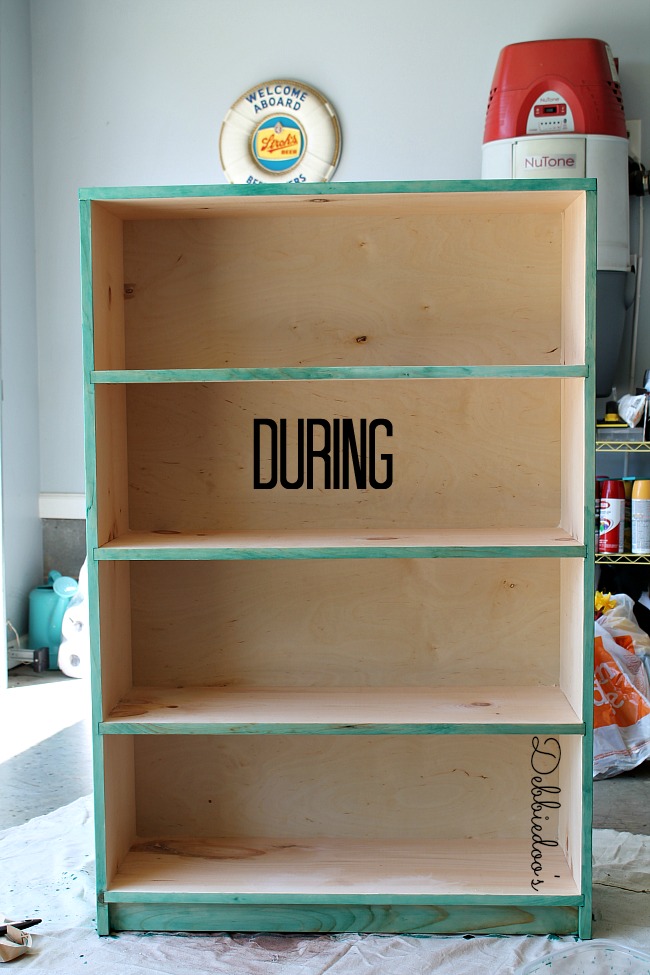
– Allow wood to dry completely.
– To seal dye-stained chair, apply one or two coats of polyurethane.
***Rub lightly with steel wool between coats; remove dust with a tack cloth***.
For clean-up, simply wash paint brushes with mild soap and water.
No strong chemicals are needed.
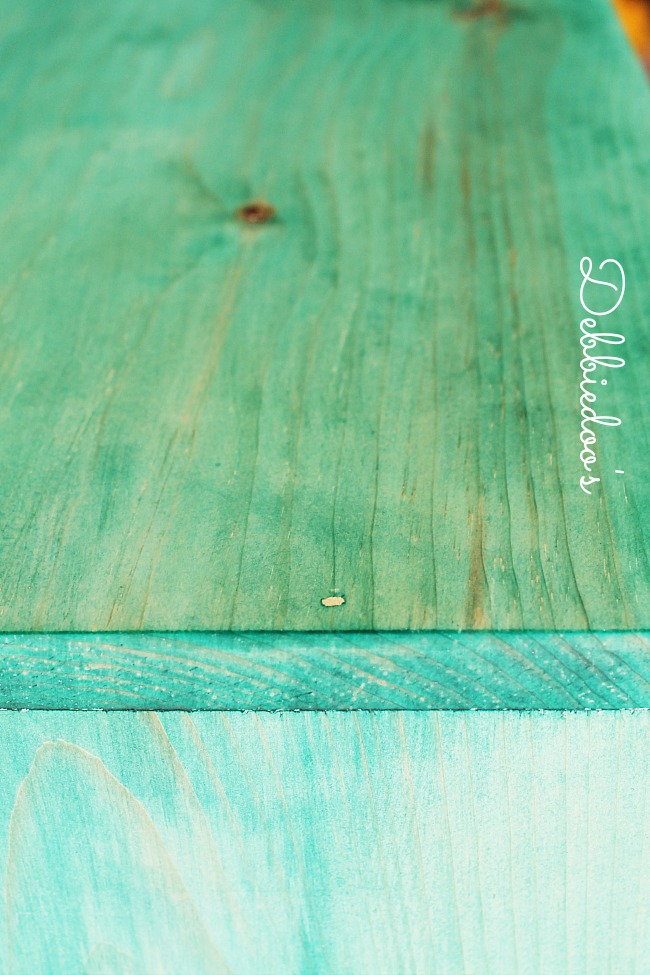
I just love the way the natural wood looks with a bit of color over it. I did however, do two coats of teal to achieve a darker, richer color.
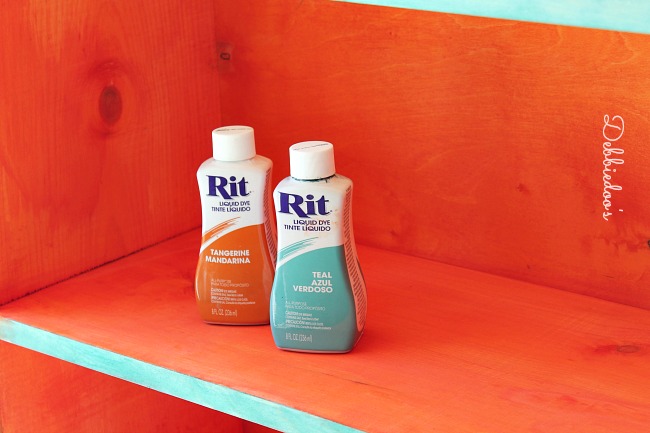
I wanted a pop and I thought the tangerine for the inner shelves would be very complimentary.
I did two coats of tangerine as well.
I love color and combining two for interest.
After my shelf dried over night, I went over it with my wool pads and it evened the tones and made it smooth.
I then vacuumed up any small particles of wool and dust left behind.
I went back with some polyurethane and gave it two coats.
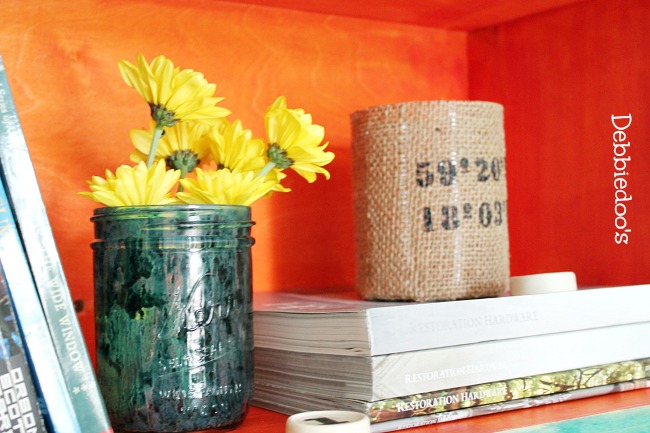
You may recall my rit dye mason jars.
I thought these would look cute styled in with my books and fresh flowers.
Such an easy touch.
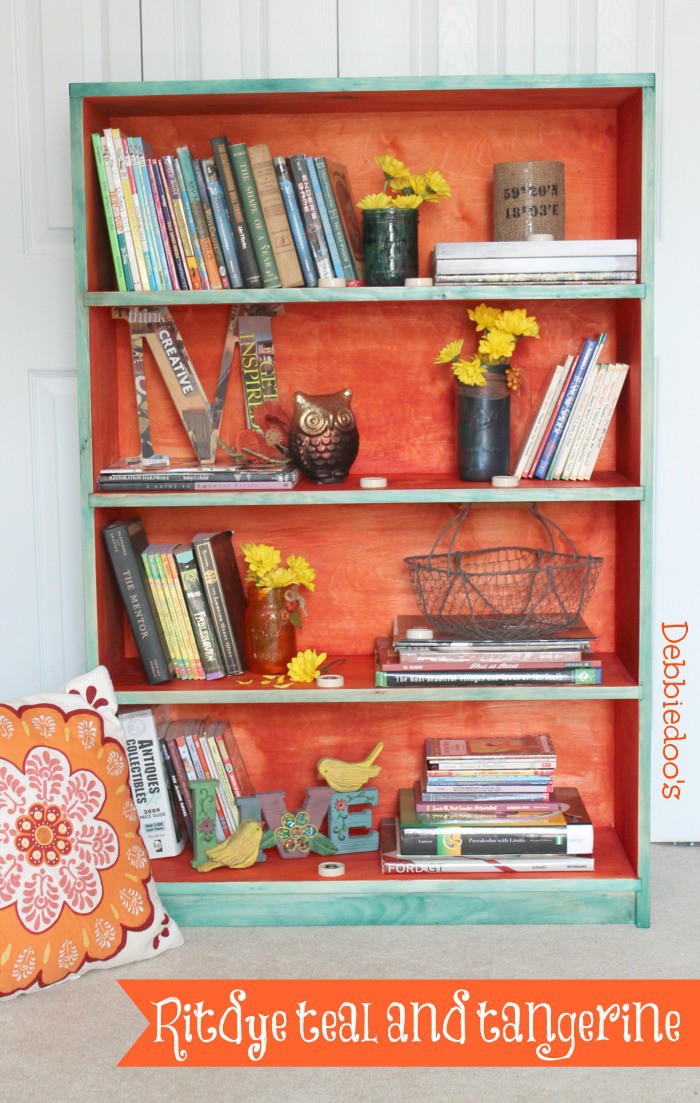
Such a happy vibrant book shelf. Great for a fun, friendly family room,
kids room, office, wherever you would like a splash of happy.
Thanks for stopping by today. Hope you will give it try. It truly looks like it was meant to be this way naturally. No brush strokes, and not to mention…
how cost friendly using Rit dye is opposed to paint and your labor involved with regular paint. You can follow me anywhere, anytime!
And don’t forget to check out my
RIT DYE gallery
of ideas as well.
Thank you so much for visiting with me today.
If you are new here, I am also very excited to share my new stencil line with you.

Farmhouse/rustic stencil line by Debbiedoo’s HERE
Thank you for your visit today!
I share all things, thrifty home decor, crafts and a recipe or two on occasion.
If you would like to commit to becoming a subscriber, I would love for you to join me.
How fun, I love this. Great colors. Hugs, marty
Very pretty Debbie! Love the color combination. You are so creative 🙂
Well, Aren’t YOU a clever girl? I love that color combo and think it is a lot of fun. Amazing what you can do with Rit Dye, isn’t it? xo Diana
Very colorful, Debbie! I never would have thought to use Rit Dye for something like this.
the bookshelf looks awsome i love the colors now where are you putting it ?
Looks amazing Debbie! Love it!
You are so creative! What a great idea. The wood looks like it’s almost glowing!
Awesome!! I love this, I’ve never seen anything like it before, thanks for sharing!
I like that the Rit dye lets the wood grain show through. The colors look very good together. Good job Debbie.
Audrey Z. @ Timeless Treasures
Debbie – that is an amazing technique! I NEVER would have thought to use Rit dye on wood but you have definitely changed that perception. And I love the color combo you chose!
Beautiful effect, Debbie! I love how the wood shows through. What a stunning color combo!
Debbie,
You are the Rit dye queen for sure. How clever is this. I love the color combo too.
Kris
I really like the color combo, its beautiful! I wonder could you use the powder Rit? I haven’t saw the liquid here yet, we live in Northern Siberia ( well not really) but we are really slow to get things this far North,
I absolutely love this look, Debbie! It is so unique. I’m also jazzed about that wipe on poly and am going to be looking into that pronto.
Your touch with mixing colors is spot on…the blue and orange are amazing! I love that wipe on poly too. So much easier than a brush. It’s very cool that you have a custom piece of furniture in your home designed by you. This will give your kids something to fight over!!!
So pretty, bright and cheery Debbie.
I had no idea you could use Rit Dye on wood. That looks amazing.
Way cool. Whodda thunk? I am going to try it! Hope you are doing well!
xo Kris
I love the color combo! I would never have thought to use dye instead of paint. Awesome! PS – I mentioned you in my blog post today (thanking people who have helped me in my first 6 months!)
Ok! This has got to be one of the coolest projects I’ve seen in a long time. I love crafting and my girls (teen agers) like to get messy with me. This would be a great project for desks in their rooms. Thanks for the ‘pick-me-upper’!
Kudos,
-Hunny
Those bright cheerful colors are so you, Debbie. Nice job.
I would give anything to have an ounce of your creativity.
Wow…I love how the dye allows the grain of the wood to show. through…who would of thought to stain a bookcase with Rit Dye…you of course…turned out beautiful Debbie….great job!
I love this bookcase! I would have never thought about using RIT to stain wood! BRILLIANT!!!!
I have the tangerine color and it is so pretty.
Looks great Debbie! Great colors too…
Blessings,
Cindy
LOVE it! The colors are perfect together ~ you know I love color! 🙂
xo
Pat
This is amazing, Debbie! Those colors look great together.
Looks great!! Does the poly seal the color so it does not rub off (on carpet and shelf items)?
Yes it does…there has been no rub off or bleeding whatsoever!:)